1. Introduction
Hilbert is a browser-based editor for direct proofs (also called Hilbert-style proofs). The system focusses on implicational logic, i.e. logic in which the language is restricted to negation, implication, and universal quantification. Hilbert uses Implication Elimination and Lukasiewicz's third set of axiom schemas for Boolean Logic together with similar axiom schemas and rules for the introduction, elimination, and distribution of universal quantifiers.
Hilbert allows users to enter premises, create instances of axiom schemas, and apply rules of inference. It provides a variety of tools for manipulating proofs within a browser window and for copying and pasting proof fragments between different browser windows. And it provides tools for saving and loading proofs to and from secondary storage.
This document is an introductory tour of the main features of Hilbert. We show how to load the system; we show how to create and manipulate proofs; we show how to work with proofs in multiple windows; and we show how to save one's work for later use. We suggest repeating the steps shown here in your own browser as you proceed through the tour.
This tour presumes the reader is already familiar with Logic and Hilbert-style reasoning. See http://intrologic.stanford.edu for a free, online course on Symbolic Logic. A simplified version of Hilbert is used in the interactive proof exercises in Chapter 4.
2. Getting Started
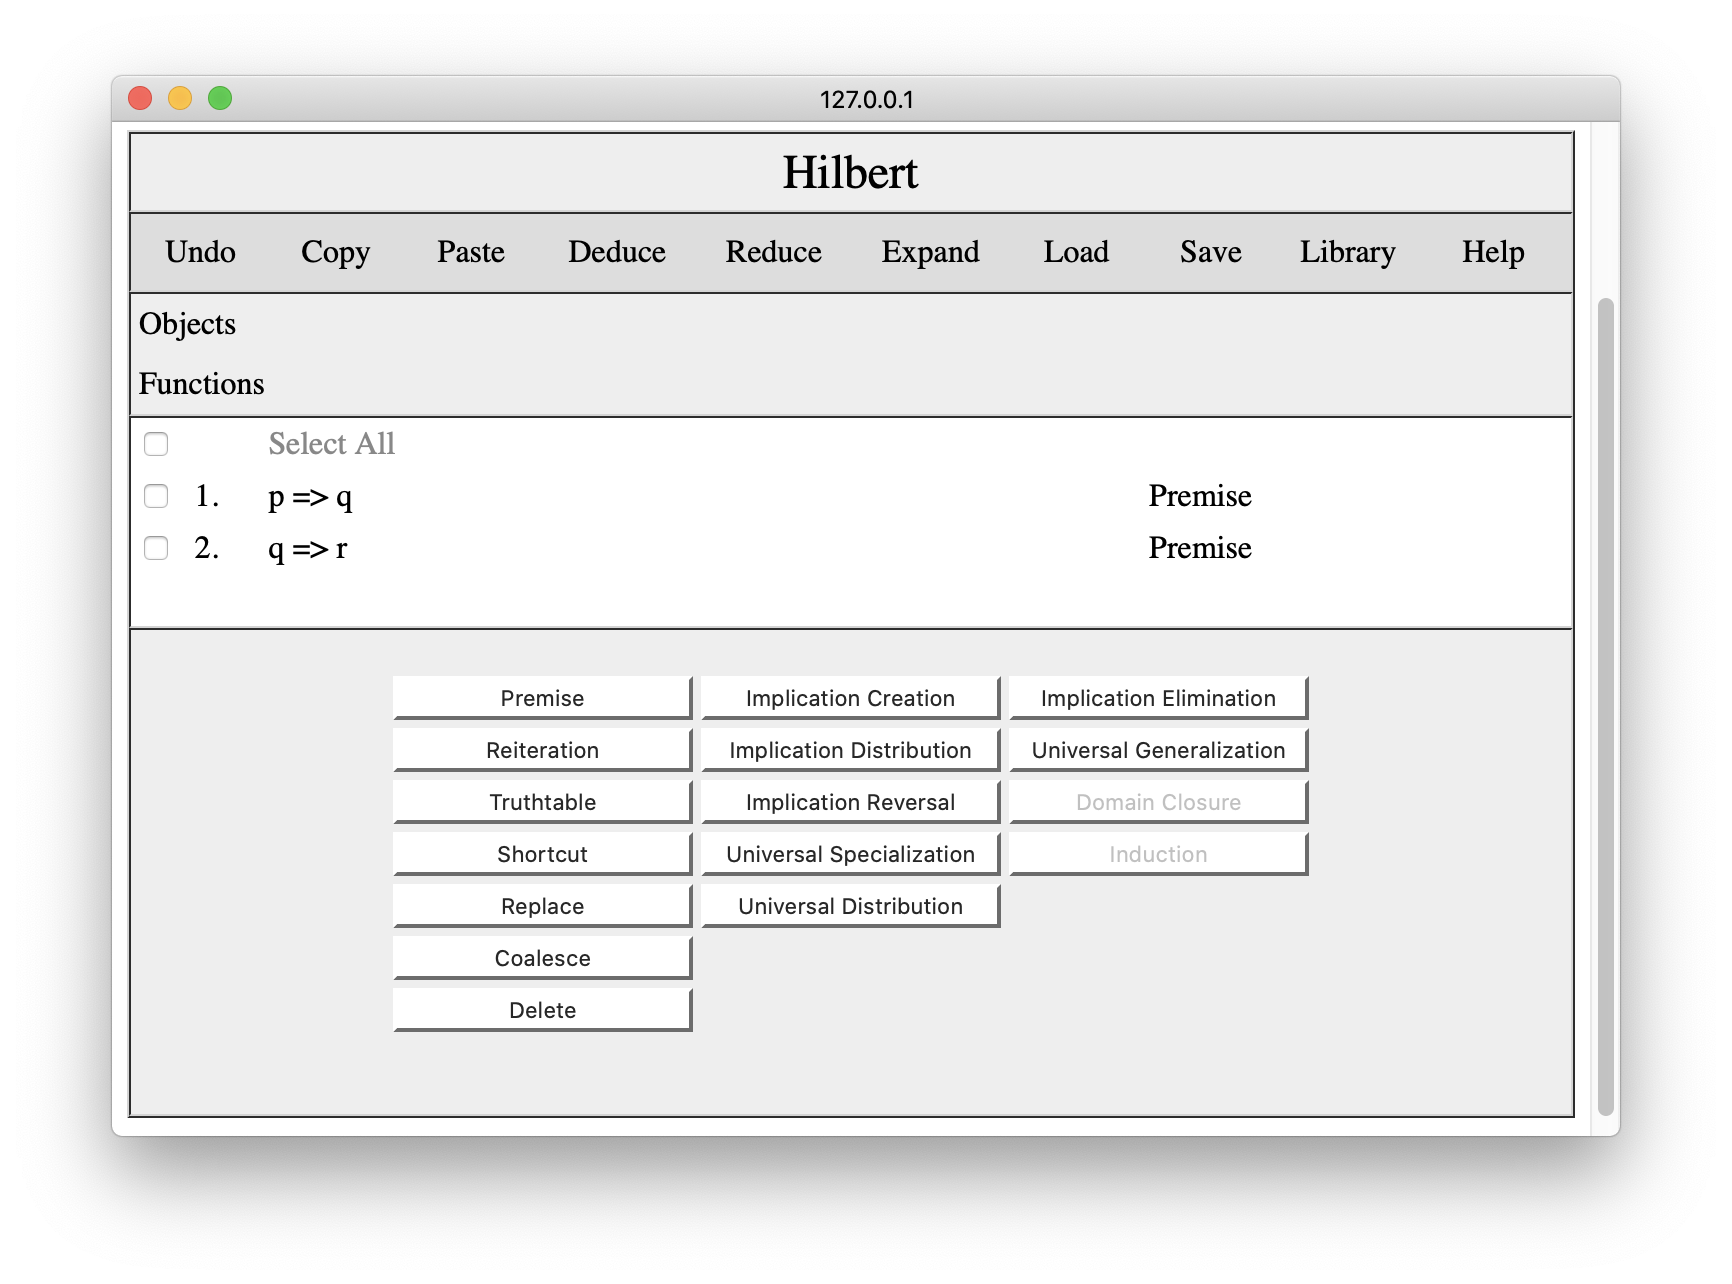
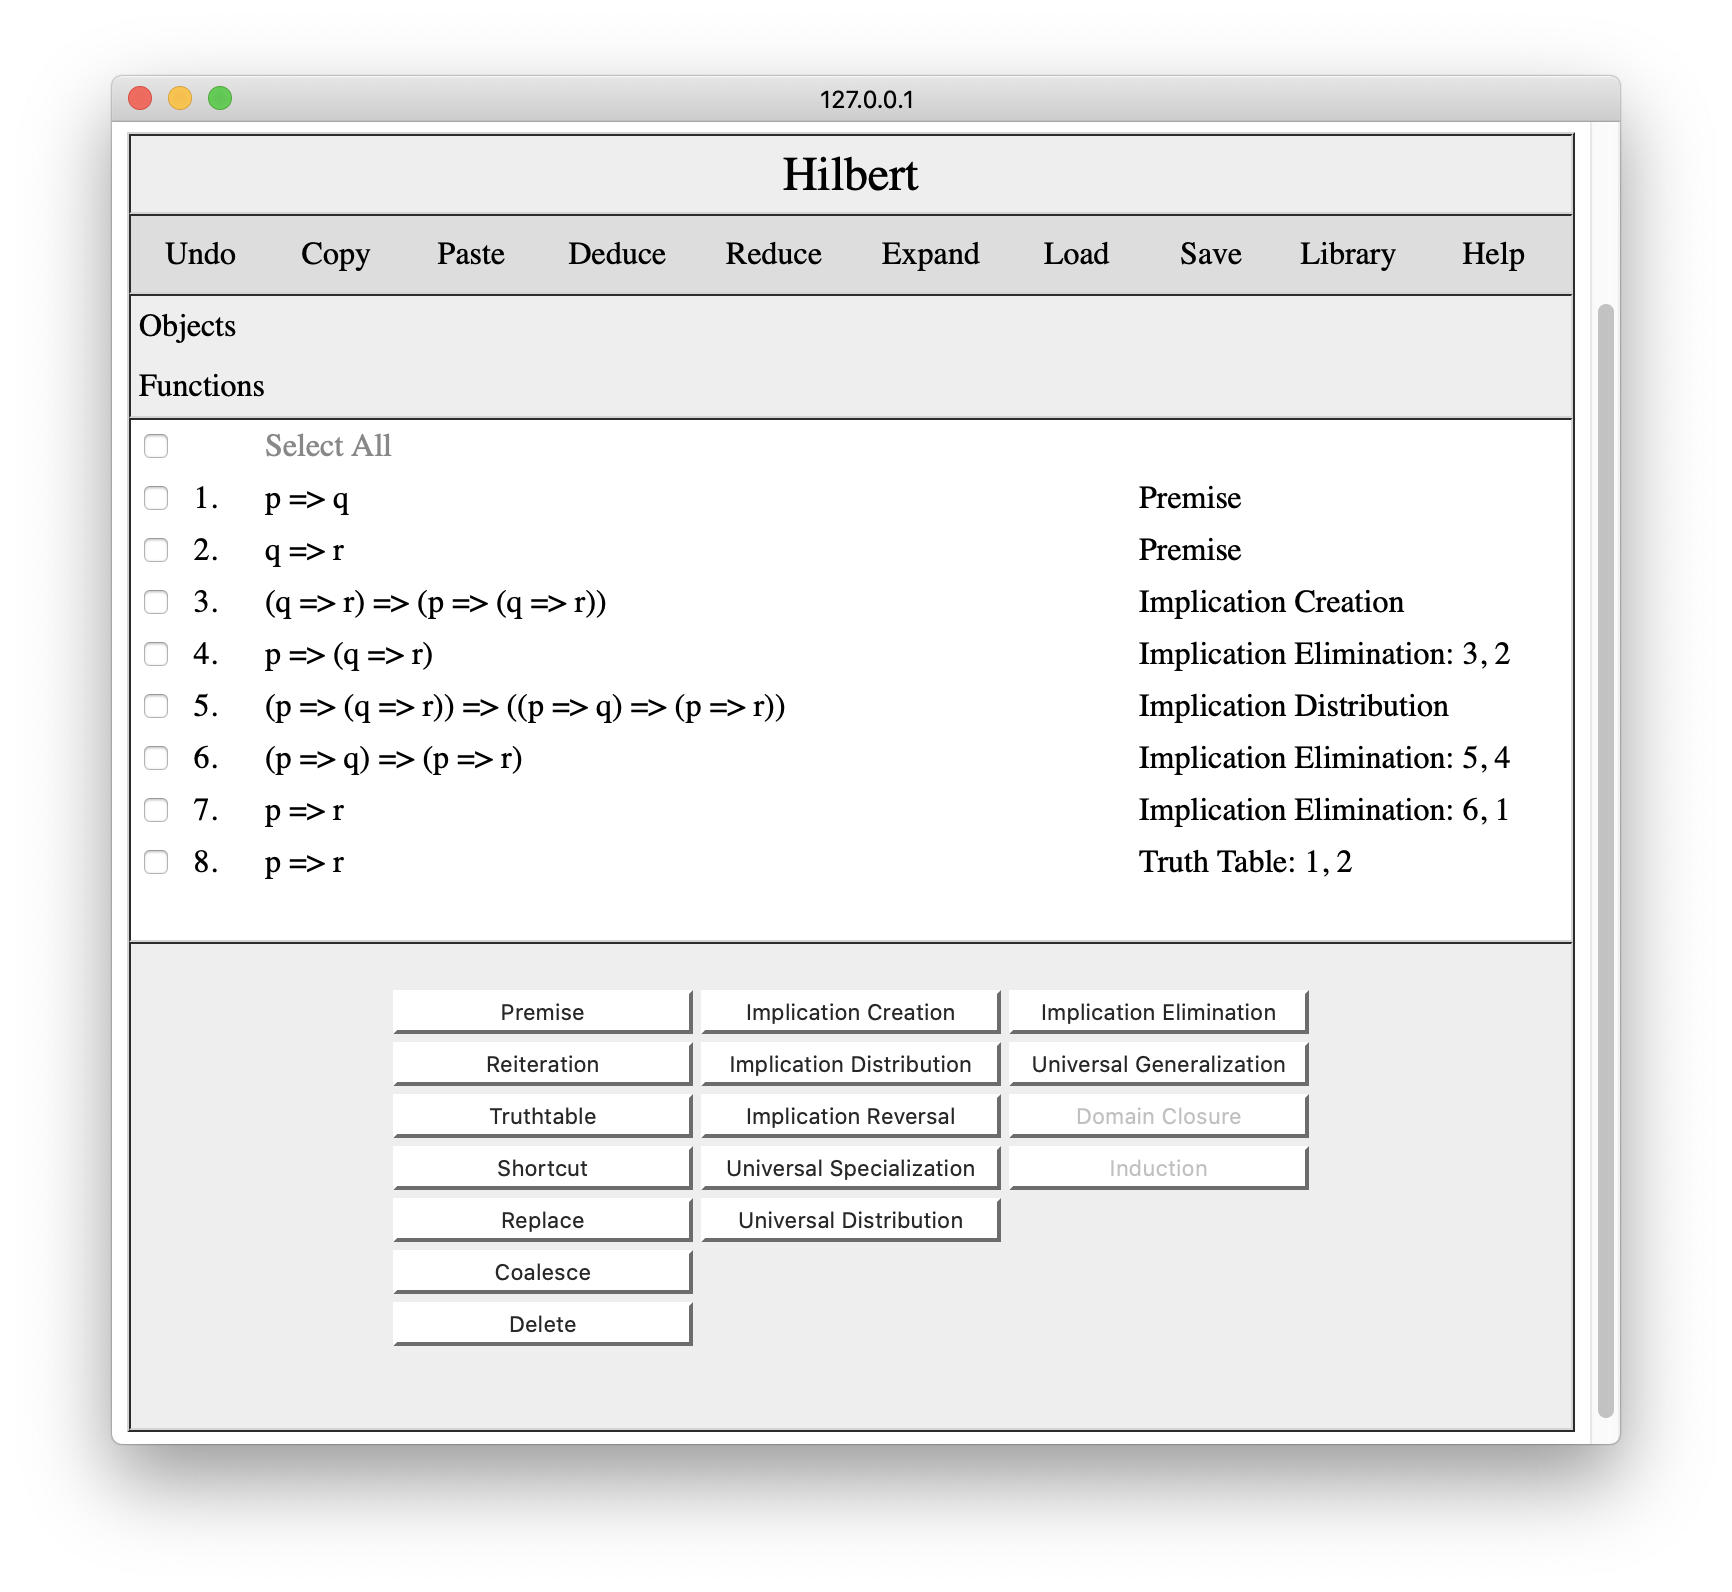
Since Hilbert is browser-based, we start by loading a suitable browser. (Hilbert runs in Safari, Chrome, Firefox, and other browsers. In our examples here, we use Safari, though the appearance and interaction are virtually the same in all major browsers.) Once our browser is started, we load Hilbert by going to http://logica.stanford.edu and clicking on Hilbert. This brings up a page that looks like the following.
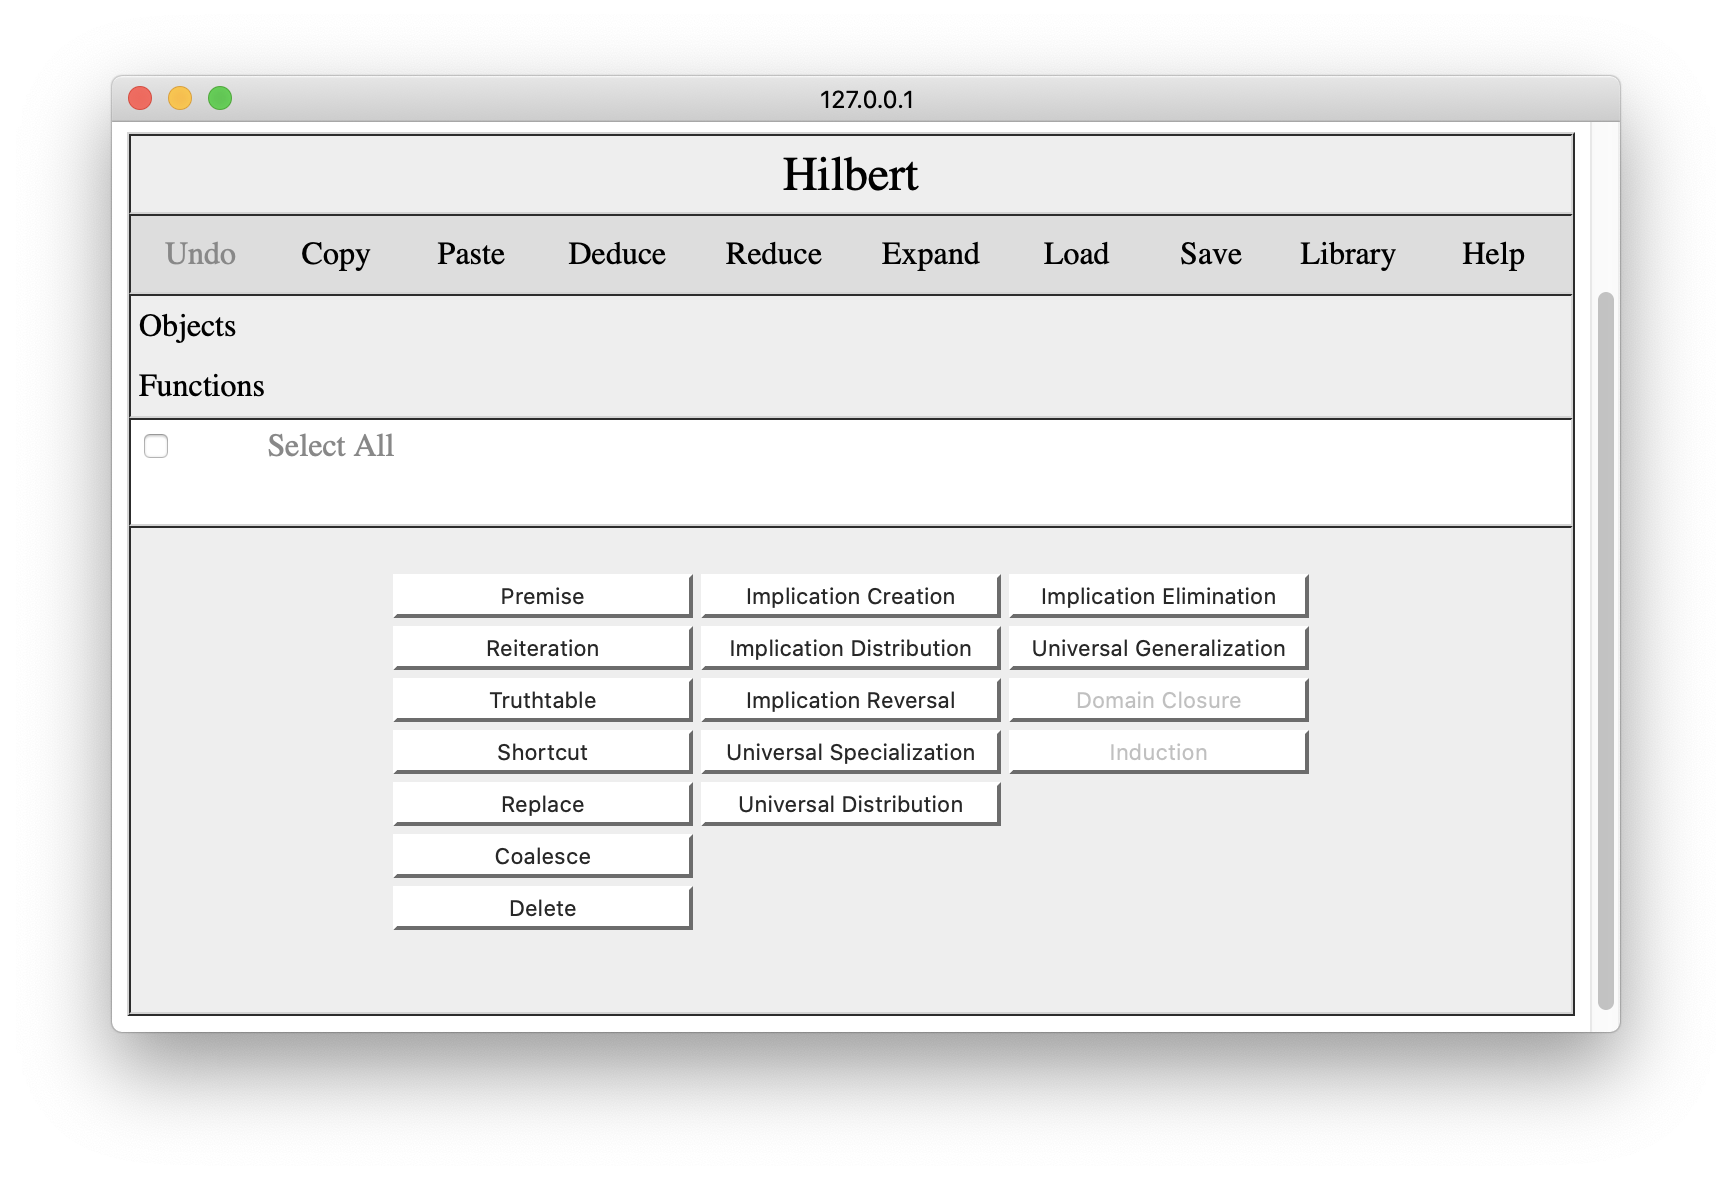
The command bar across the top includes overall operations of various sorts. One can undo one's latest change to the proof. One can copy and paste proof fragments to the browser's clipboard. One can add clipboard contents to the proof in various ways (using Deduce Reduce, and Expand). One can save proofs in secondary storage or load previously saved proofs. One can view a library of proofs of commonly used results. And there is a Help button to get information on the language use in the editor.
Below the command bar, there is a panel listing object constants and function constants used in the proof. The lists are populated automatically as sentences are entered into the proof. The information is provided for the user's convenience in applying rules of inference involving domain closure and induction.
The proof itself is displayed below this. As we have just begun the demo, our proof is empty. As we shall see, each line of the proof has a number. Different lines can be selected by clicking the check boxes on those lines. This allows one to apply rules of inference or other operations to those lines, to copy those lines to the clipboard, and so forth. The Select All button selects or deselects all lines in the proof.
The operations for editing the displayed proof are accessible via the buttons at the bottom of the page. Using the buttons in the first column, one can add premises, reiterate earlier lines in the proof, delete lines from the proof, and perform various special operations (as described below). The buttons in the other columns allow the user to instantiate axiom schemas or apply standard rules of inference.
In the next few sections, we illustrate these capabilities by first developing a proof of a simple result and then using that proof in developing a proof for a more complex result. In what follows, we restrict ourselves to Boolean Logic. Proofs in Quantificational Logic or Functional Logic are analogous. The schemas and rules of inference are different, but the operations are the same./p>
3. Creating Proofs
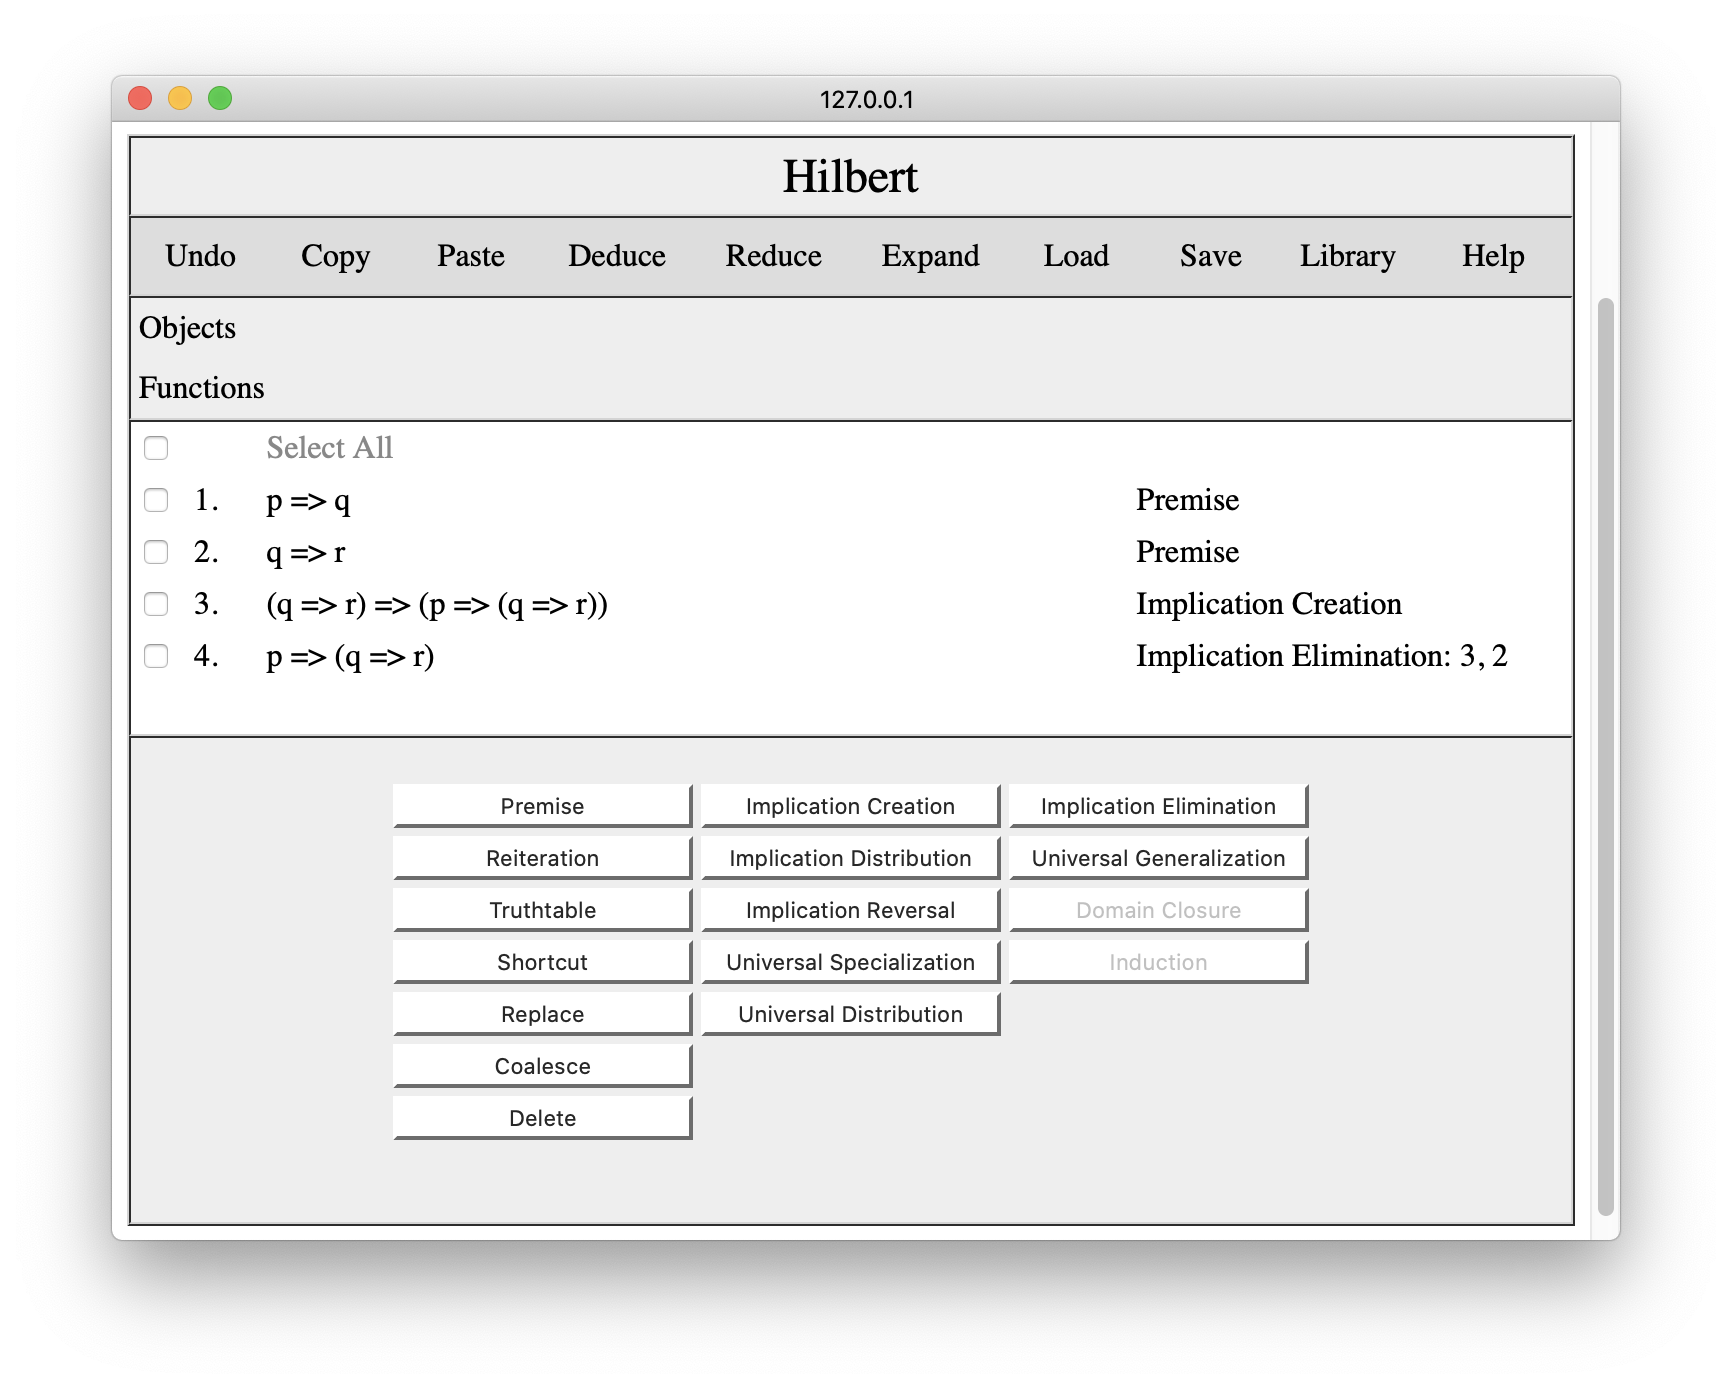
To start, let's create a proof of the transitivity of implication - given p=>q and q=>r, we want to deduce p=>r.
The first step here is to add our premises. To do this, we click the Premise button in the editing palette. This opens a small interaction pane below the proof, allowing us to enter the premise we want to add to the proof. (Note that we are using the ascii encoding of logical formulas. If you are unfamiliar with this, click the Help button for details.)
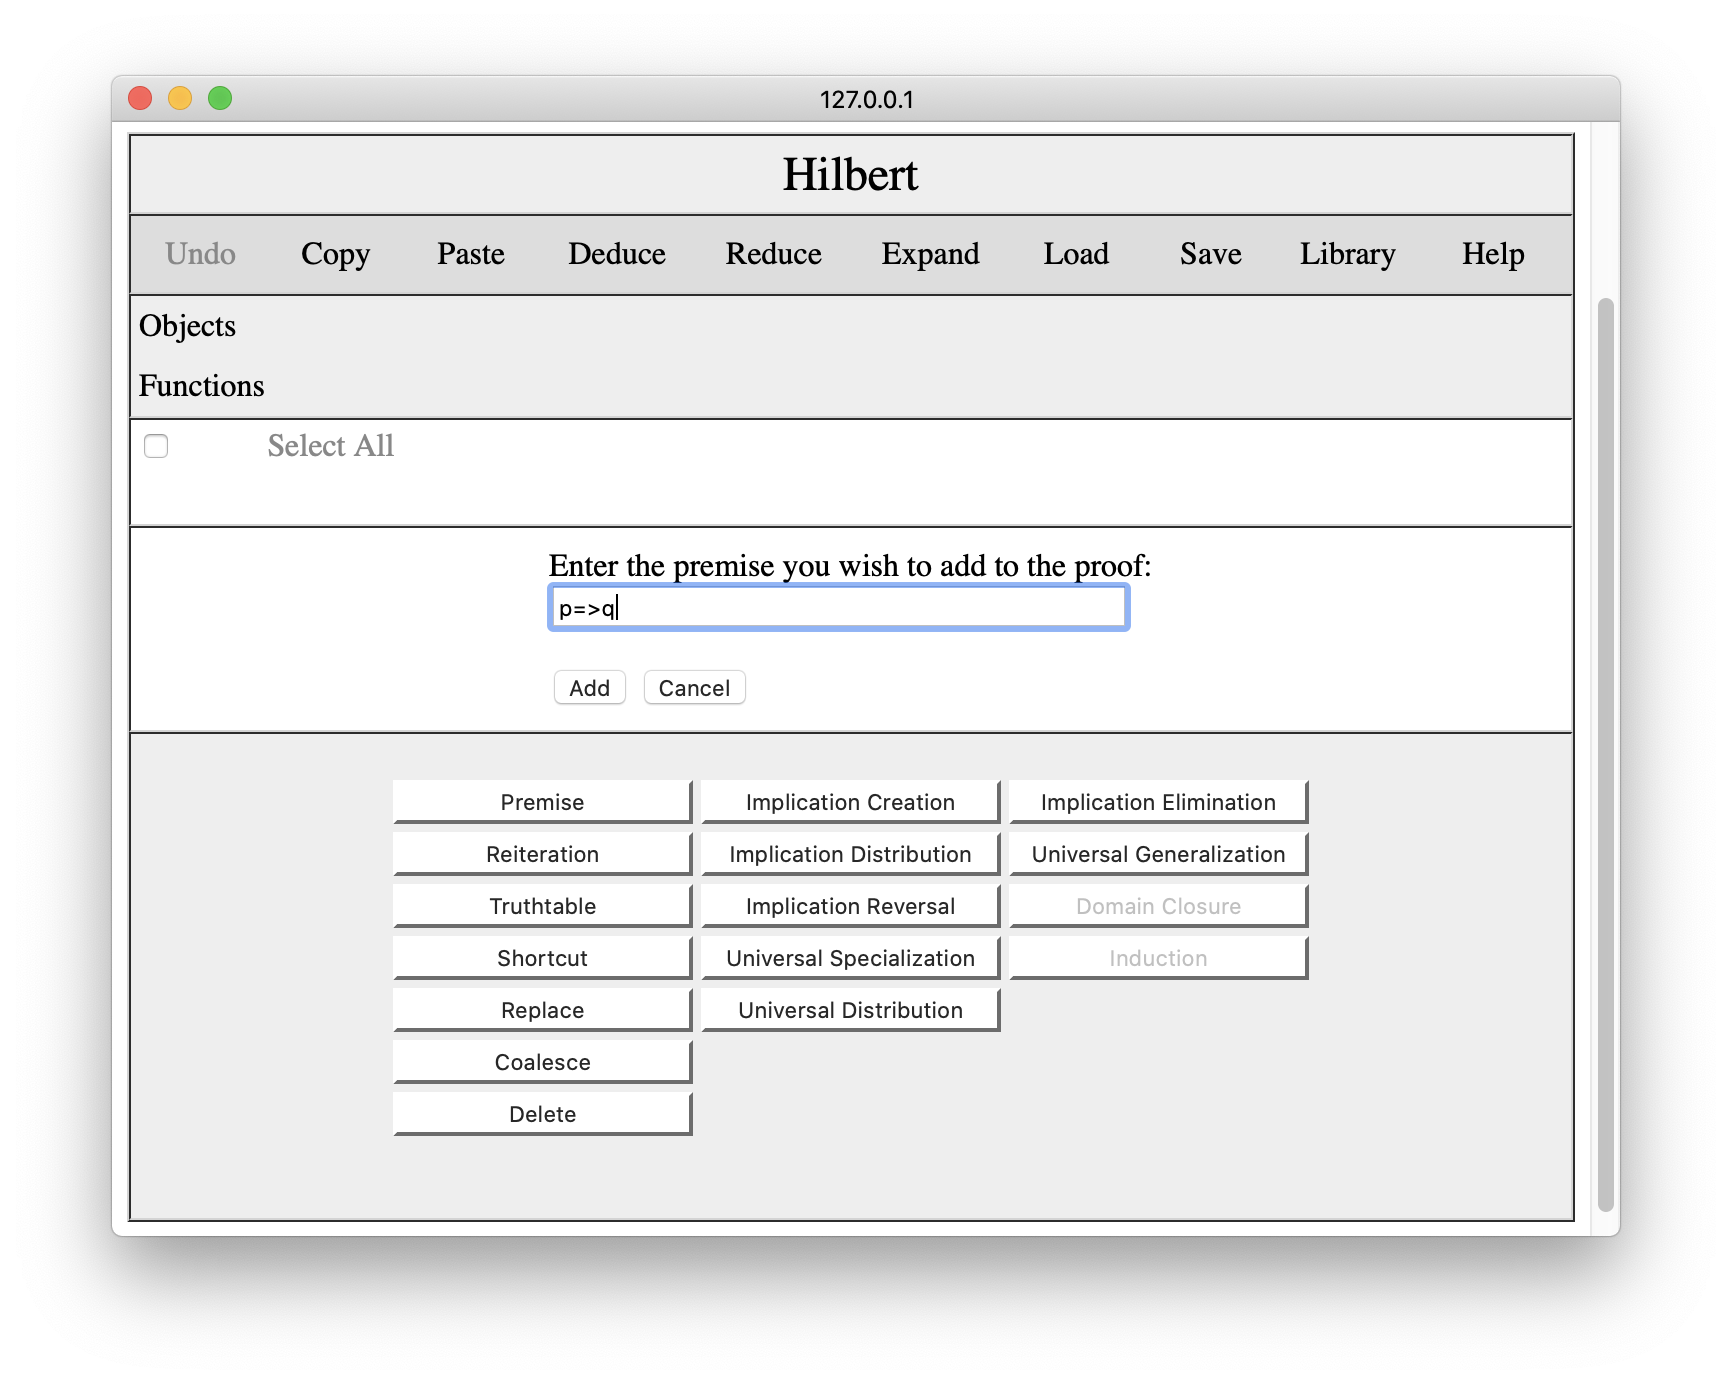
Once we are happy with the sentence, we wish to add, we press Add, and the premise appears in the proof pane, as shown below. If we change our minds about adding the premise, we can click cancel to close the interaction pane.
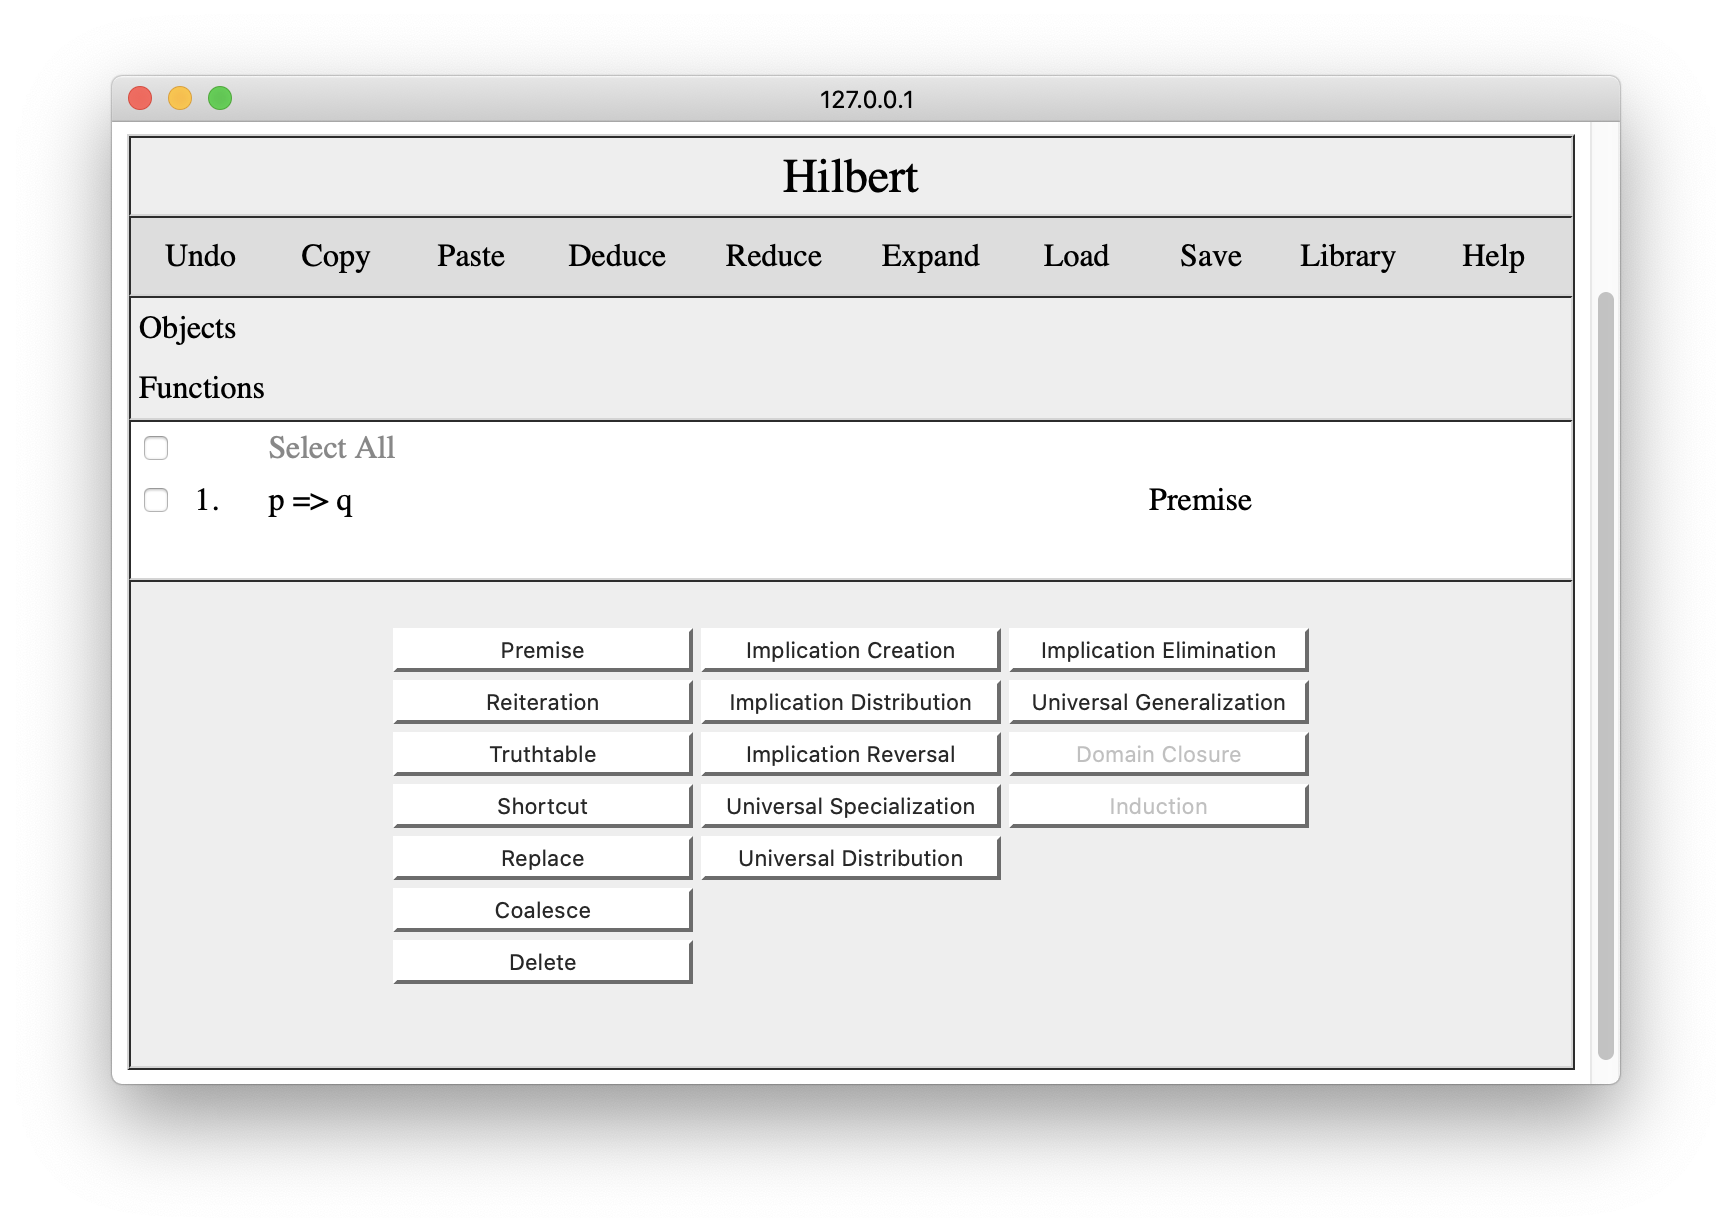
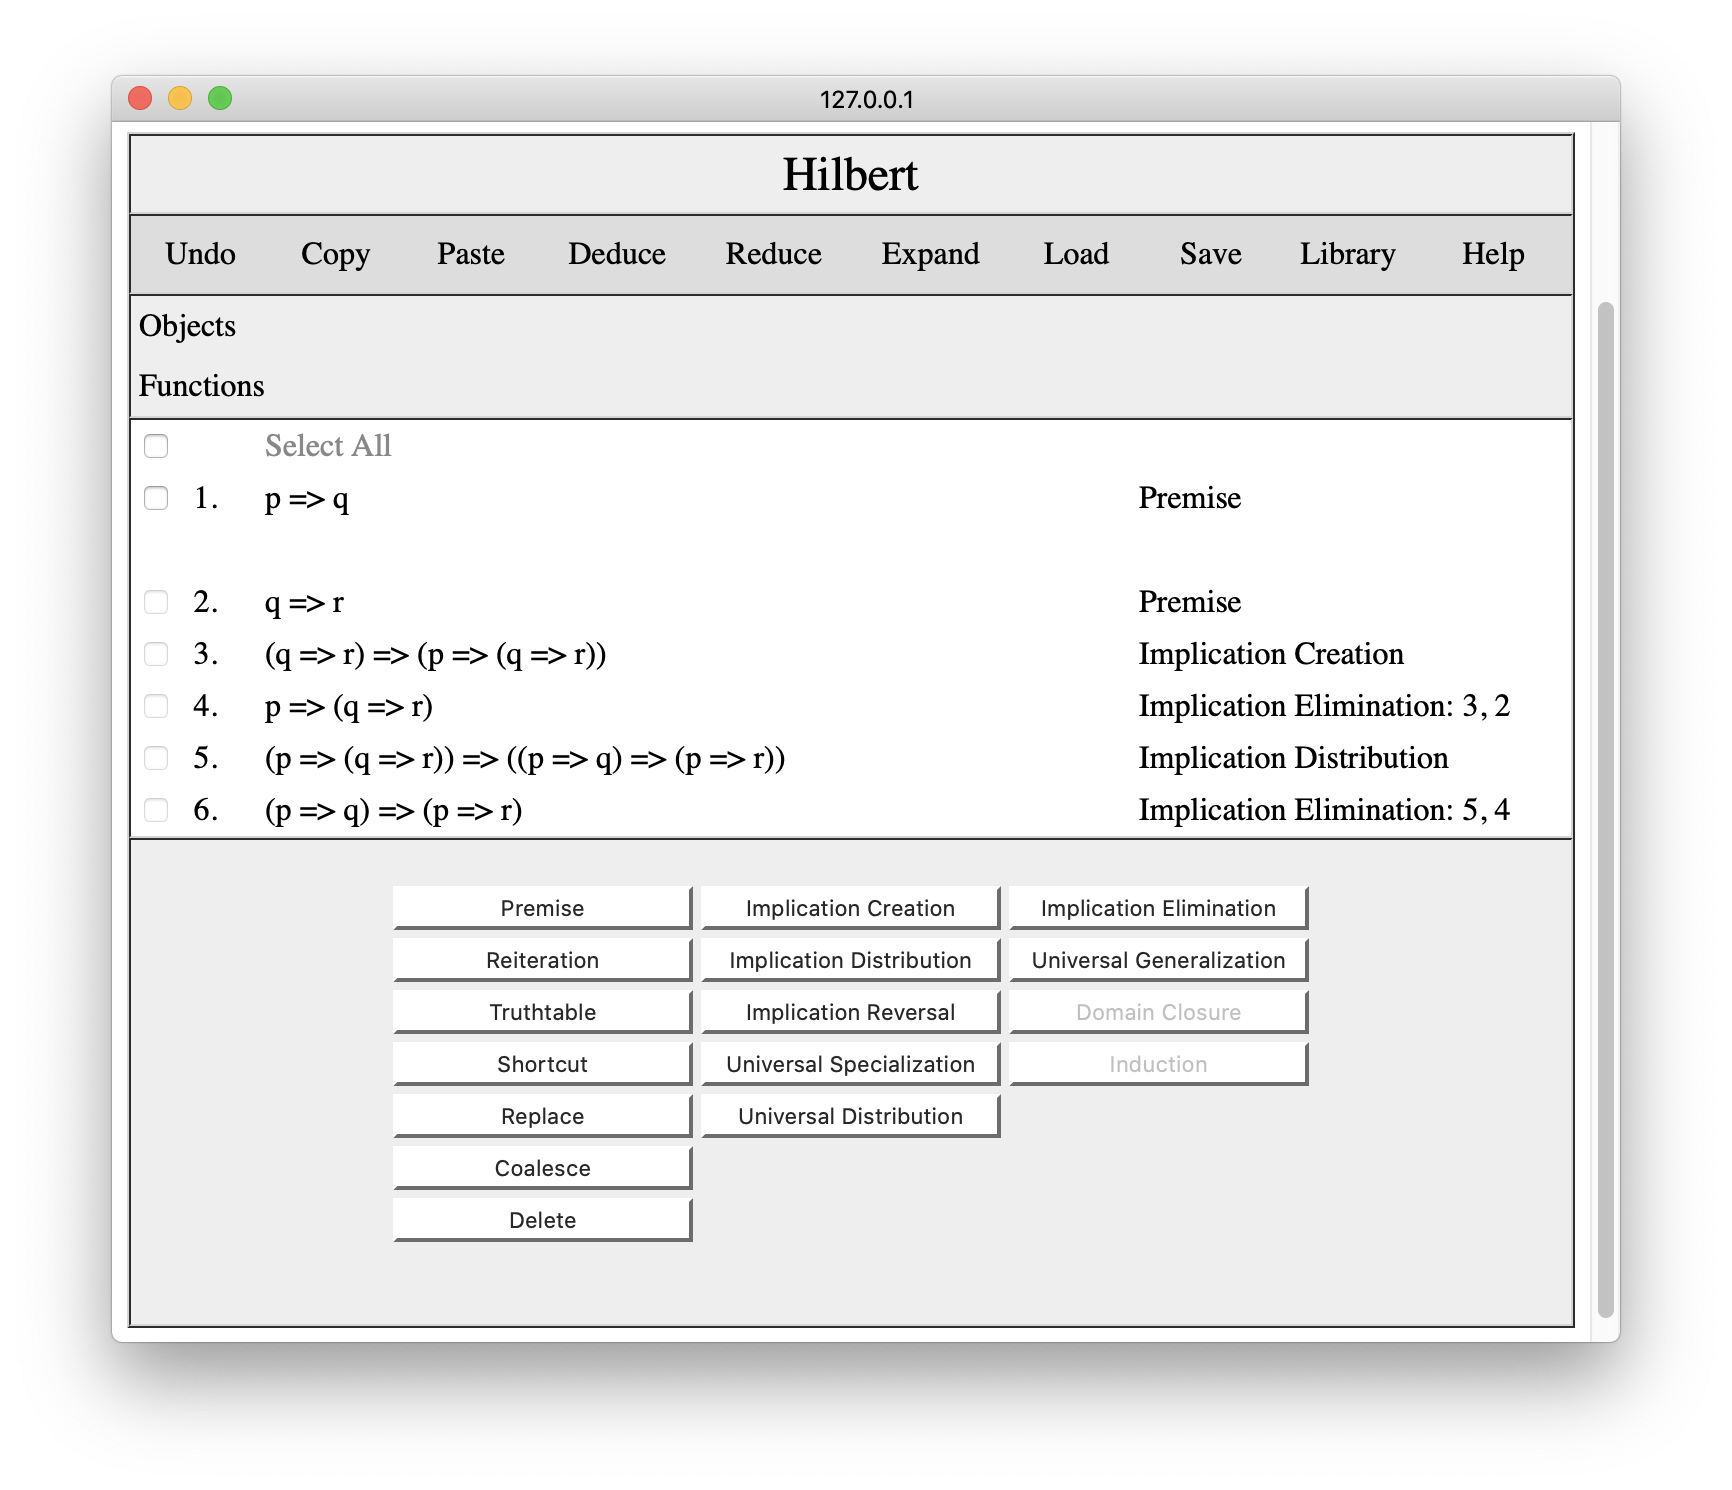
To add the second premise, we press the Premise button again and enter our second premise.
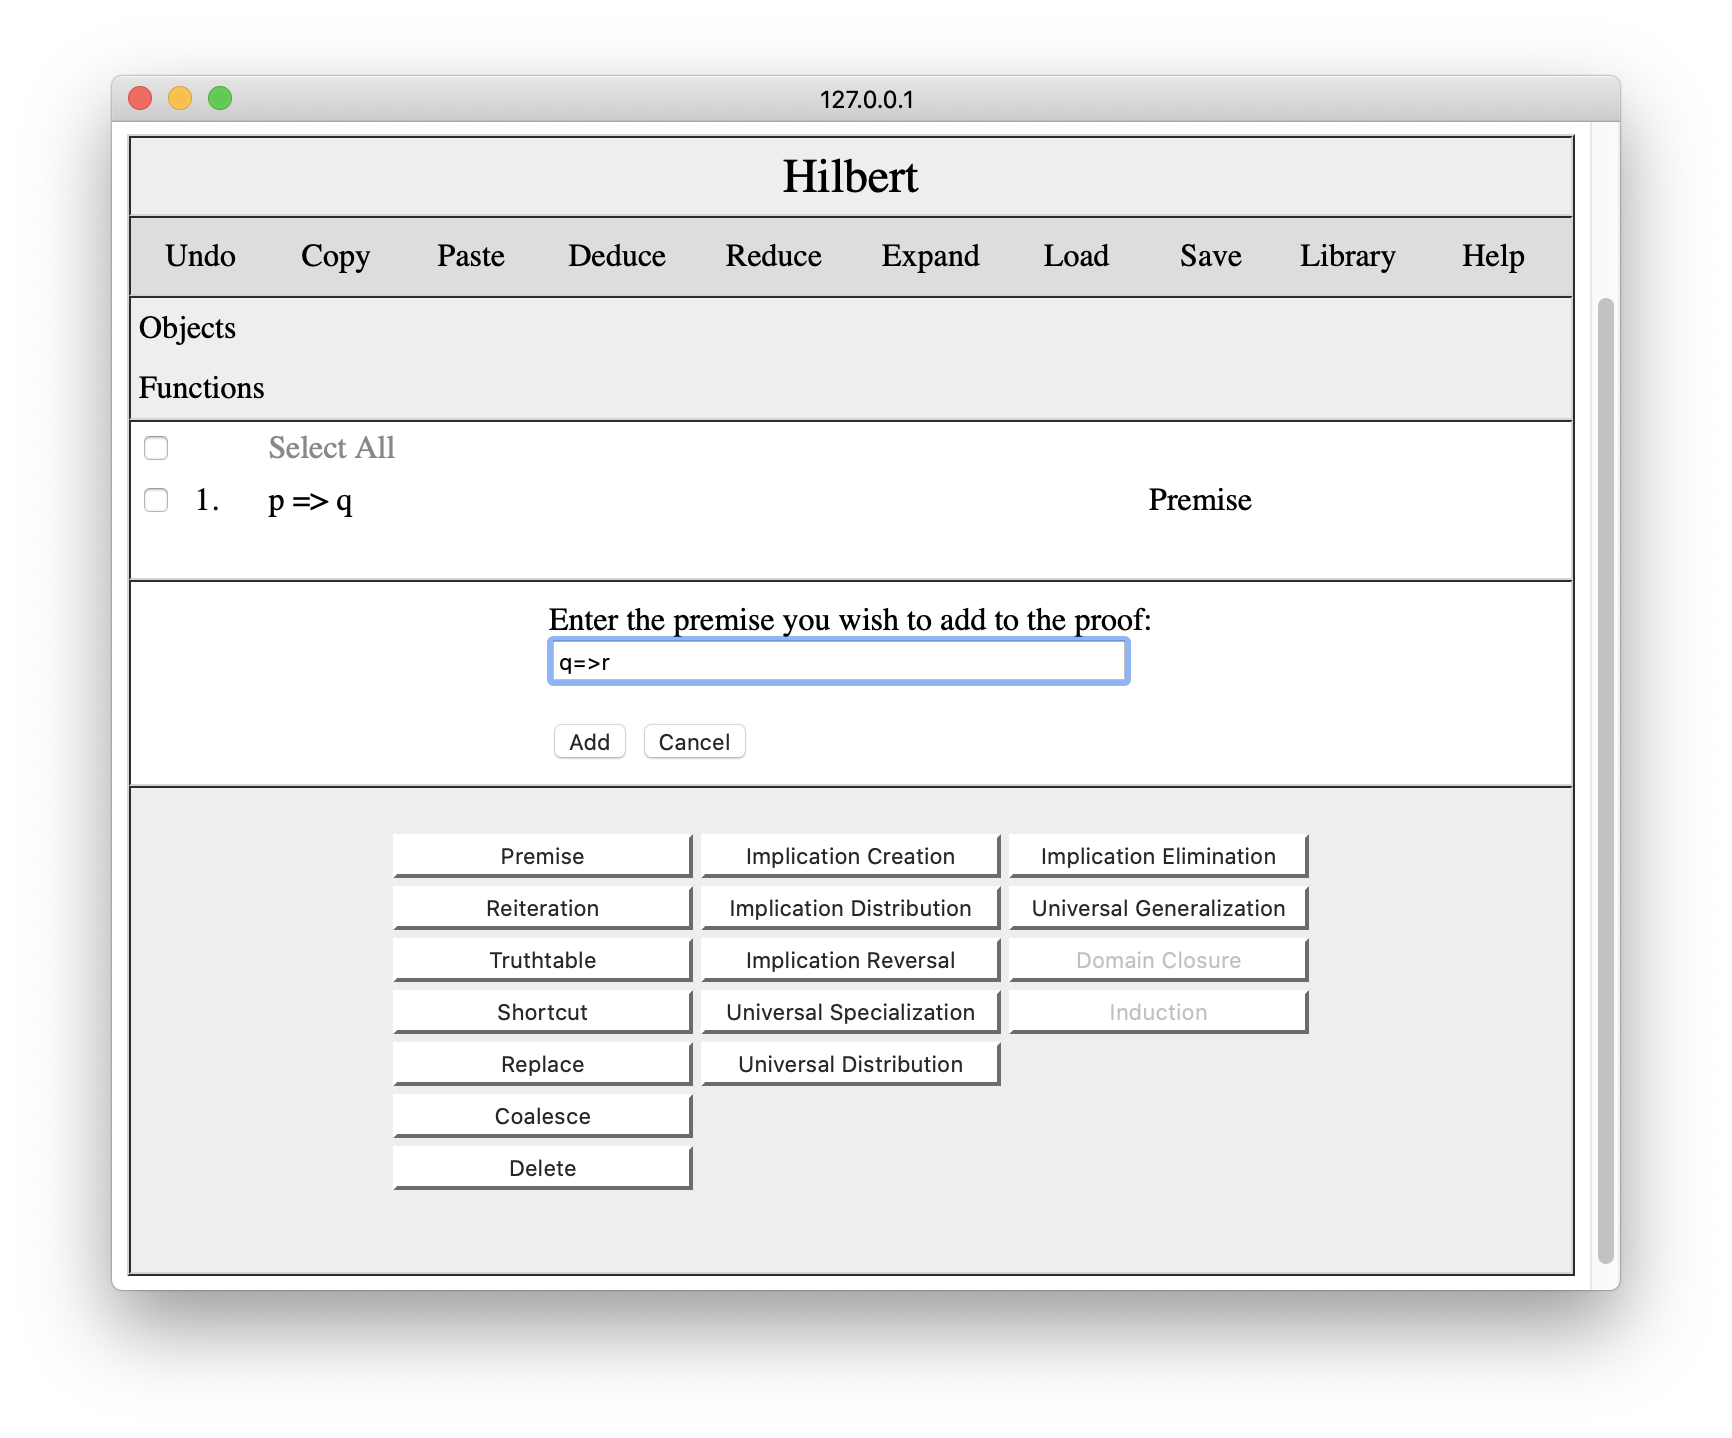
We press the Add button, and the second premise appears in the proof.
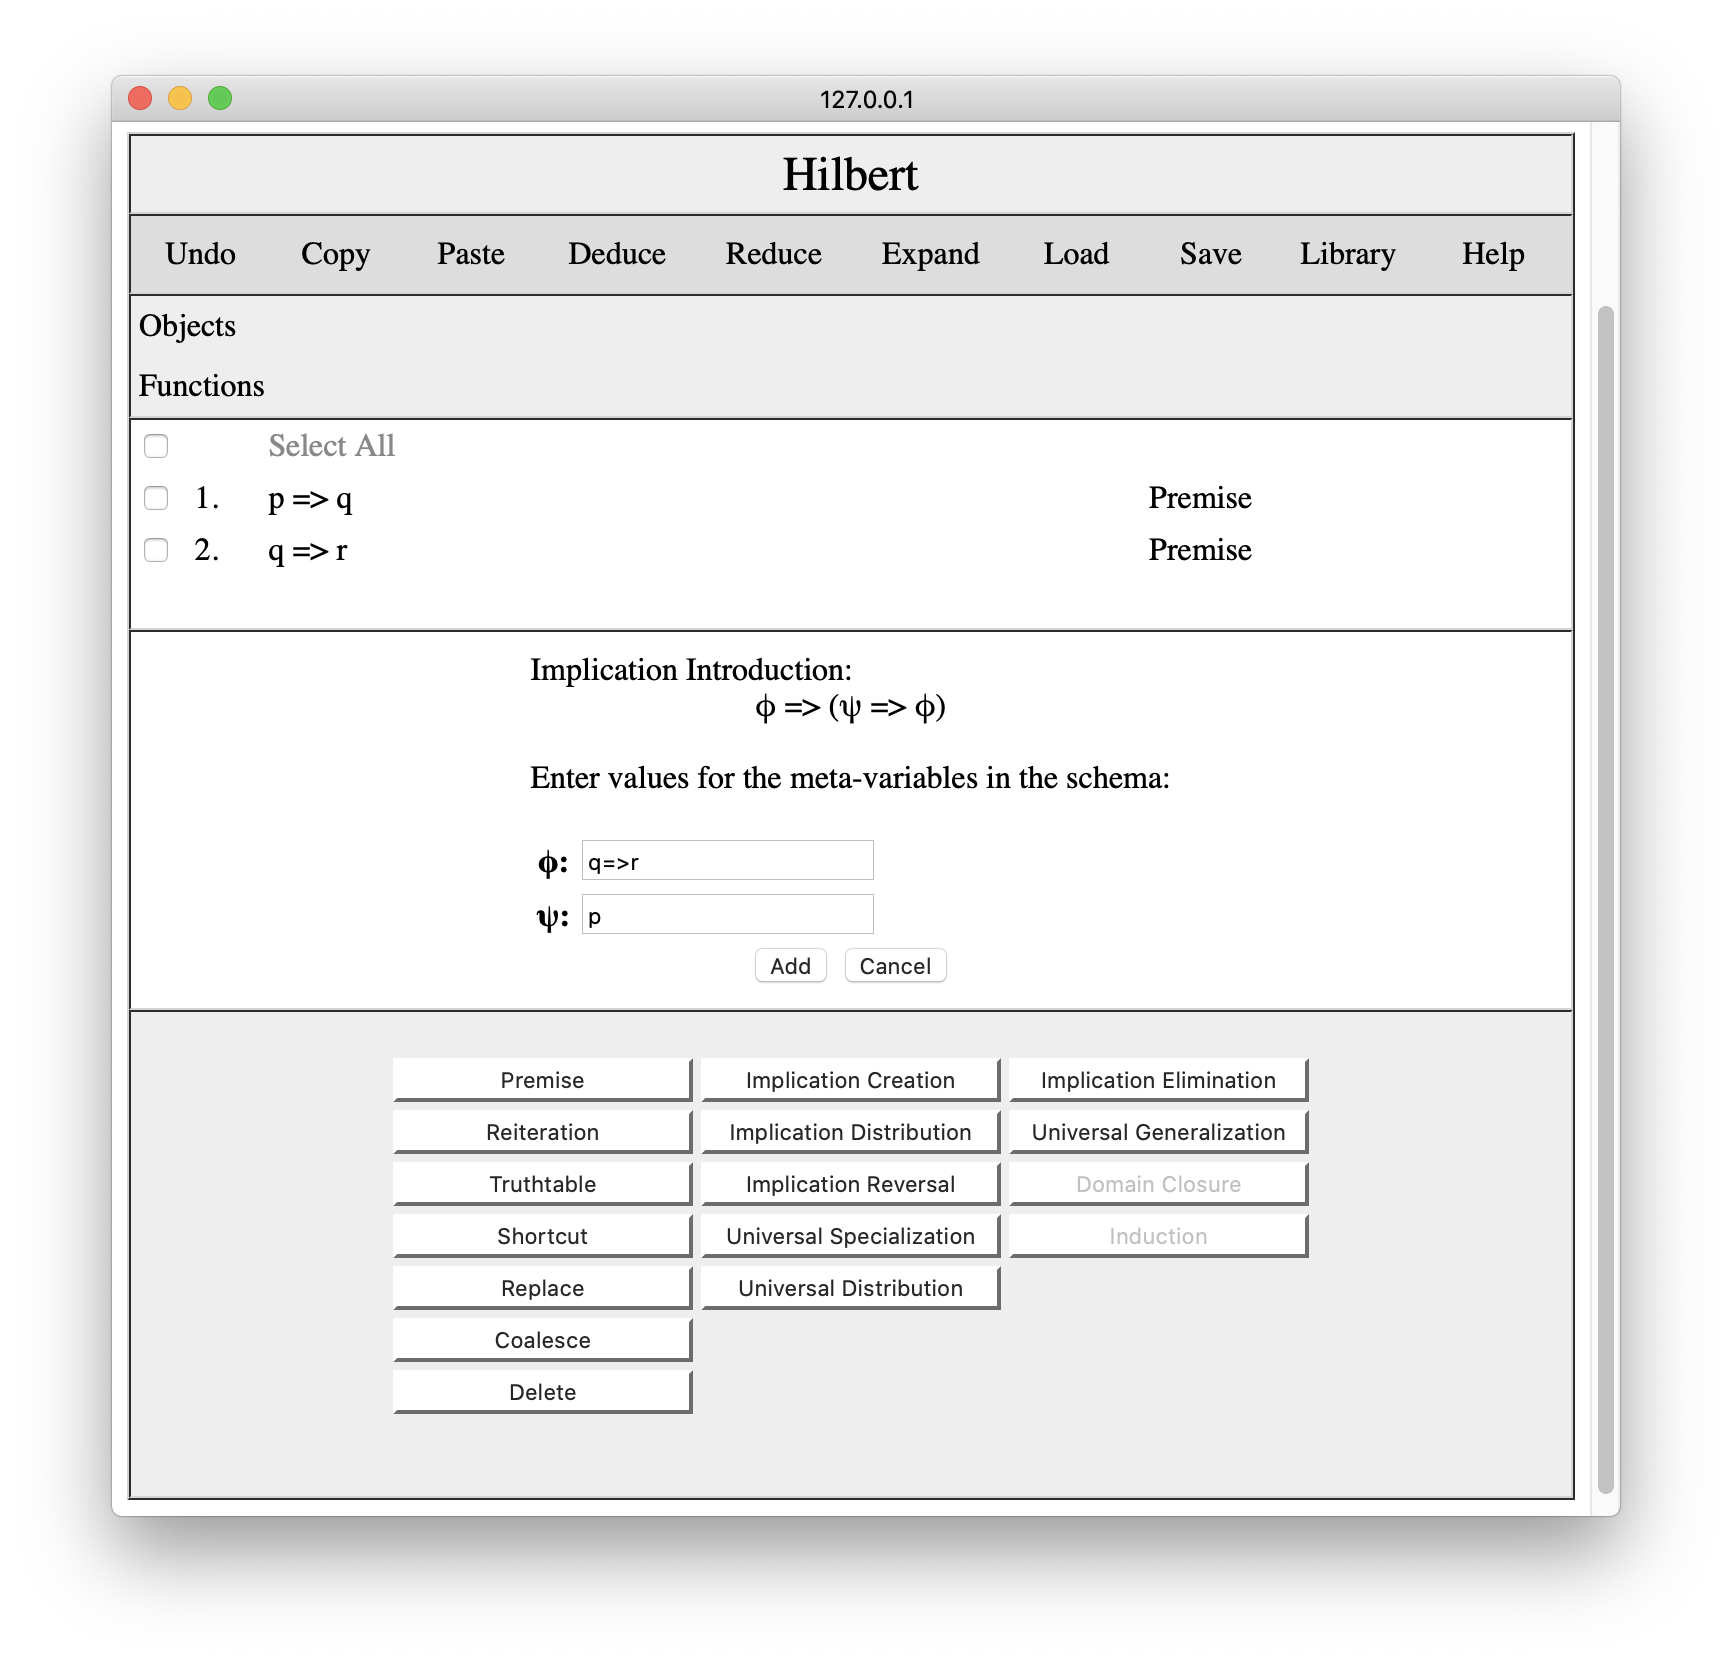
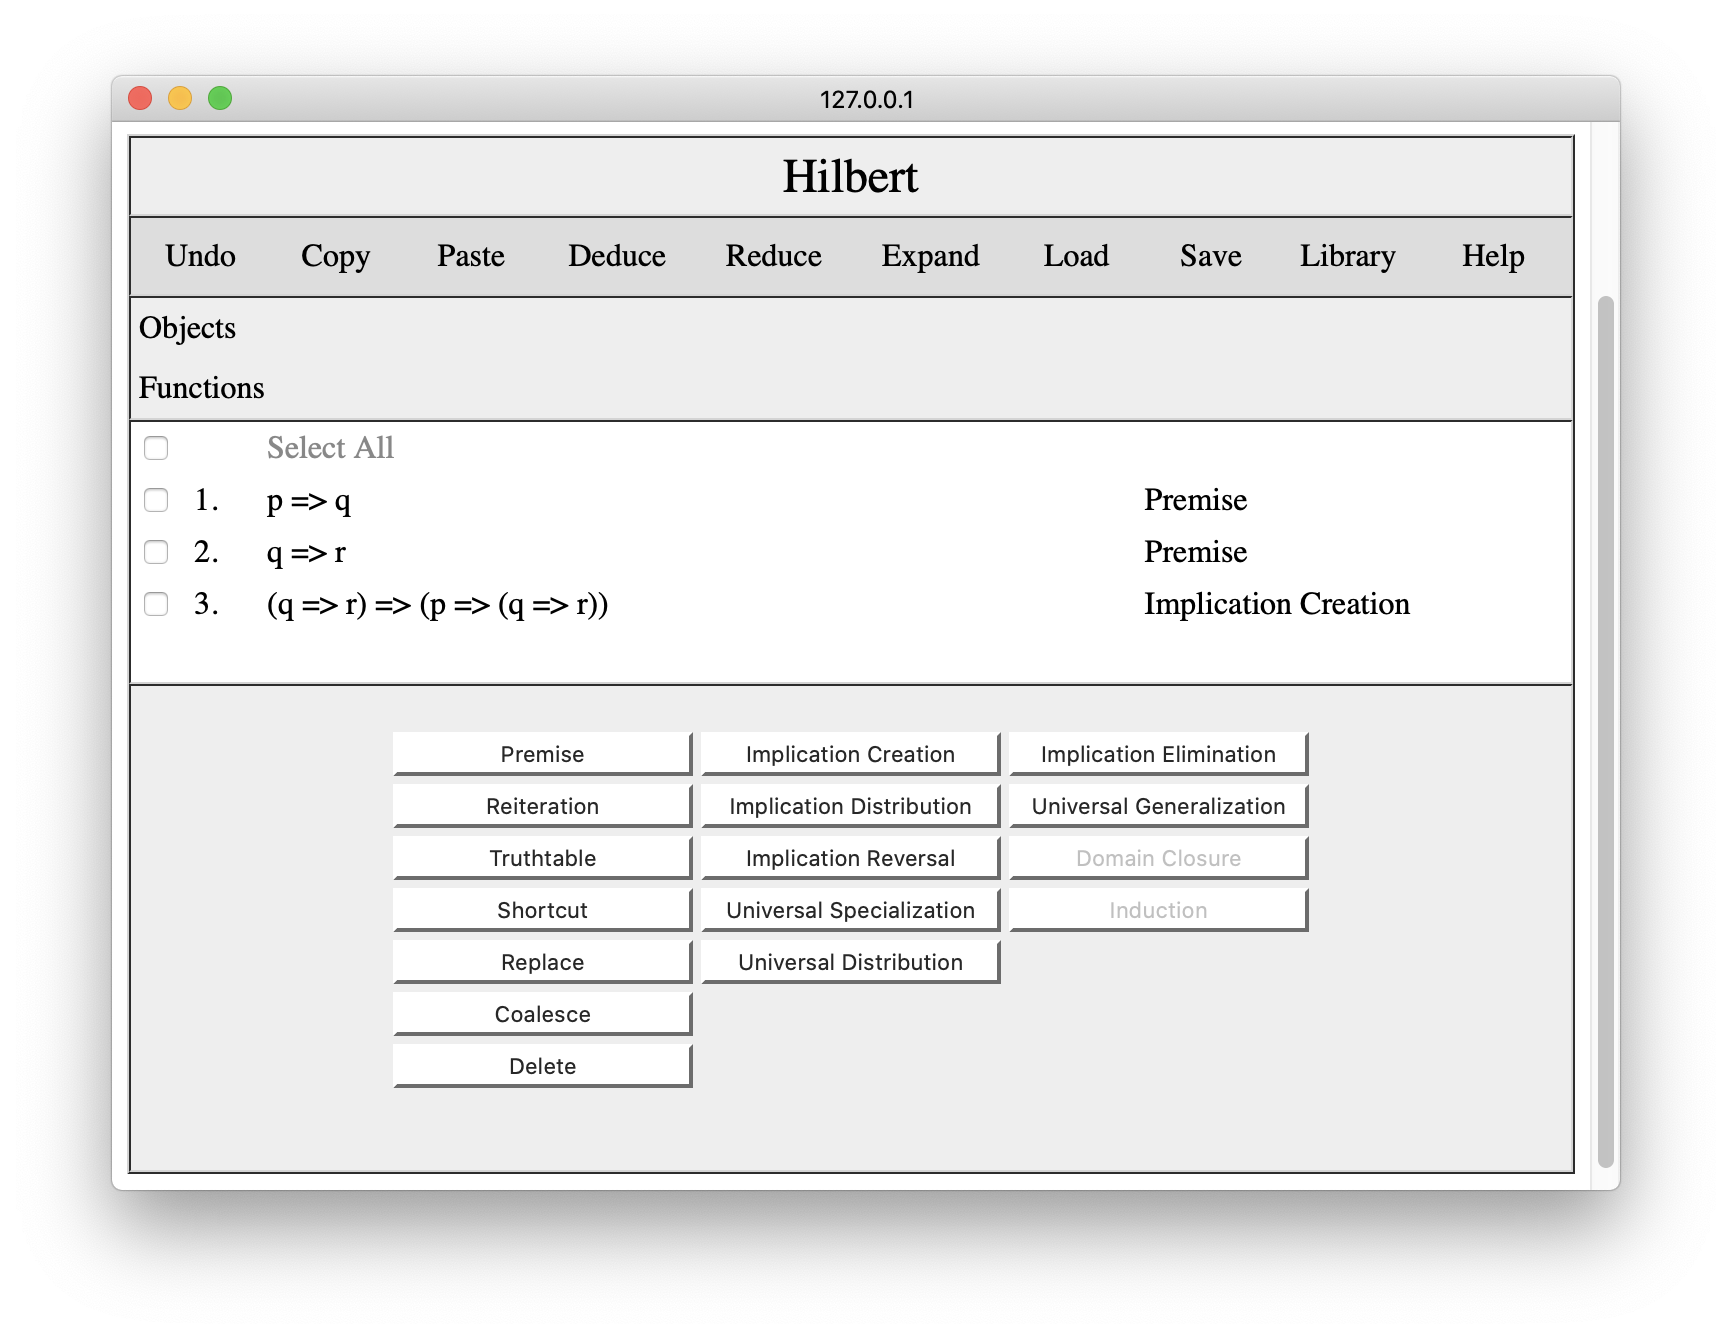
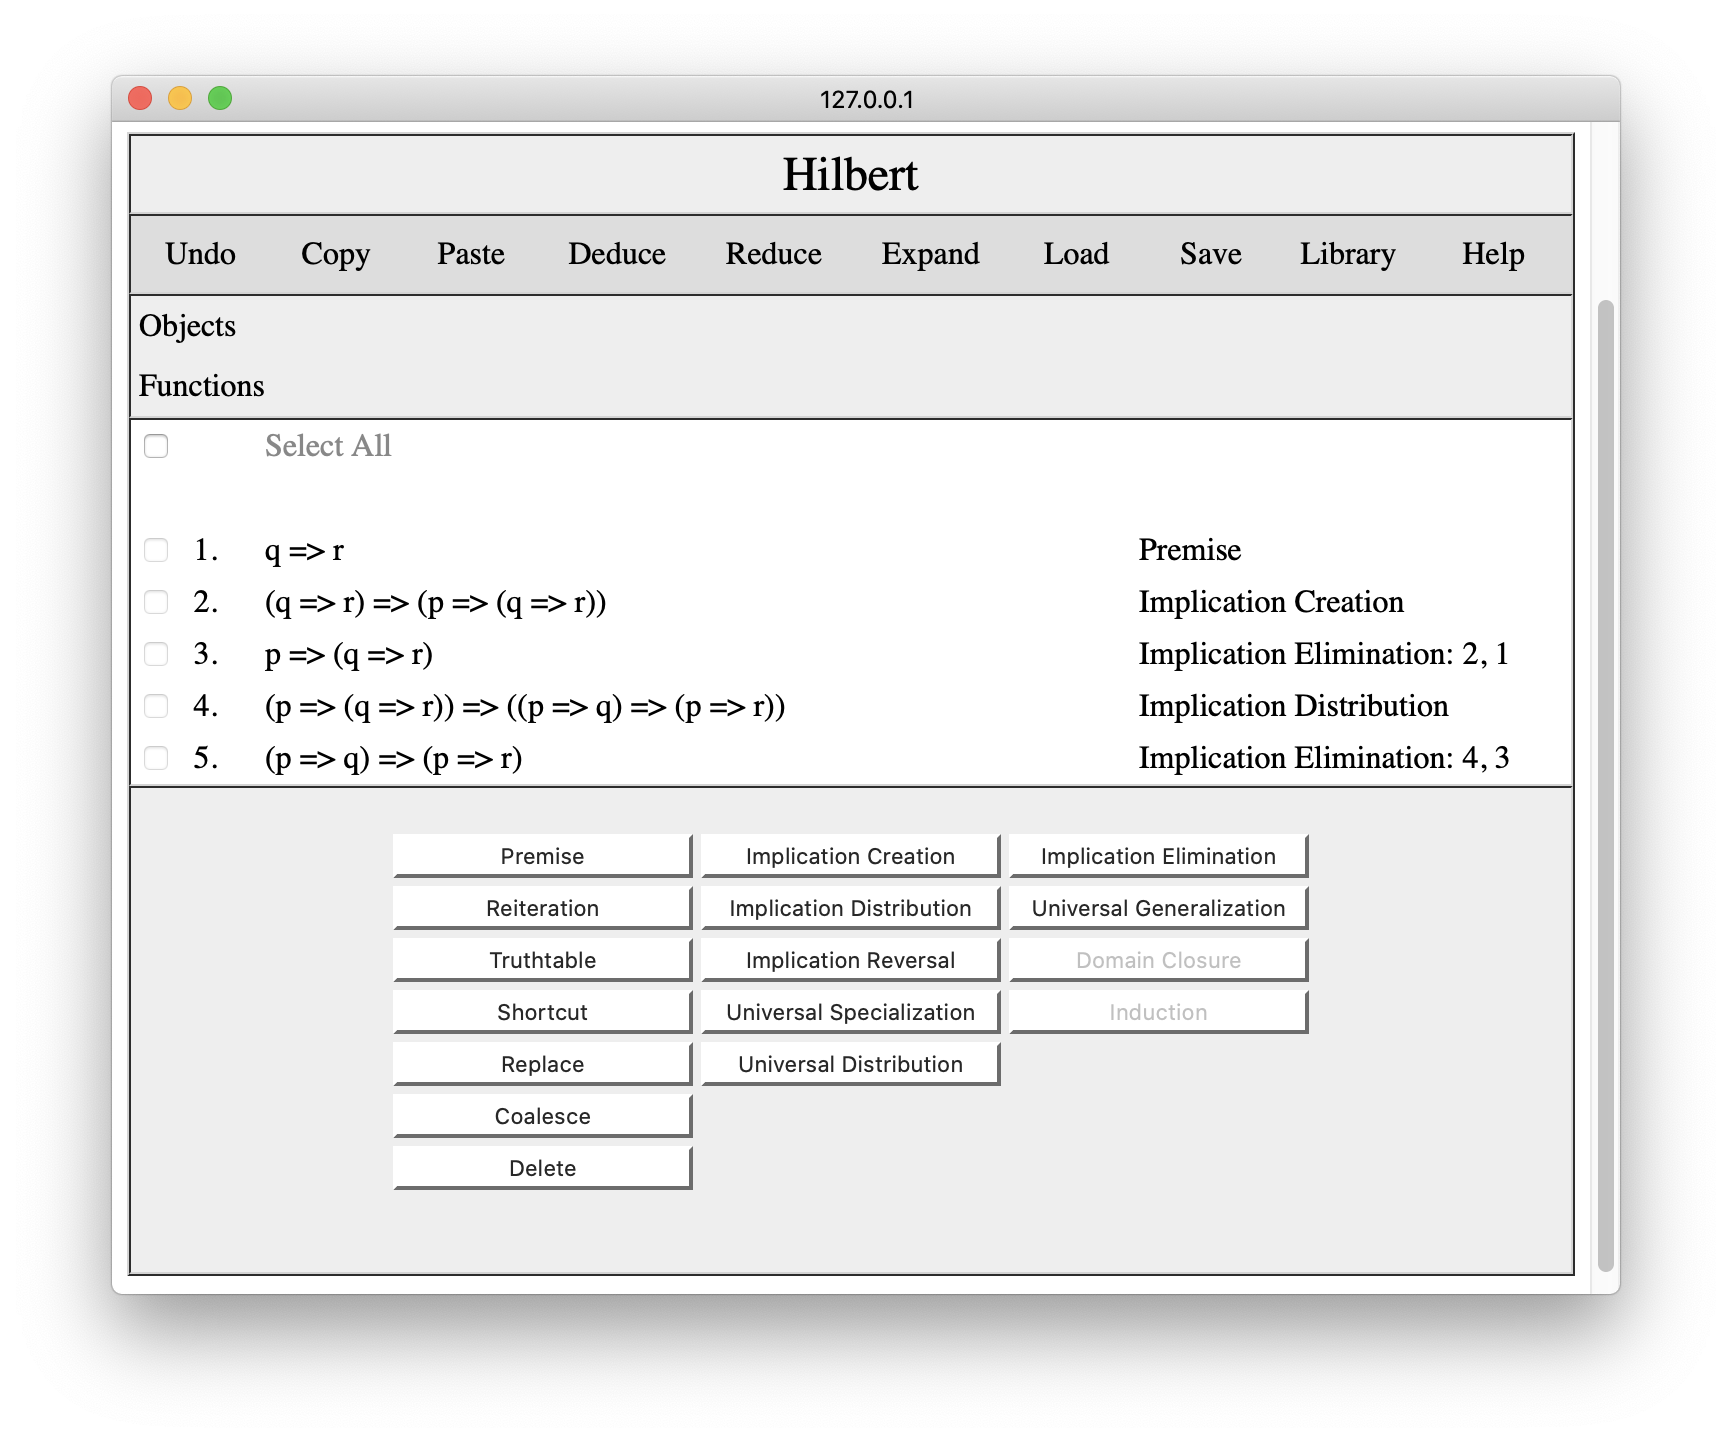
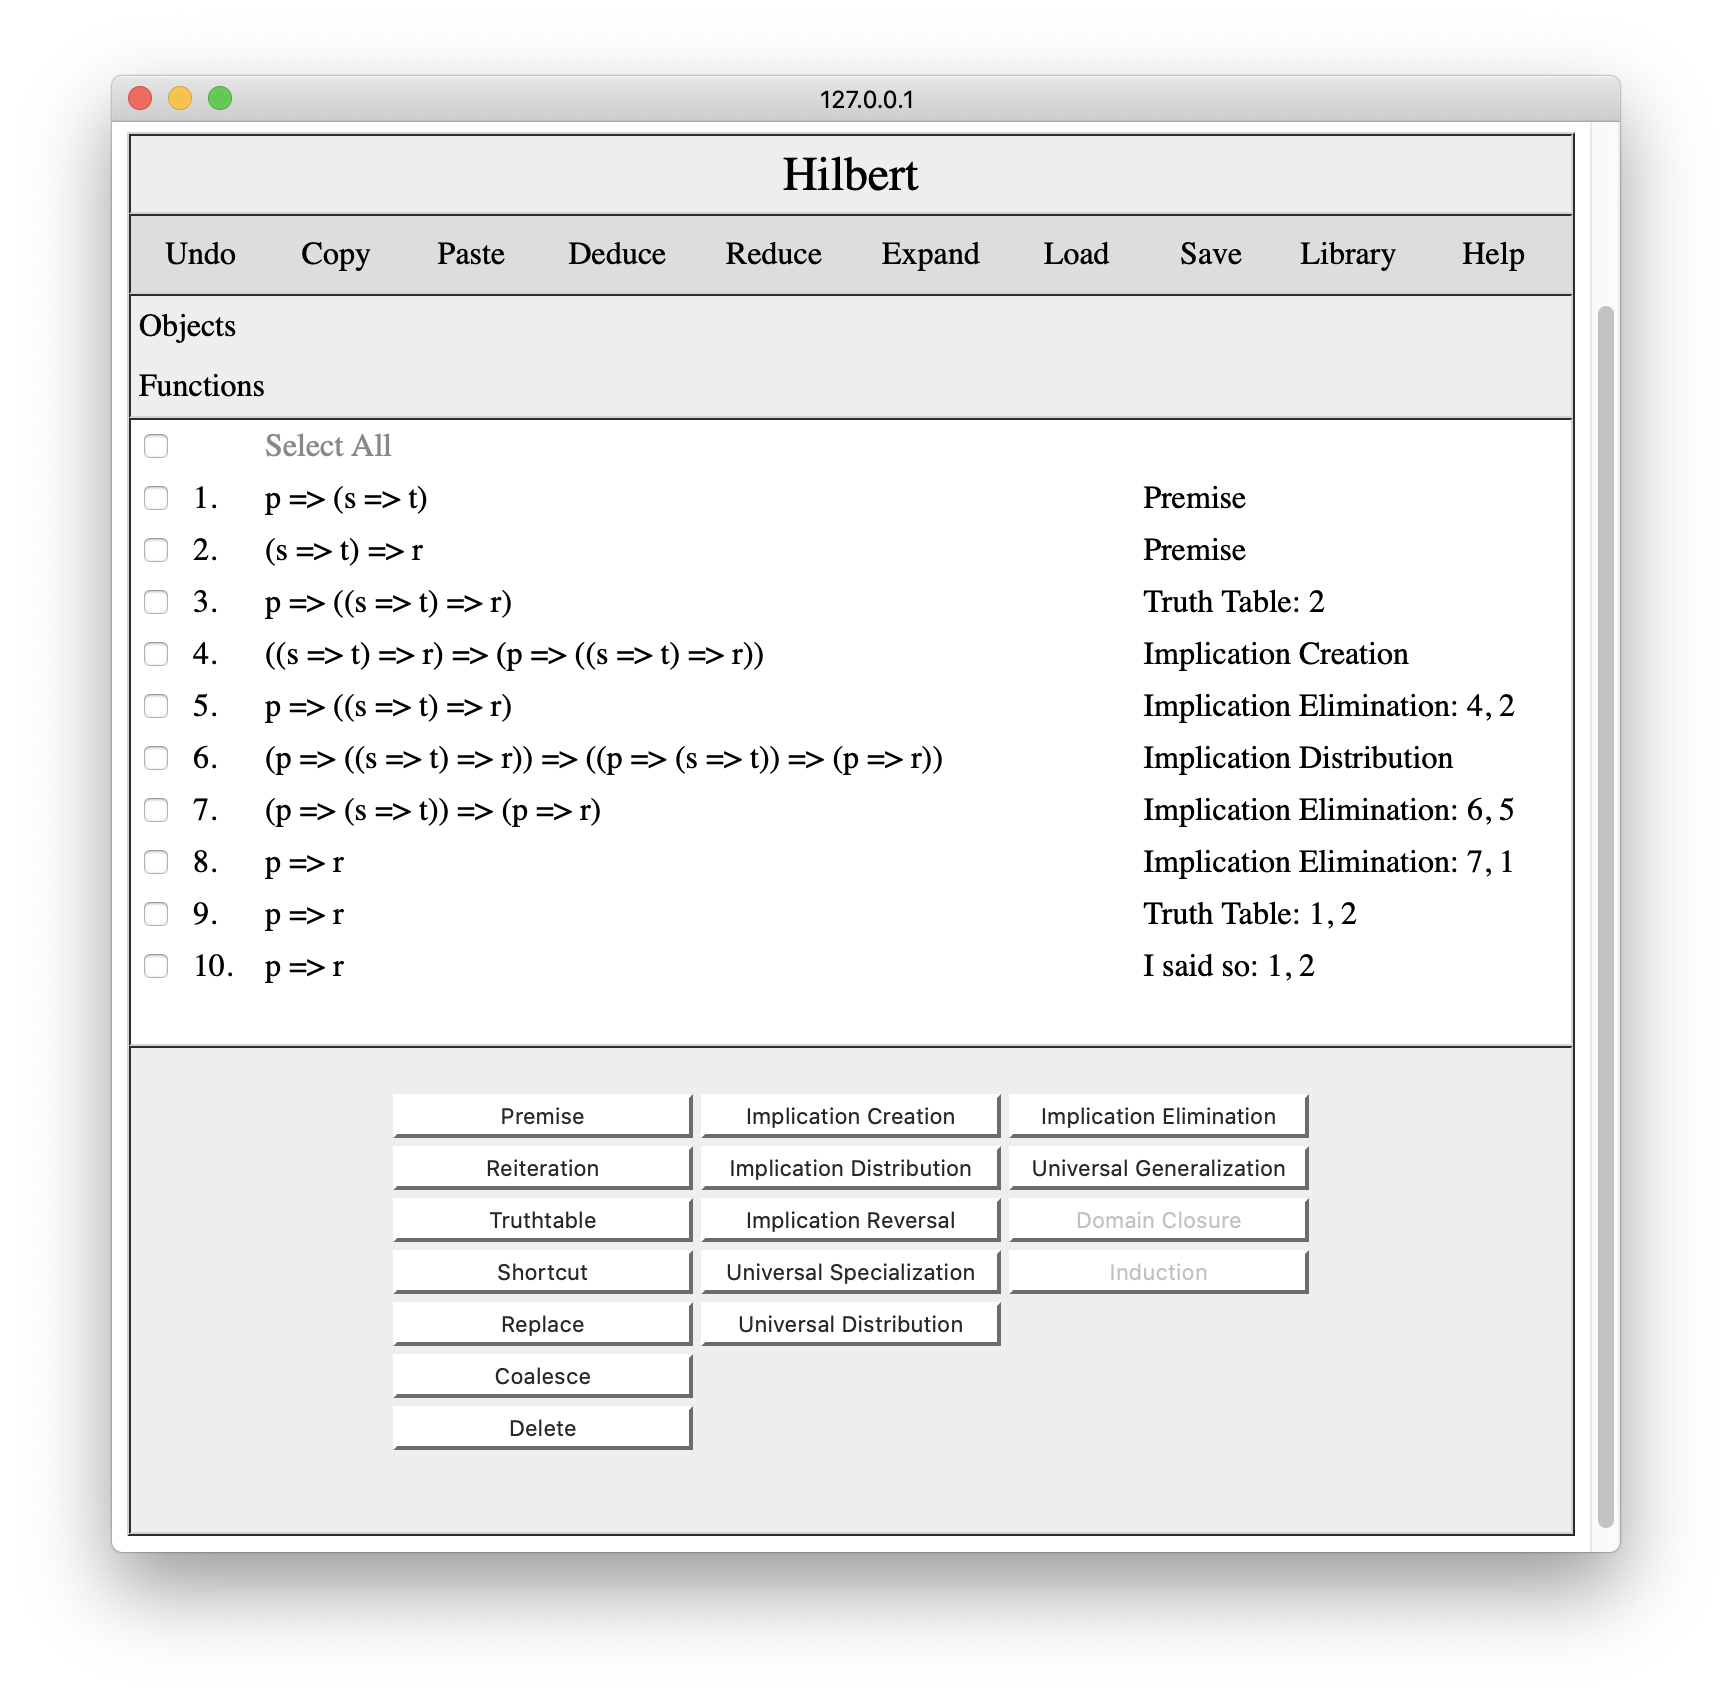
Now that we have our premises in our proof, we can begin to add schemas and/or apply rules of inference. The trick in this proof is to start with an instance of Implication Creation, viz. ((q=>r)=>(p=>(q=>r))). To this end, we click the Implication Creation button. We enter (q=>r) for phi and p for psi.
Once we press Add, the corresponding instance is added to the proof.
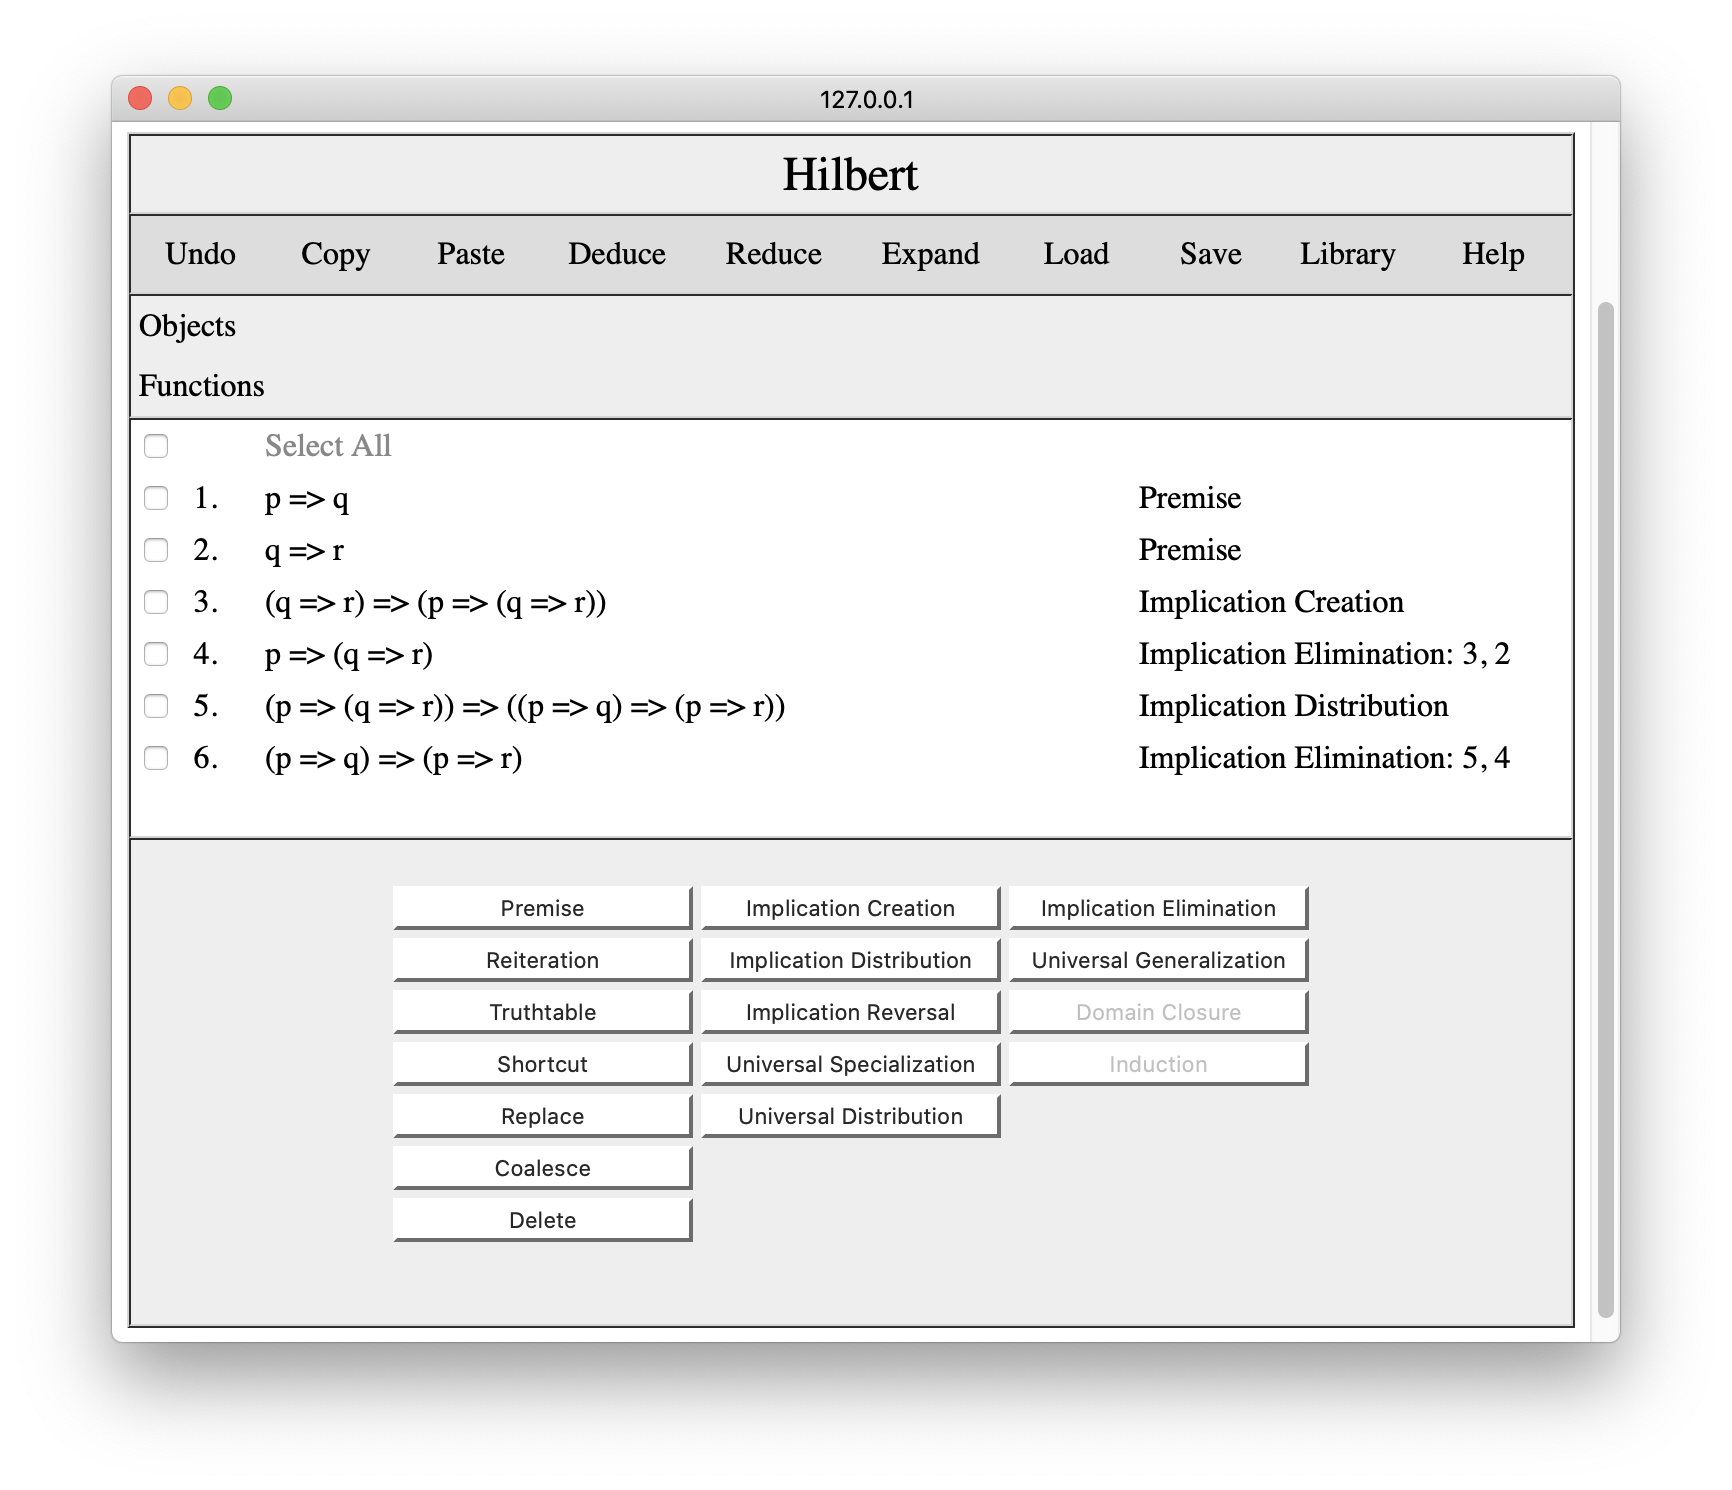
Given this result and our second premise, we can apply Implication Elimination. First we check the steps to which we want to apply the rule, in this case steps 2 and 3.
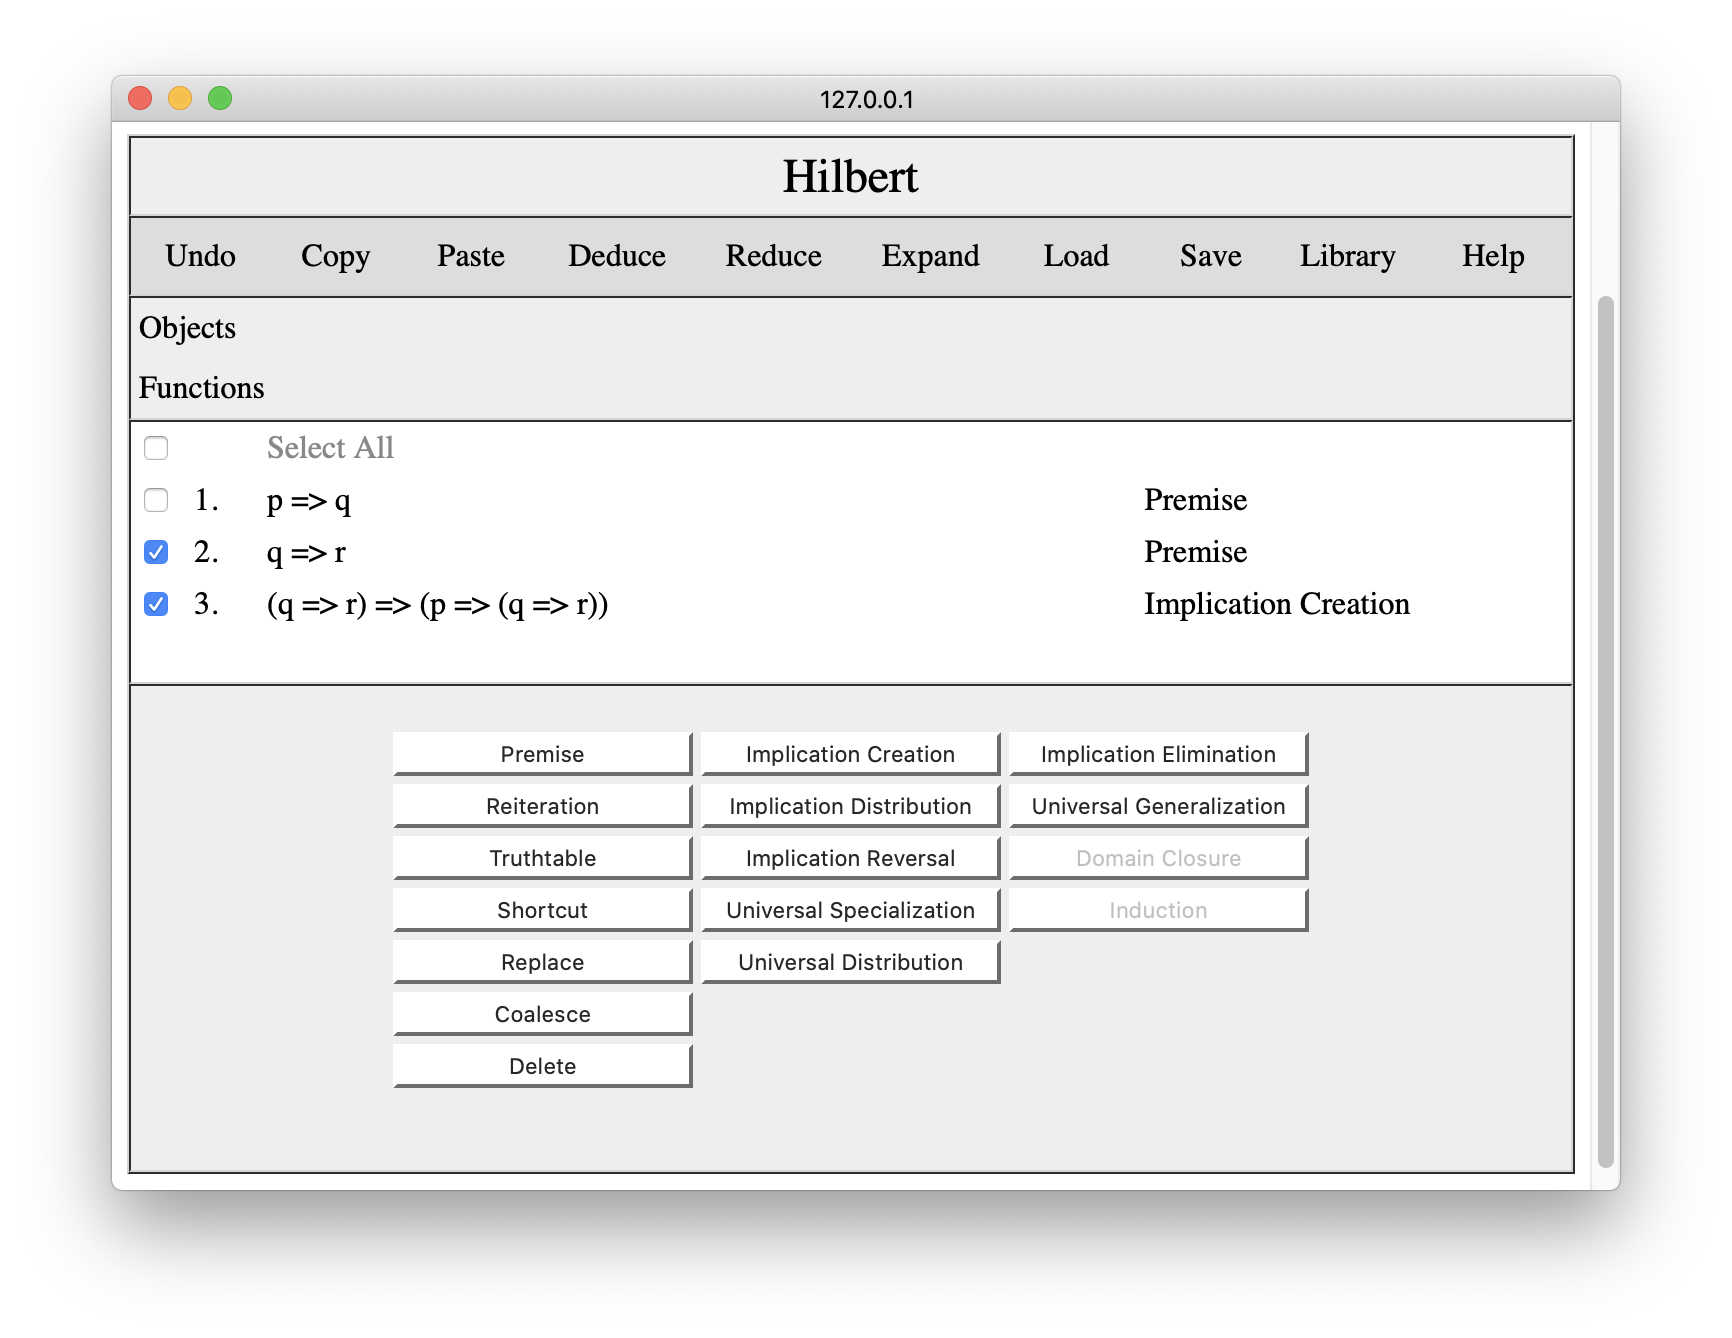
Having done this, we press the Implication Elimination button, and the system adds the corresponding result to the proof.
Now that we have this result, the next step is to use implication distribution. If we click the Implication Distribution button, we get an interaction pane that asks us to enter formulas to substitute for the metavariables in the implication distribution schema. We choose p for phi, q for psi, and r for chi.
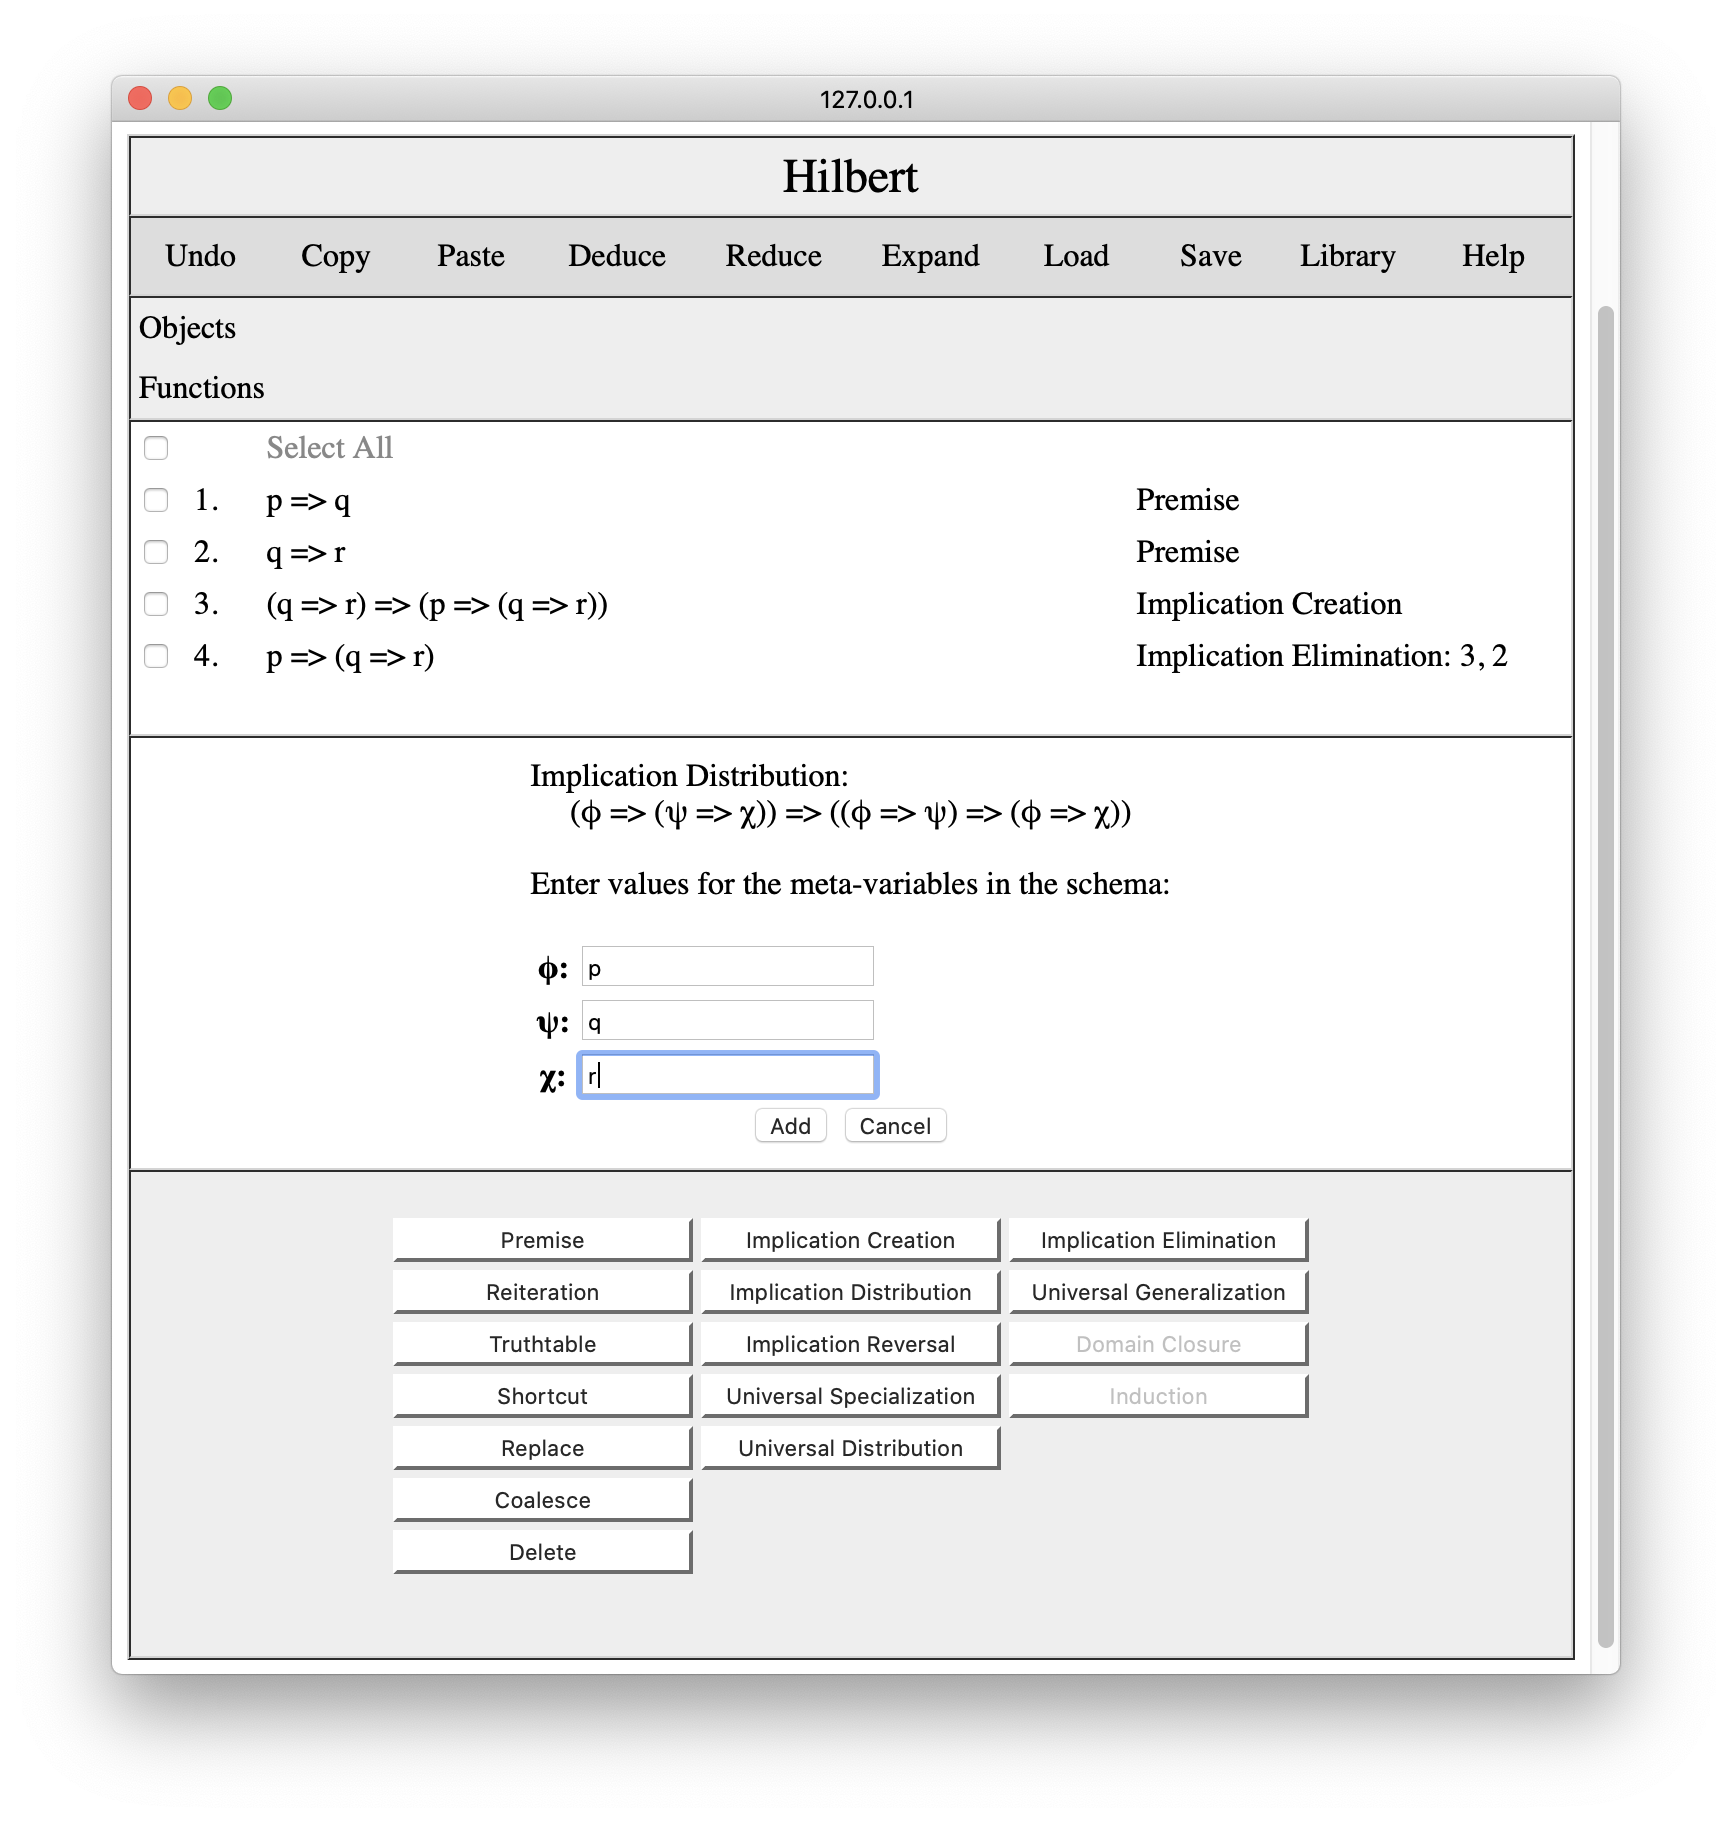
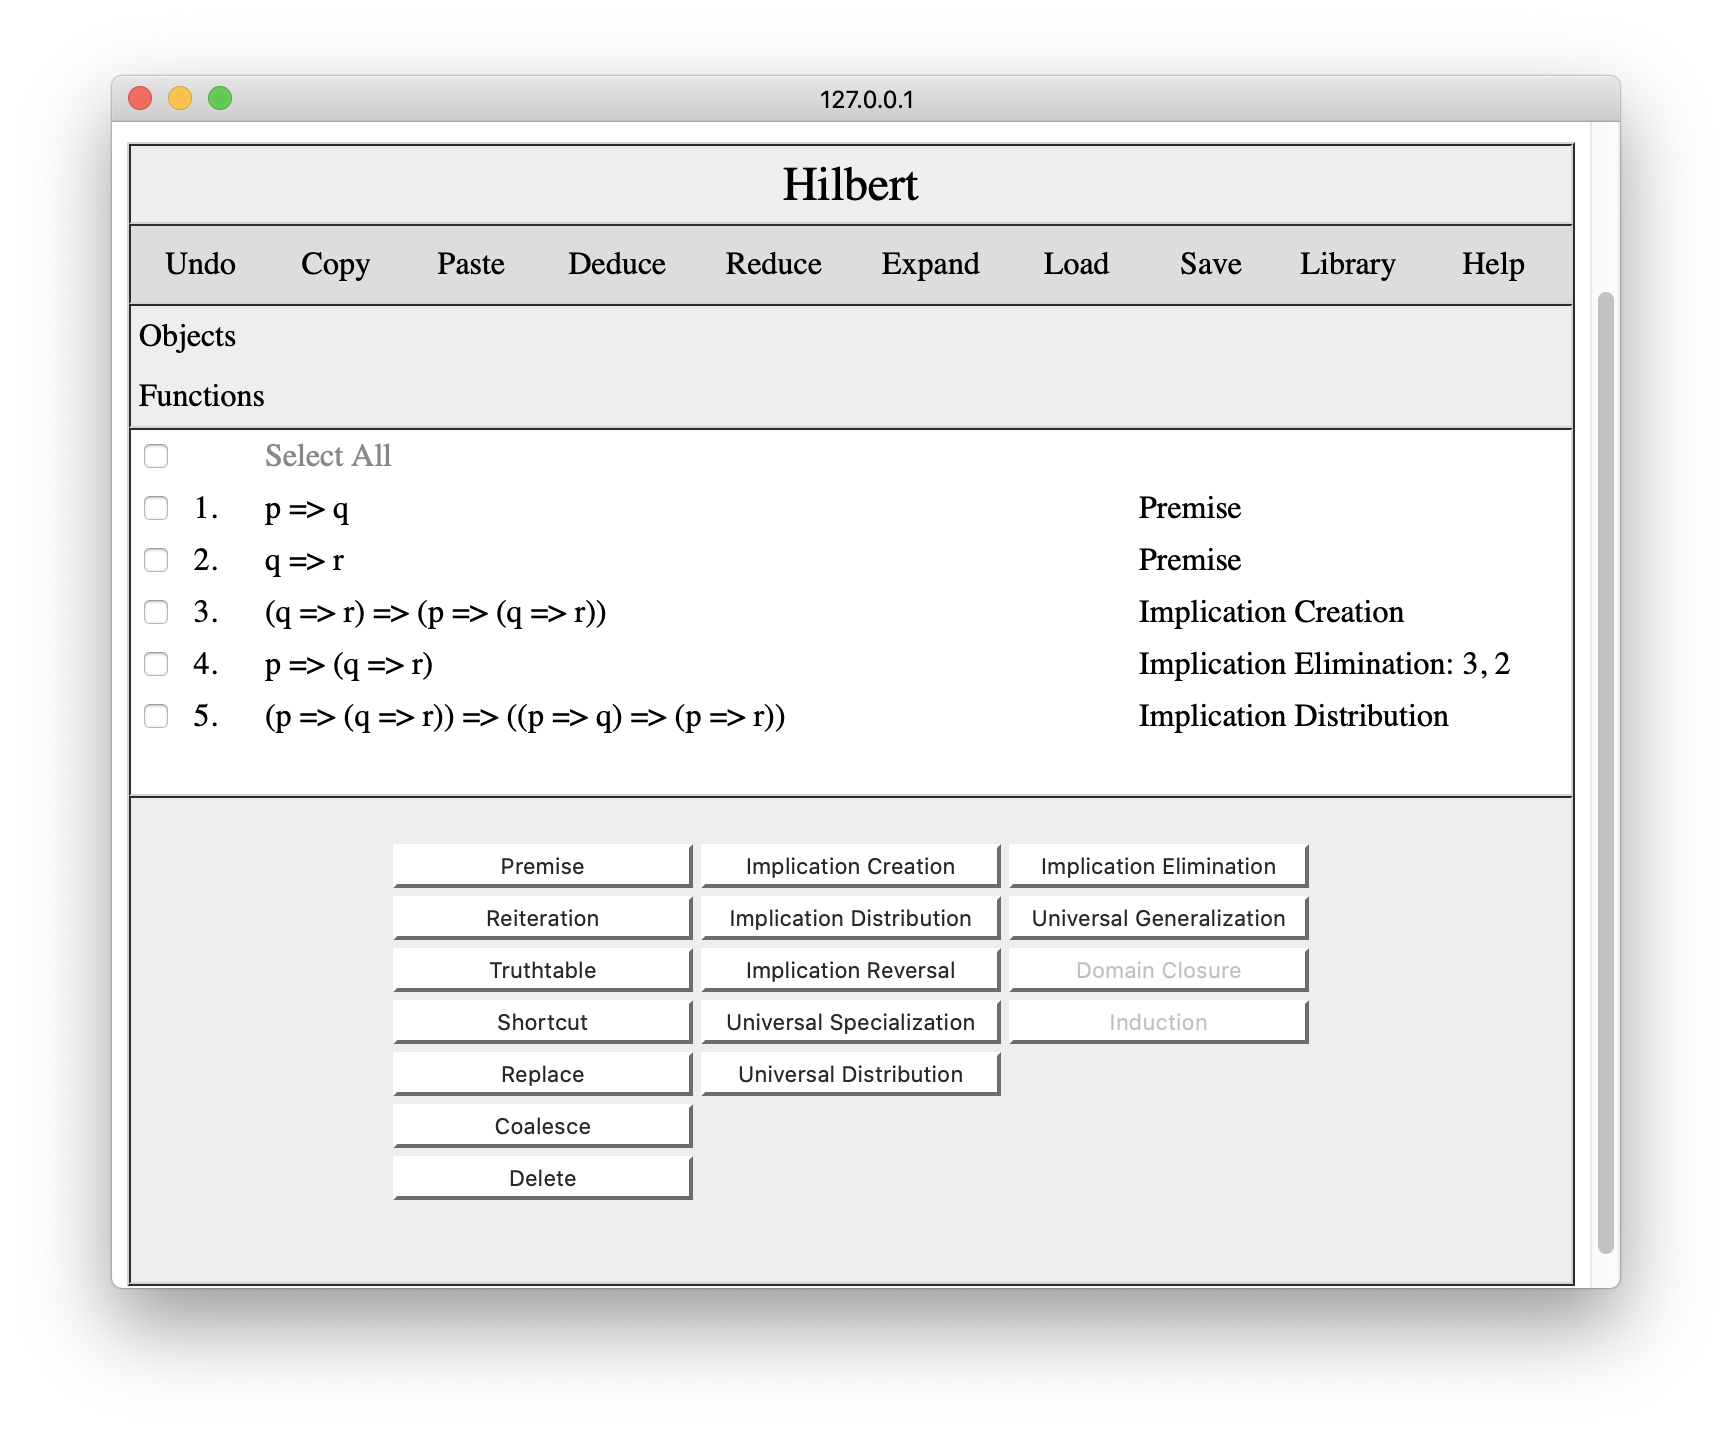
Once we press the Add button, the instance of ID is added to the proof.
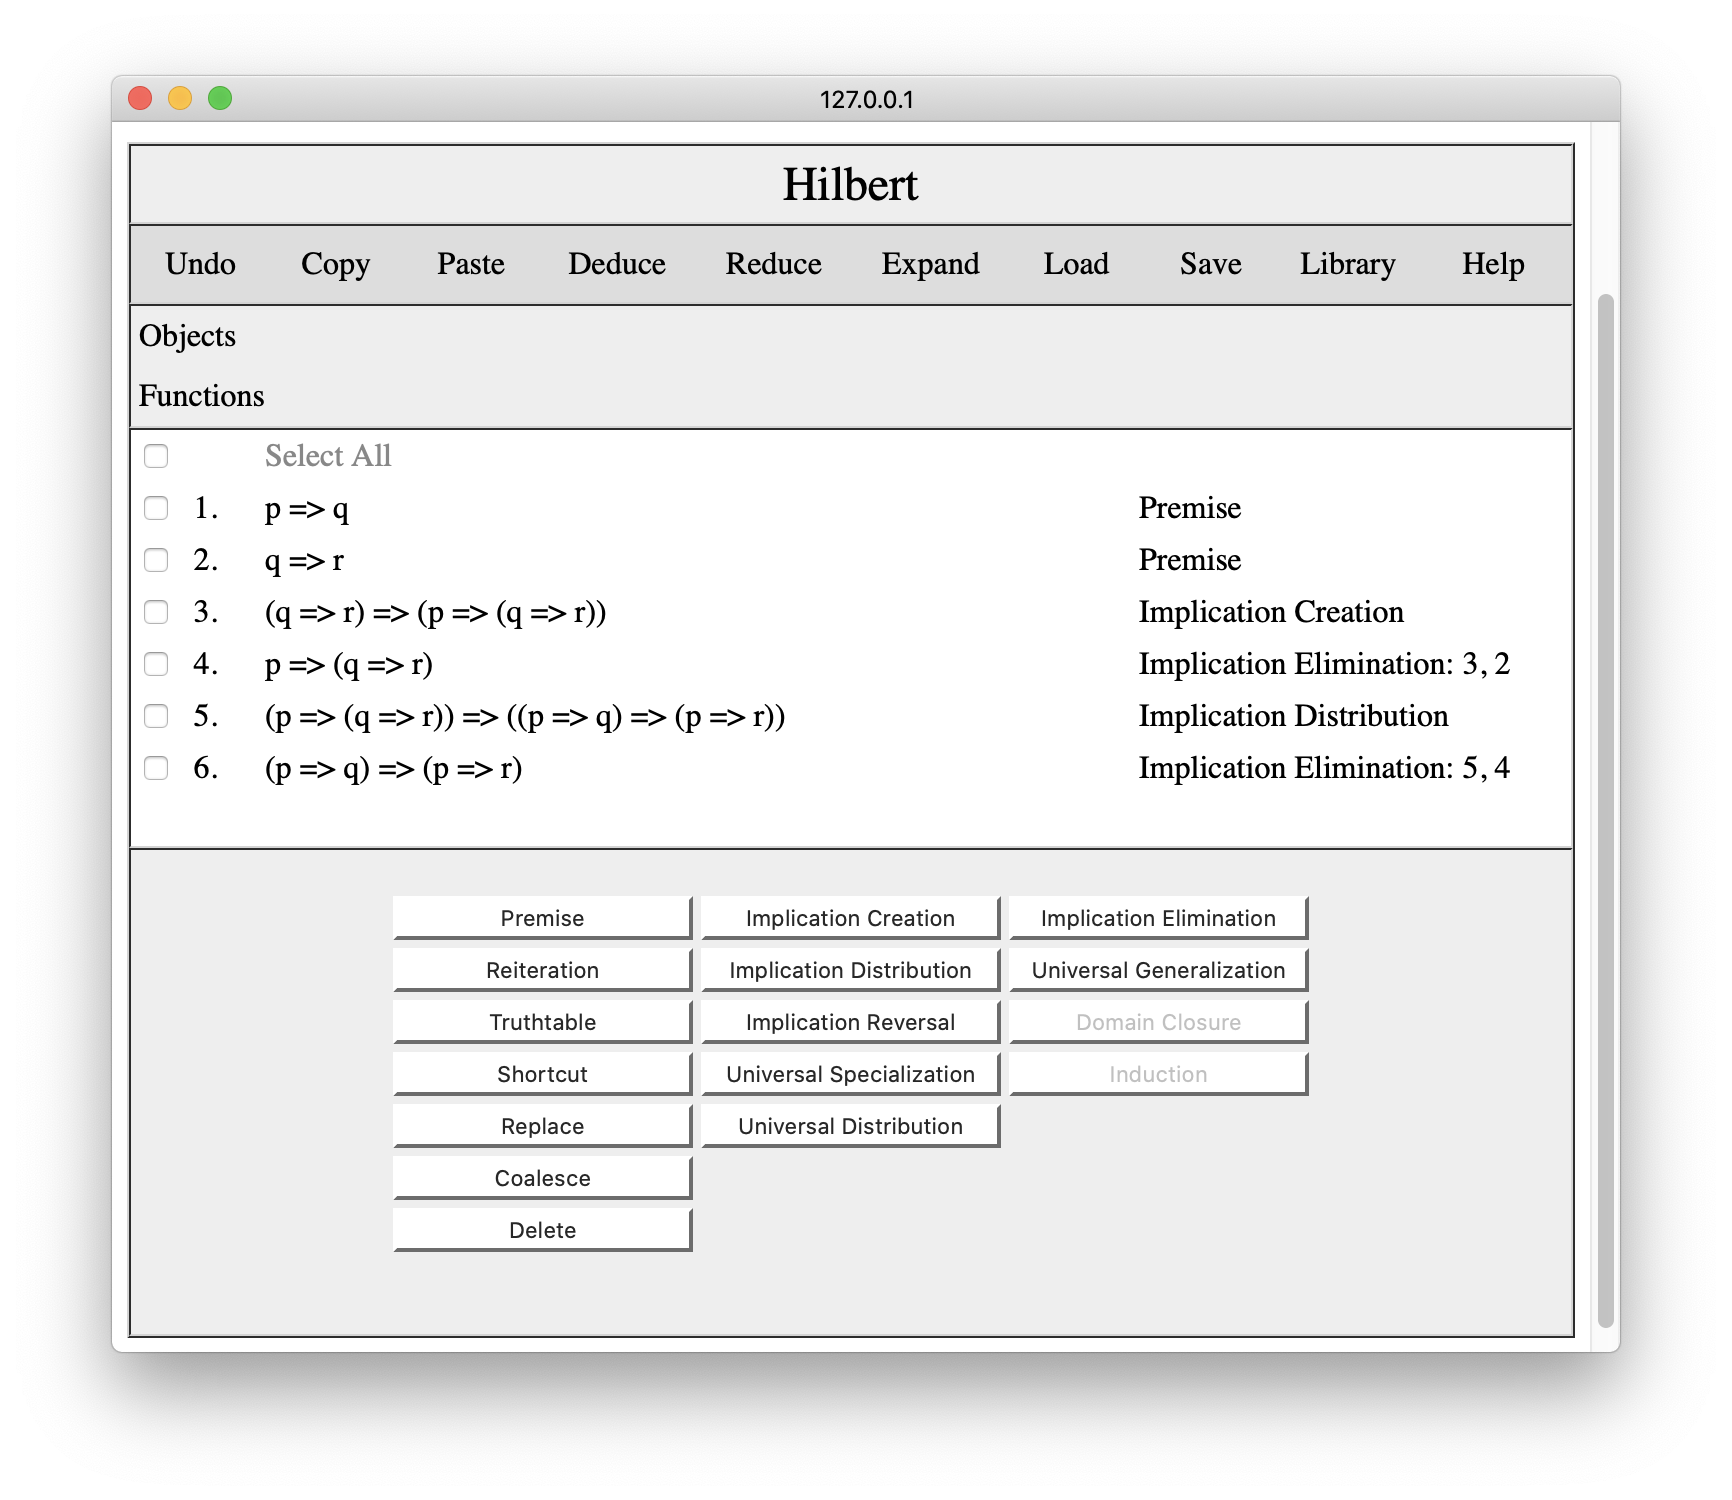
Now we select steps 4 and 5 and press Implication Elimination once again, with the result shown below.
Finally, we can click steps 1 and 6 and press the Implication Elimination button a third time to get p=>r.
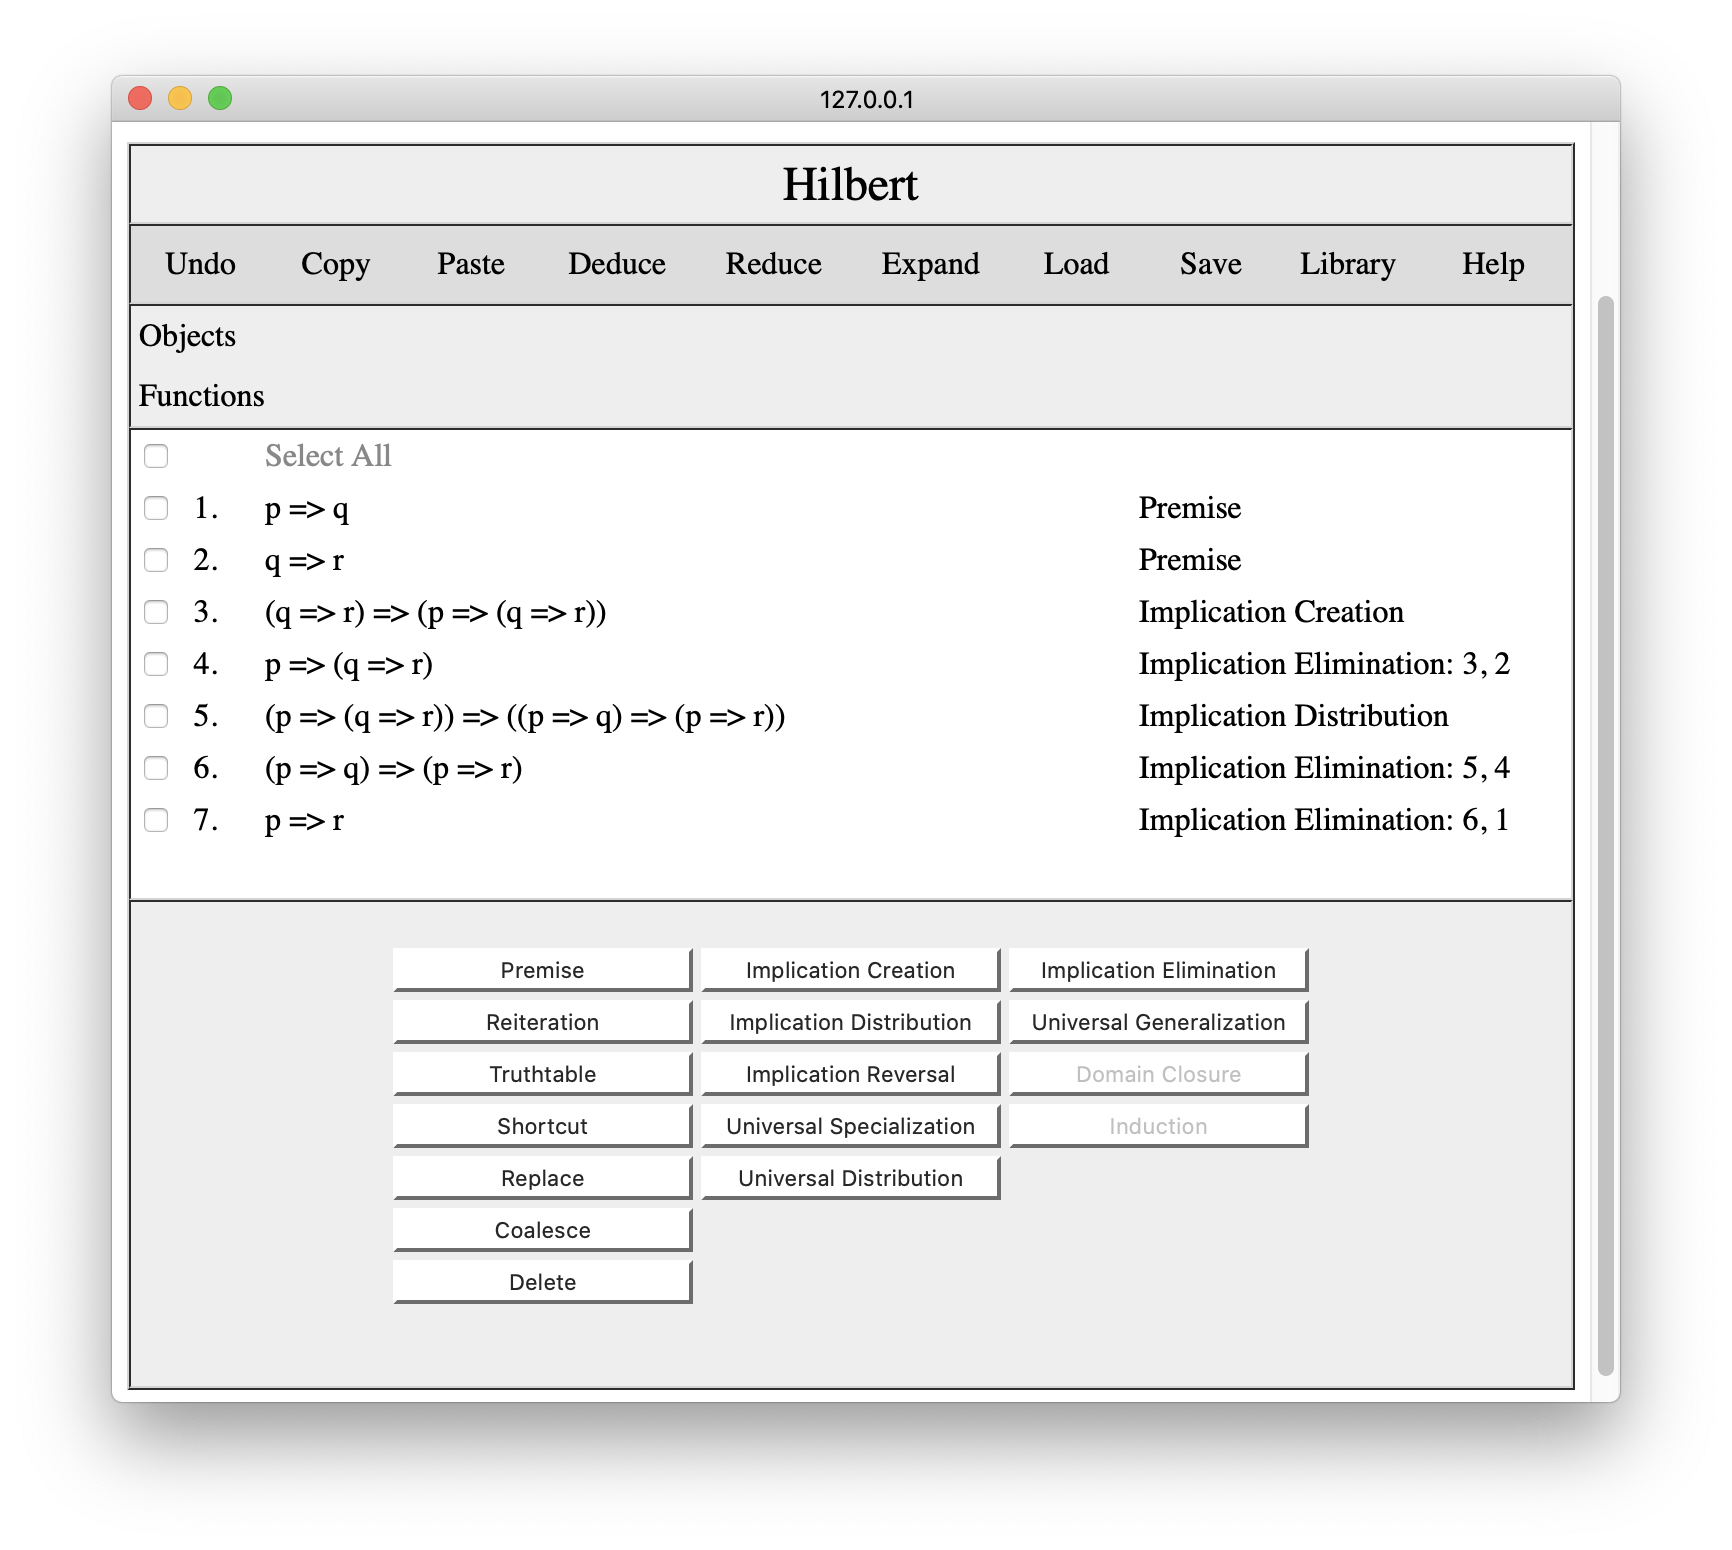
Since this is the sentence that we wanted to prove, we are done.
4. Editing Proofs
In addition to axiom schemas and rules of inference, Hilbert provides a variety of other useful tools for editing proofs.
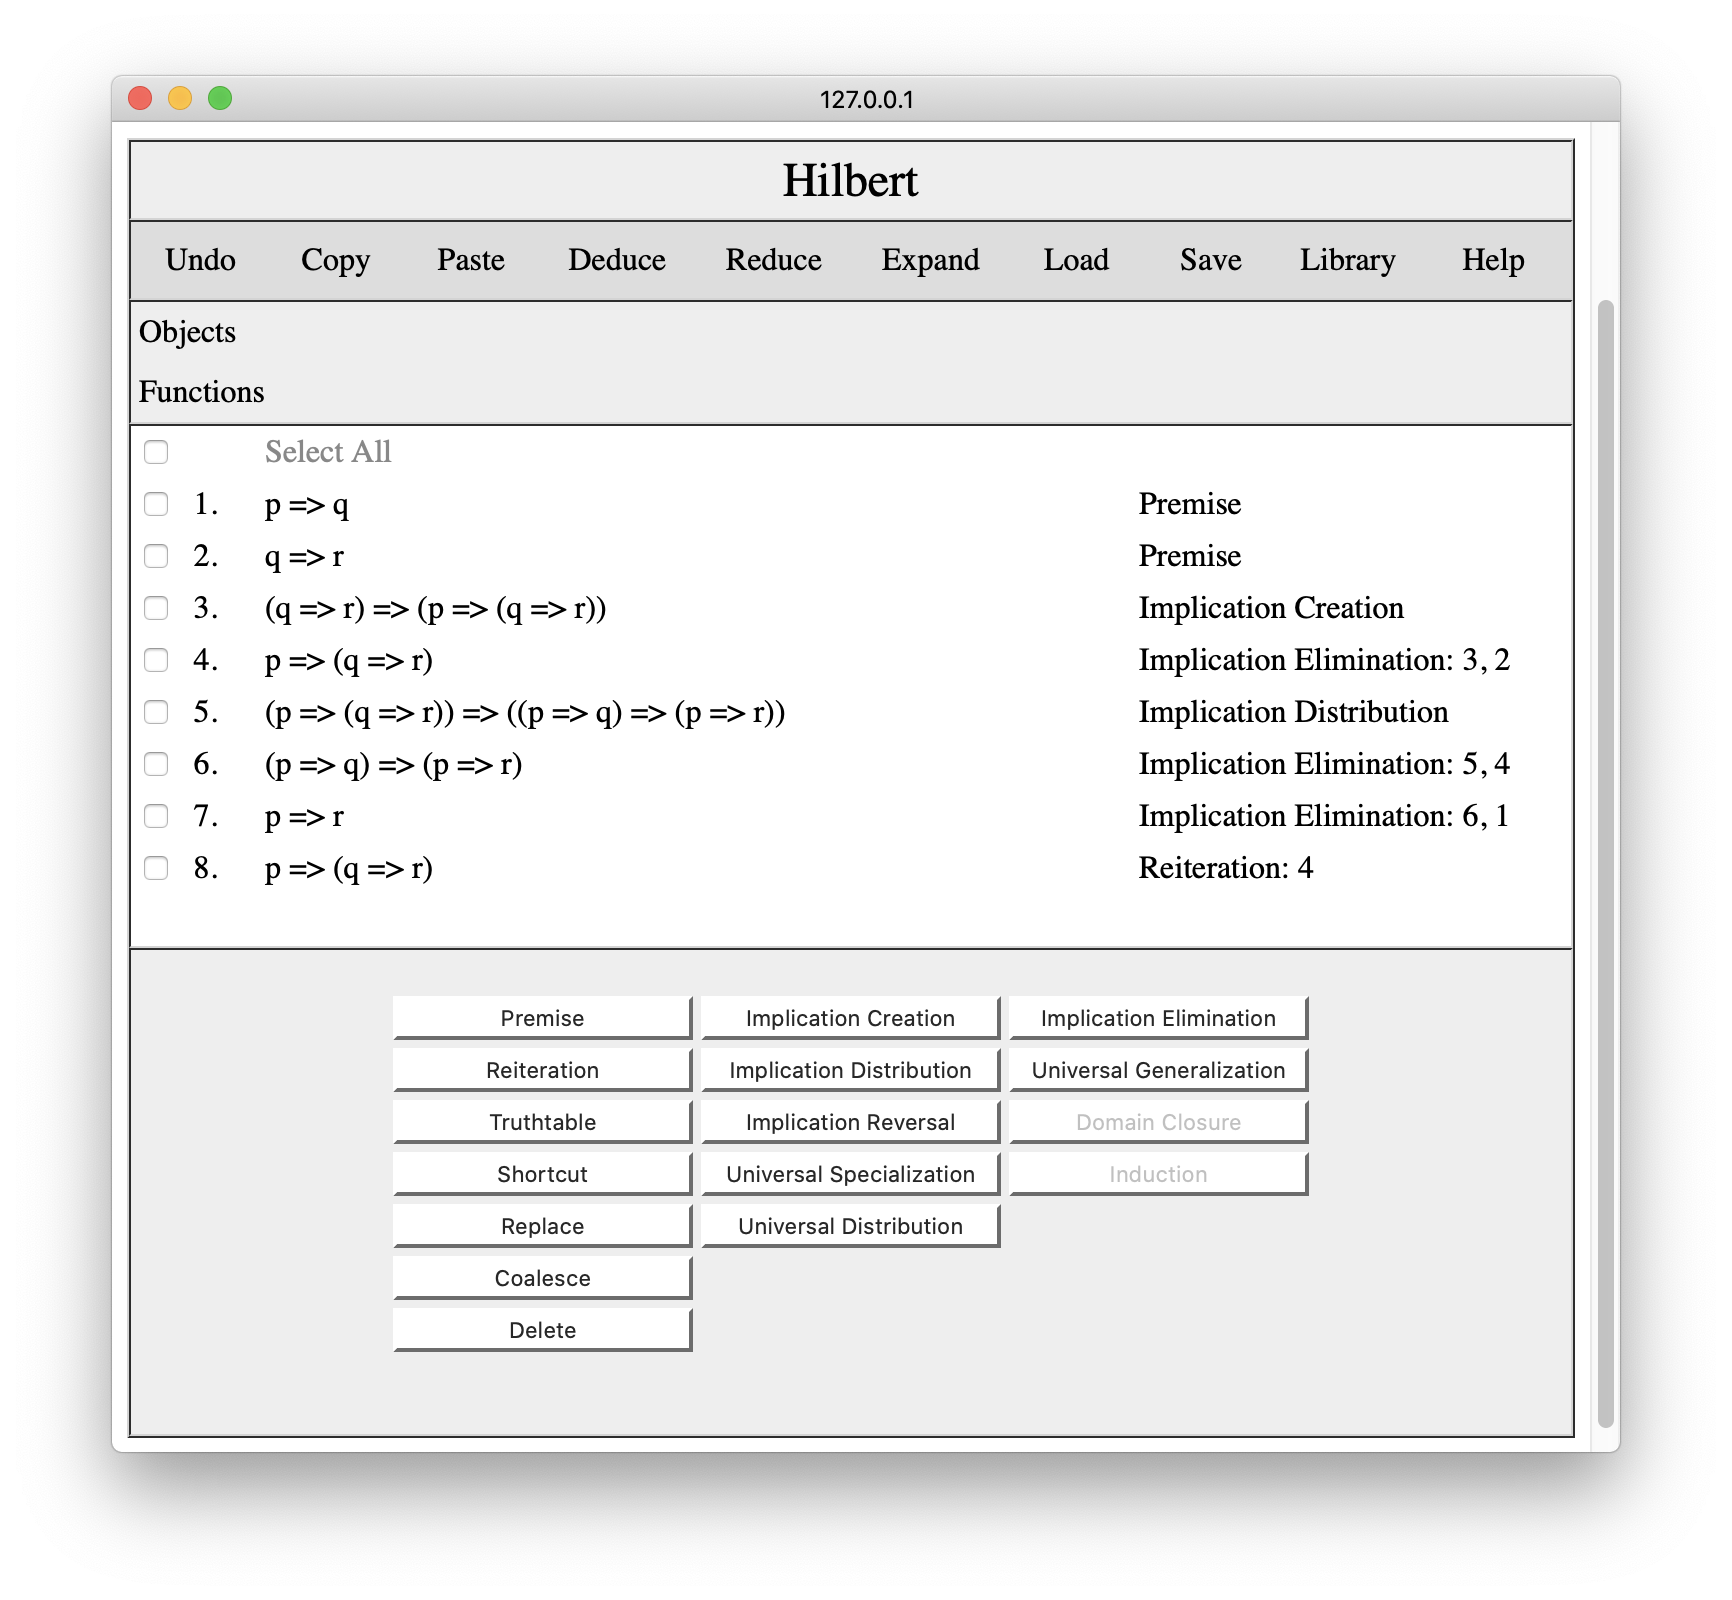
Occasionally, while creating a proof, it is useful to repeat an earlier conclusion. To do this, we select the step or steps we want to repeat and click the Reiterate button. In the following, we have reiterated the conclusion from line 4.
The Undo button reverses the latest change to the proof and reverts to the state before that operation was performed. For example, pressing Undo in this situation would lead us back to our original proof. Note that in the current version of the editor, only one level of Undo is provided, and there is no Redo (i.e. one cannot undo an undo).

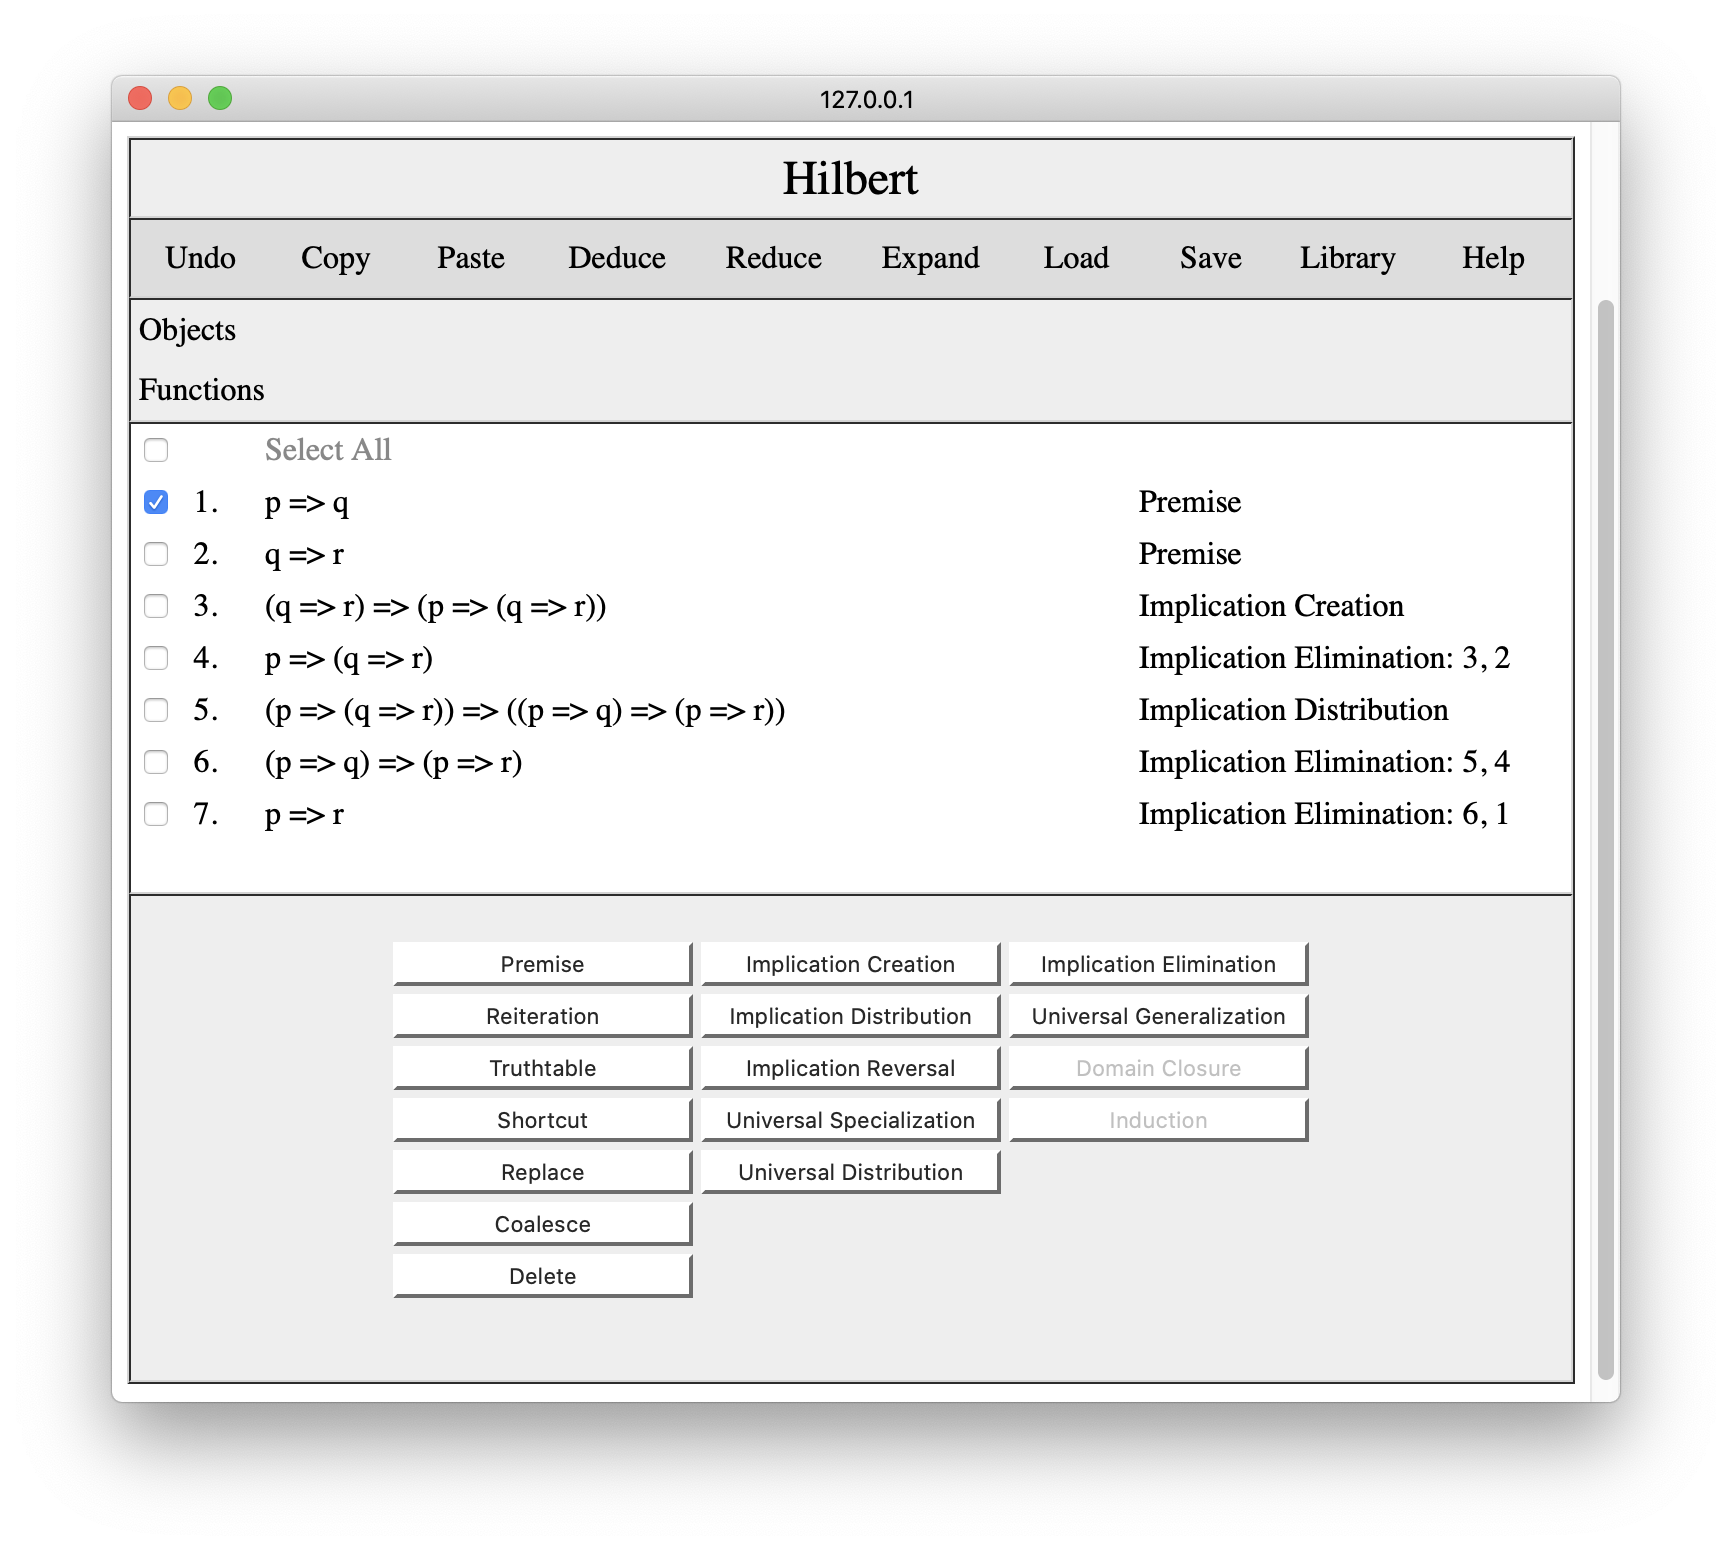
If we decide we do not need one or more lines in the proof, we can select those lines and click the Delete button to remove them. For example, if we thought we no longer needed line 1, we would select that line, as shown below.
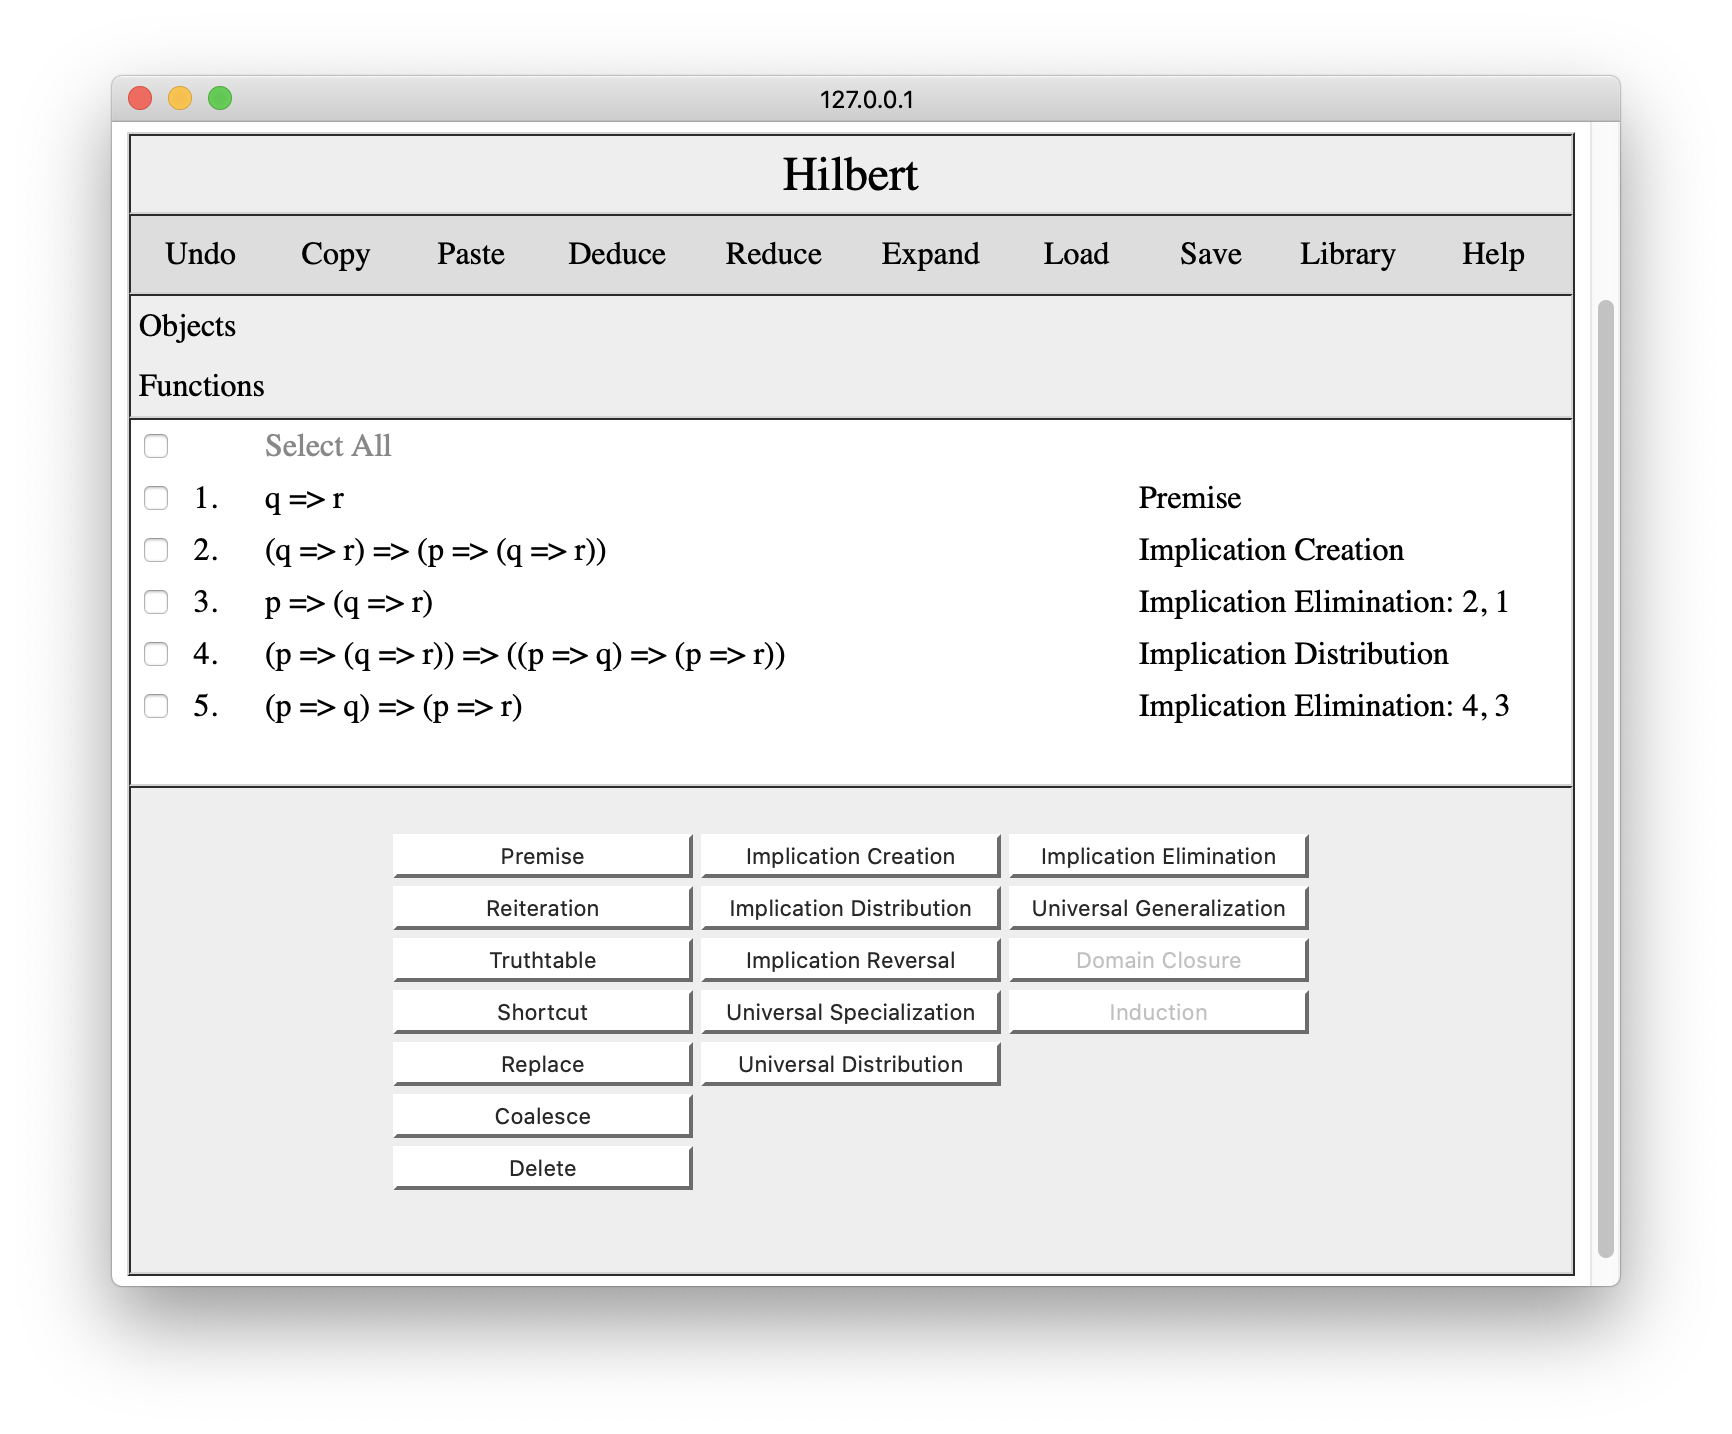
Pressing the Delete button in this situation leads to the following result. Note that p=>q has been removed and the system has also removed all lines dependent on that line, viz. the original line 7. Note also that the remaining lines have been renumbered.
Once again, pressing Undo would revert to our original proof. Of course, we could also reconstruct our proof using the premise key, but that would put the premise at the end of the proof.
Luckily, it is possible to add results at other places in the proof. The trick is to reset the system's cursor. This is done by clicking on a line number In the example below, we have clicked on line 2, and the system has opened up some empty space to indicate the new location of the cursor.
If we now enter p=>q as a premise, it will appear at the cursor, as shown below.
Note that we can make any inferences at the cursor. It is not just for premises. the only restriction is that we cannot use later lines in the proof to make these inferences, and Hilbert will not allow us to select any lines when the cursor is set to an earlier line.
Once we are done making changes at a particular line, we can move the cursor to a different line by clicking on that line number. Or, by clicking on the open line, we can move the cursor back to the end of the proof, as shown below.
At this point, we can apply implication elimination to lines 1 and 6 to get us back to our original proof.
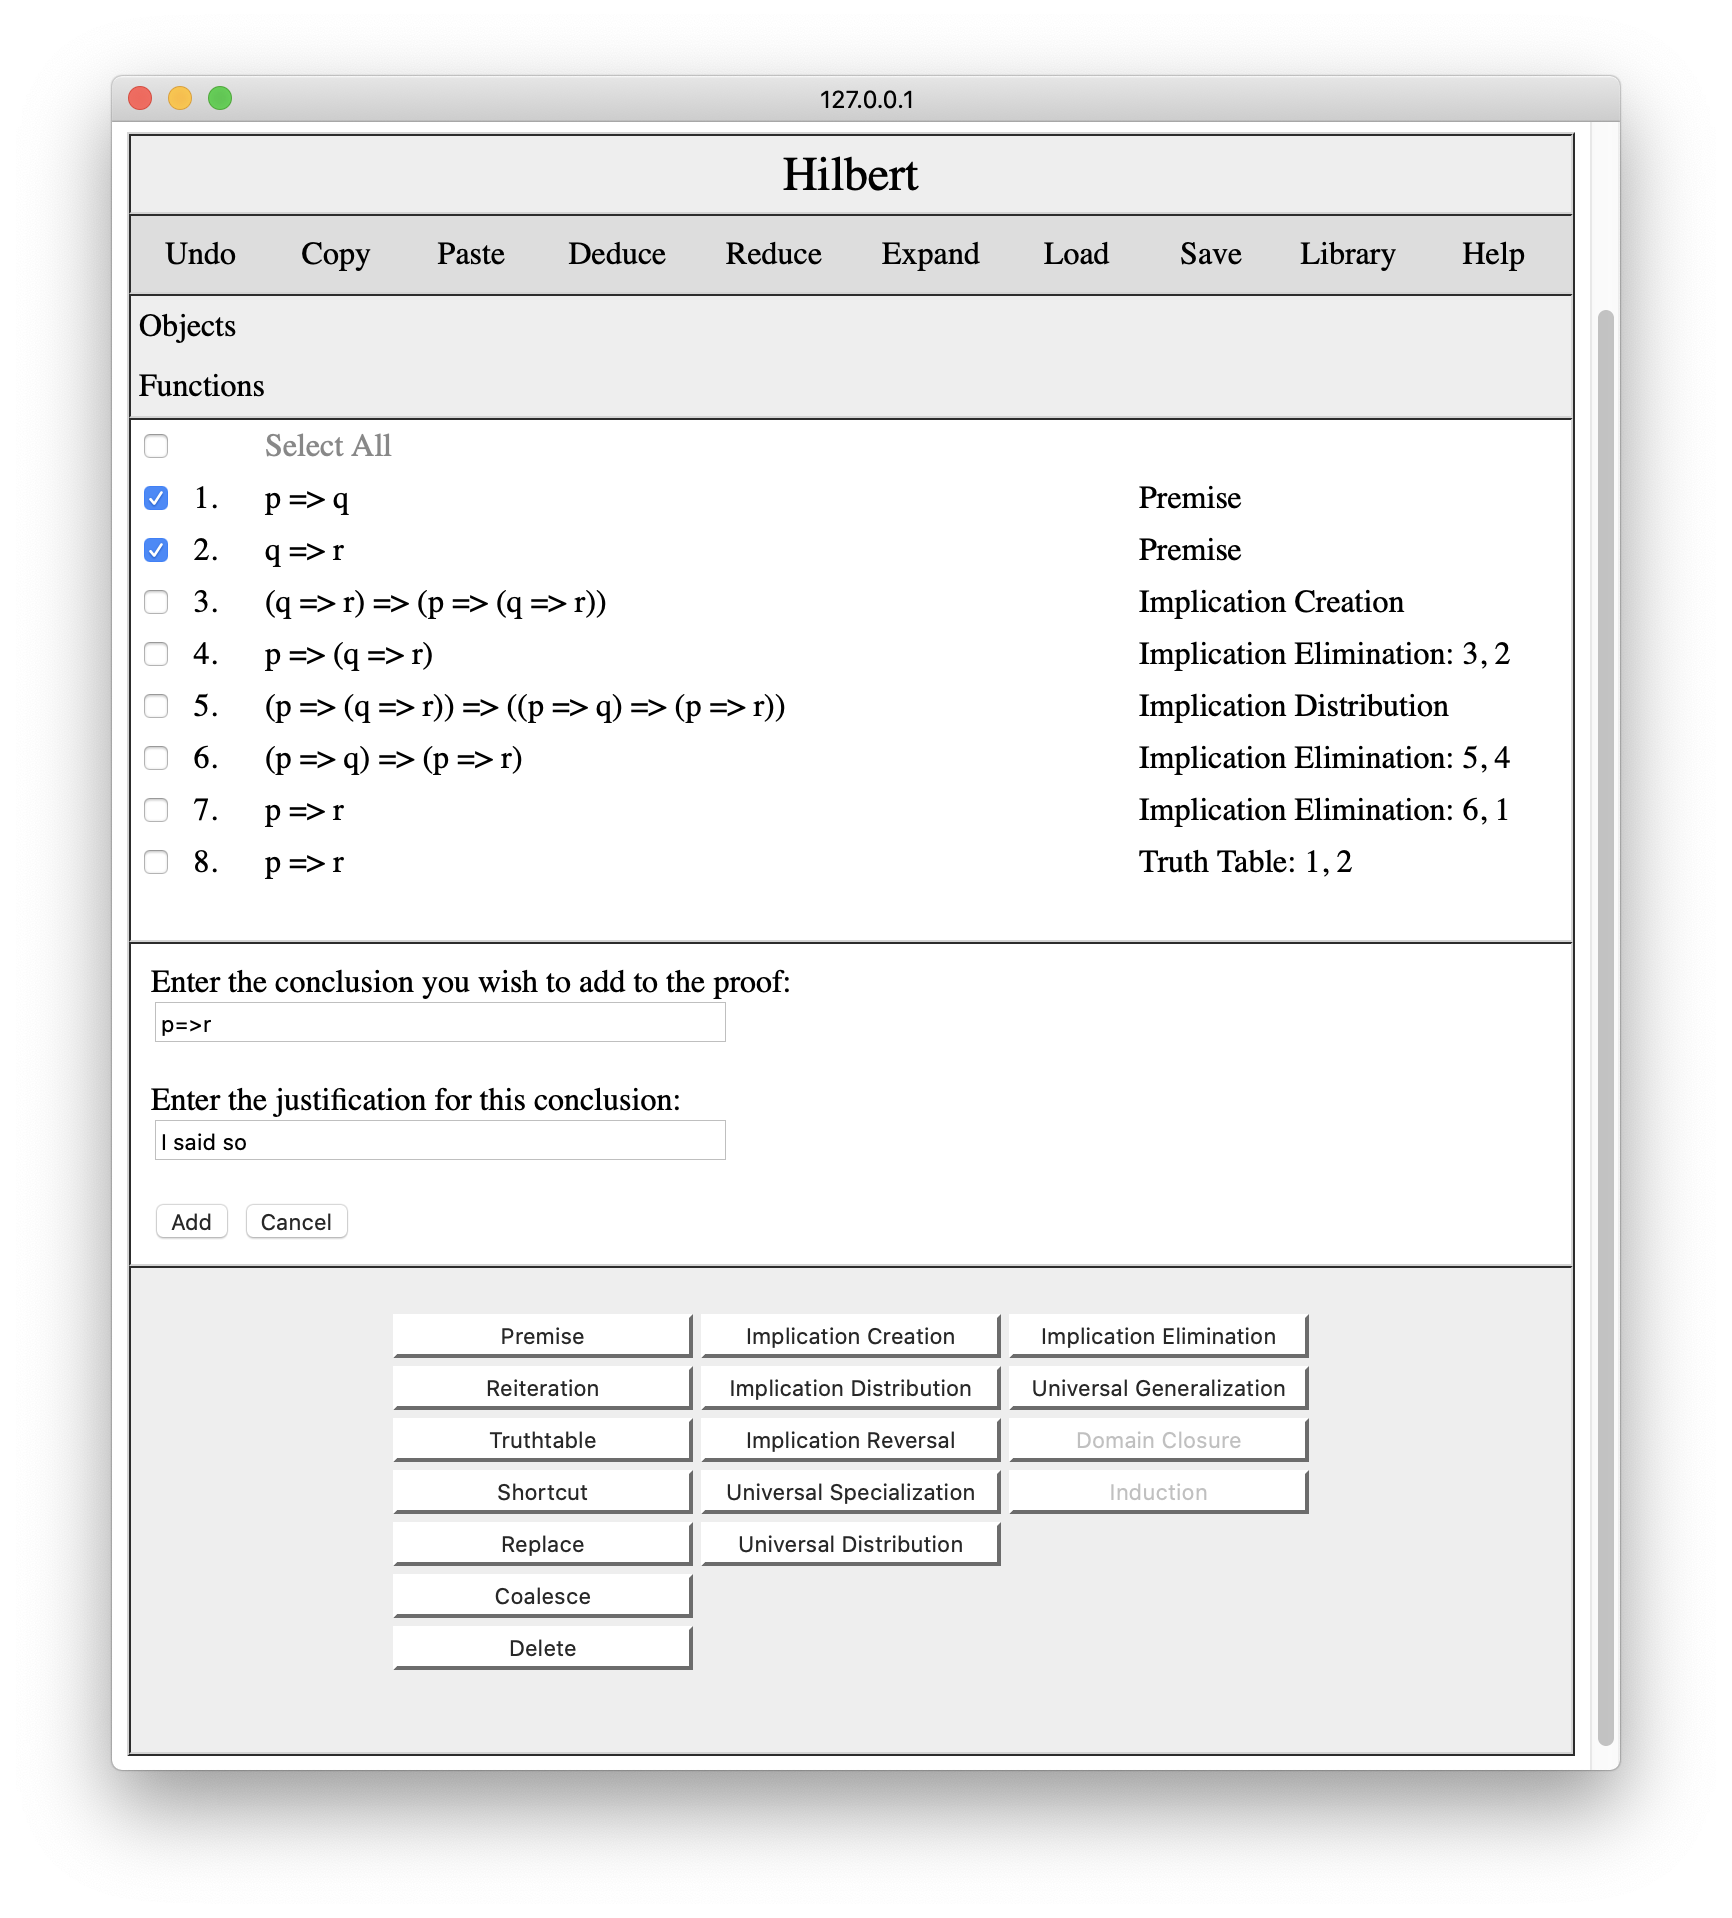
The Truthtable tool allows one to enter a conclusion by checking a truthtable for the premises and the desired conclusion. In some cases, this is simpler using schemas and rules of inference. Suppose, for example, we wanted to demonstrate our overall conclusion p=>r using a truth table rather than schemas and rules of inference. To do this, we woud check our premises p=>q and q=>r and press the Truthtable button. This would bring up an interaction pane in which we can enter our desired conclusion, in this case p=>r.
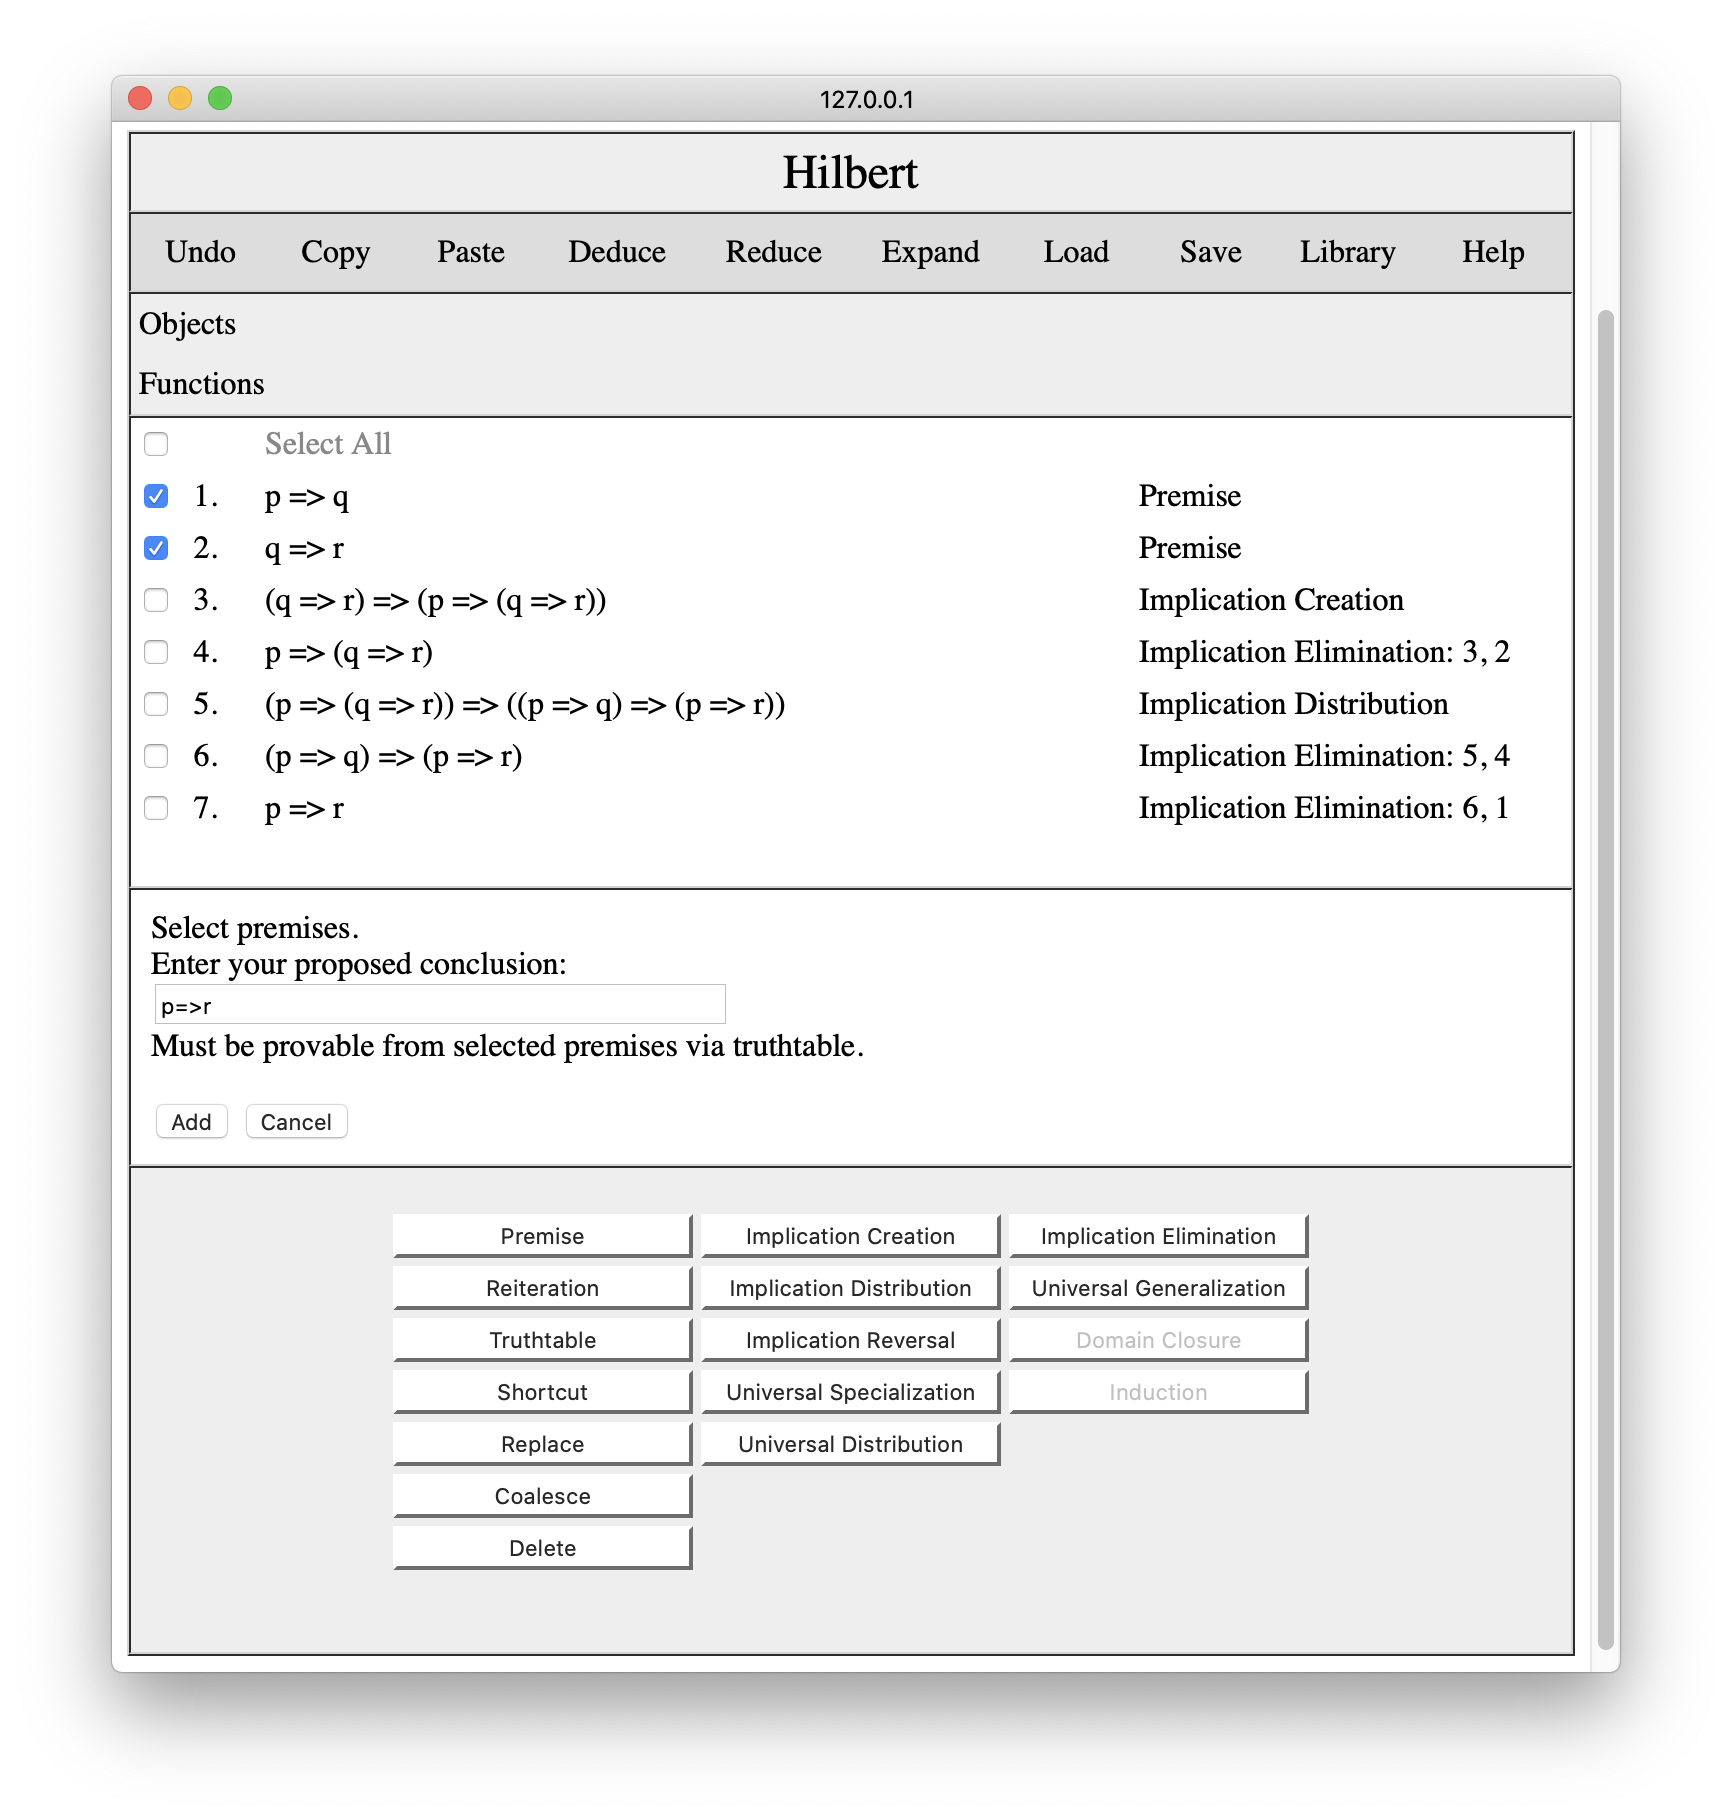
When we press the Add button, the system checks whether the sentence follows from the checked premises and, if so, adds the conclusion to the proof with a different justification.
There are times when we know that a conclusion follows from premises but we are not yet ready to produce a proof. In this case, we can add a short cut and eliminate it later. In order to do this, we check the premises for our shortcut, press the Shortcut button, and enter our conclusion.
When we press the Add button, the system adds the conclusion to the proof with the specified justification. And we now have three different arguments for our conclusion.

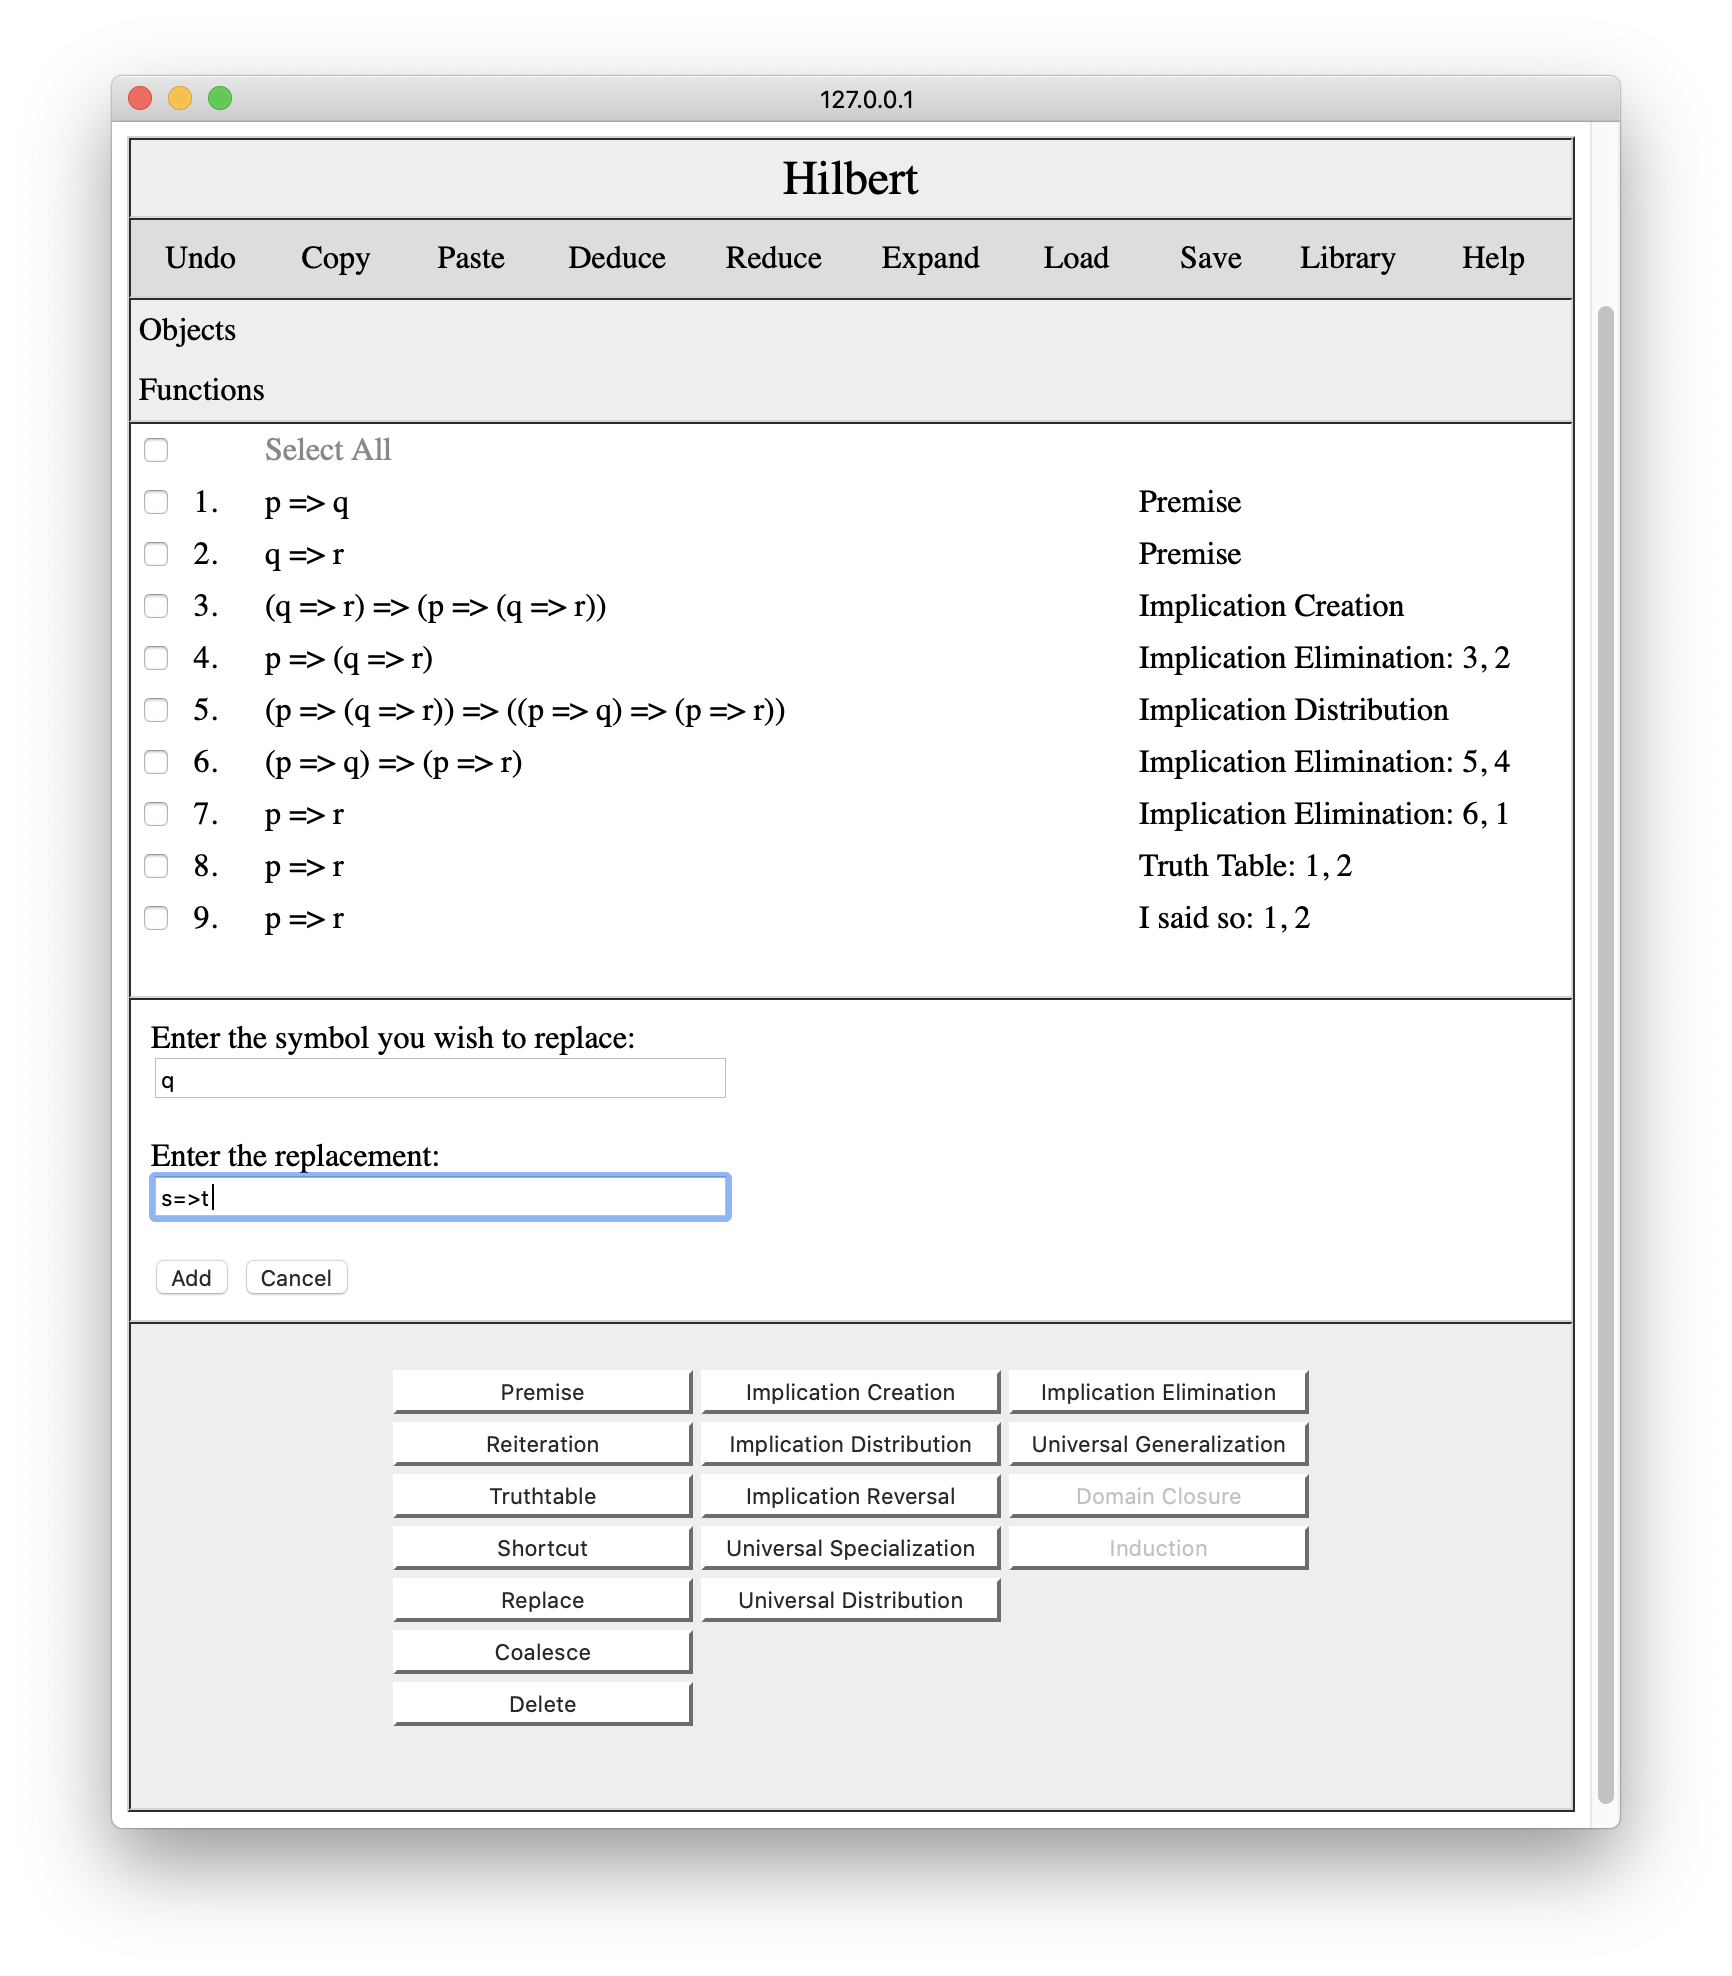
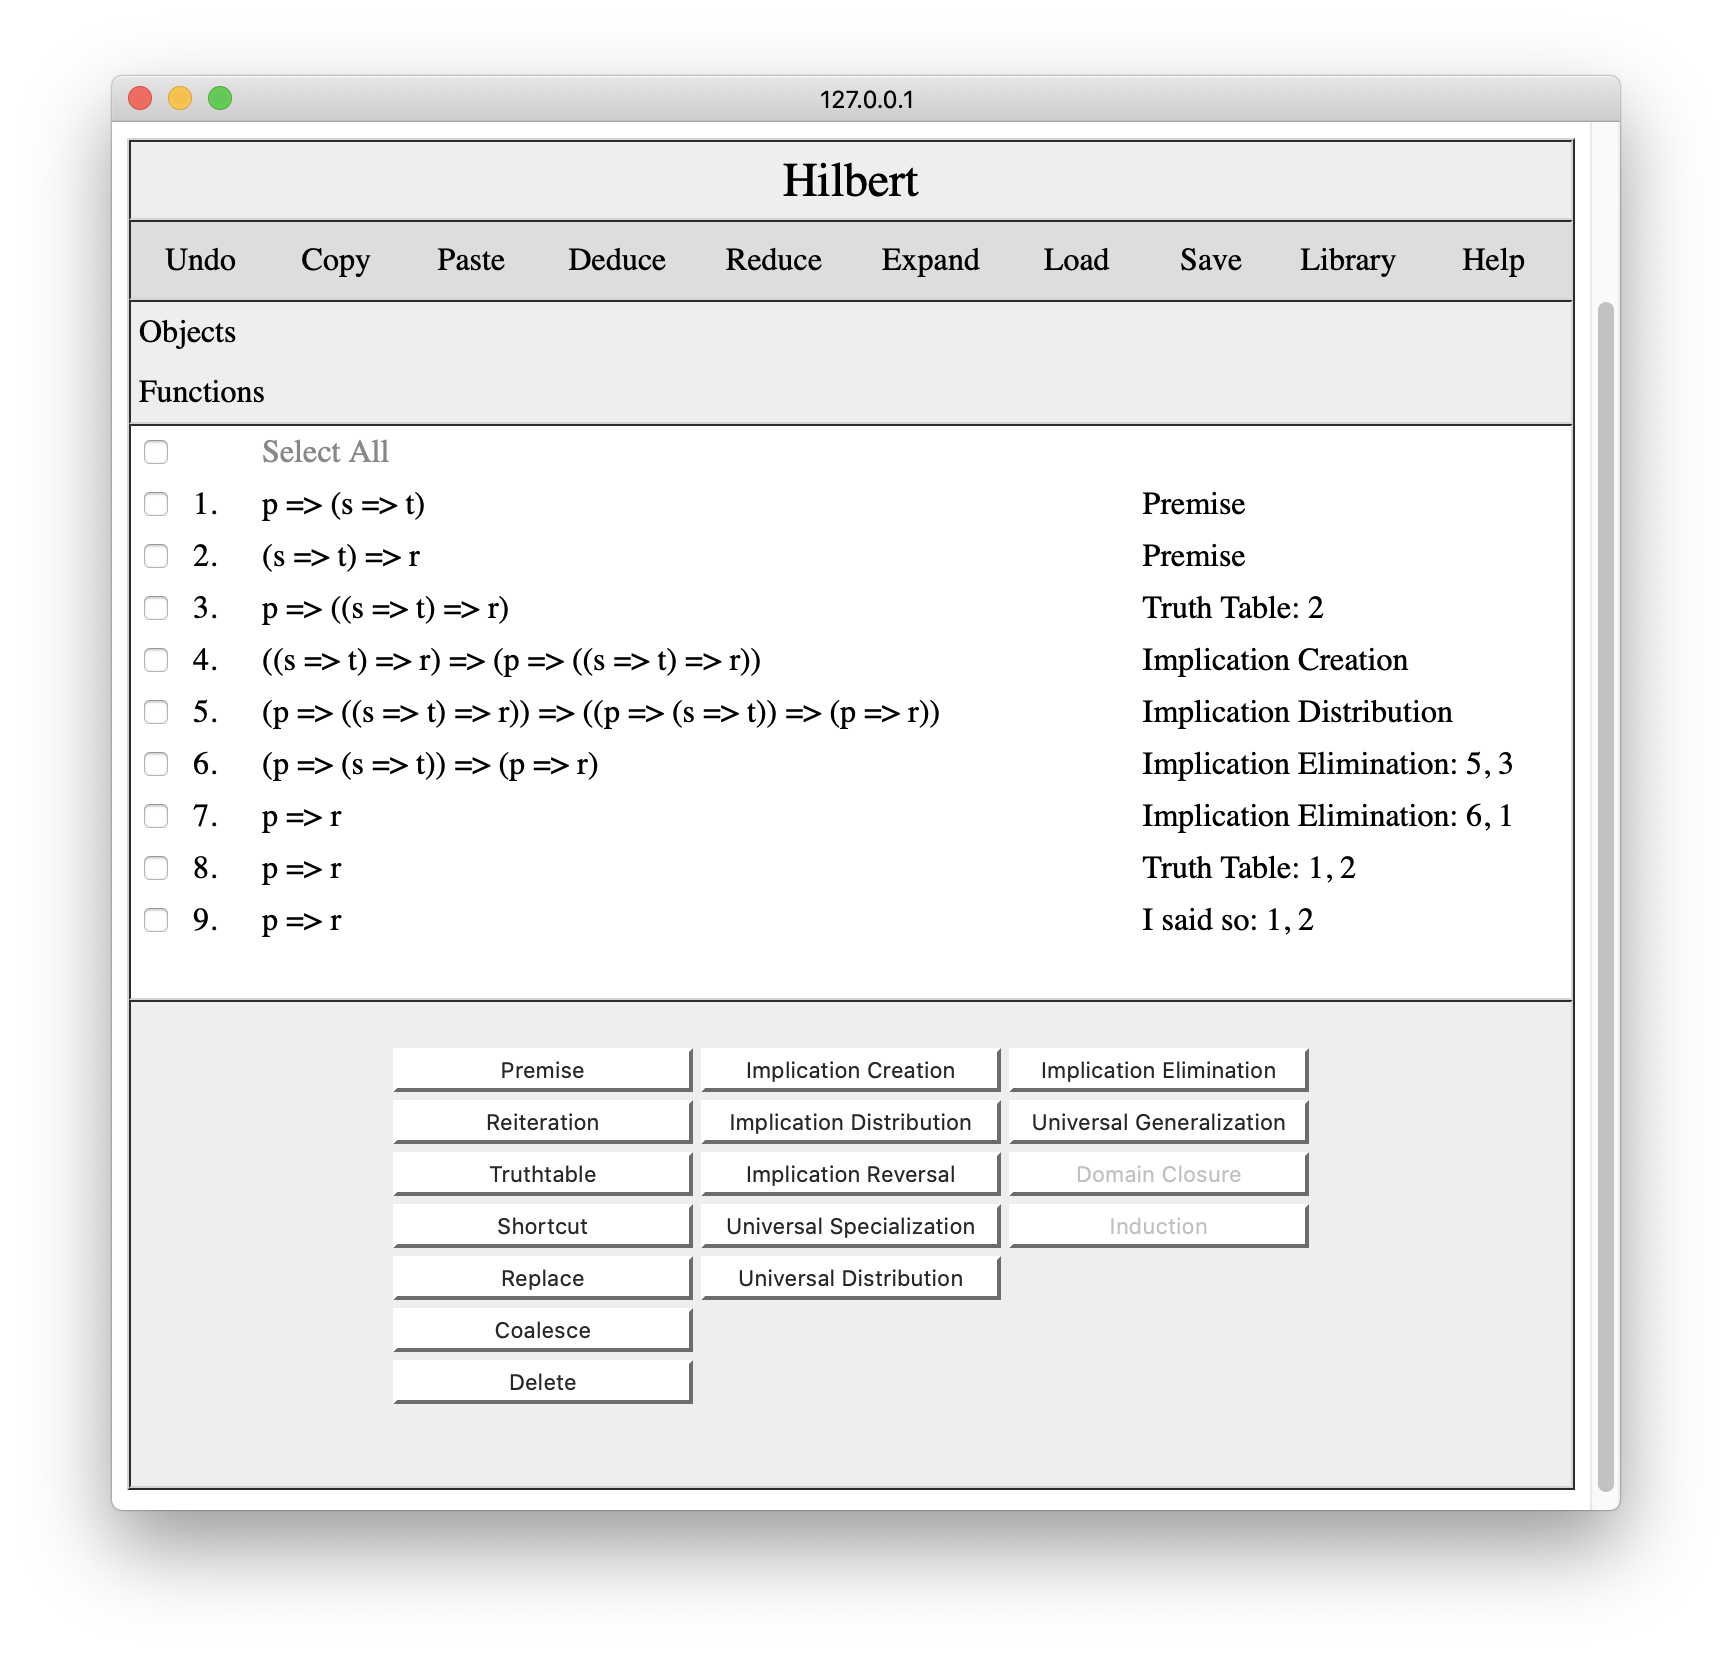
Once we have proved something, we sometimes want to apply the proof to other premises. For example, we have proved p=>r from p=>q and q=>r. Suppose we wanted to prove p=>r from p=>(s=>t) and (s=>t)=>r. Rather than redoing the proof, we could simply replace the symbols in our old proof. To do this, we press the Replace button, which brings up the interaction pane shown below. We enter the symbol we want to replace (in this case q) and the replacement (in this case s=>t).
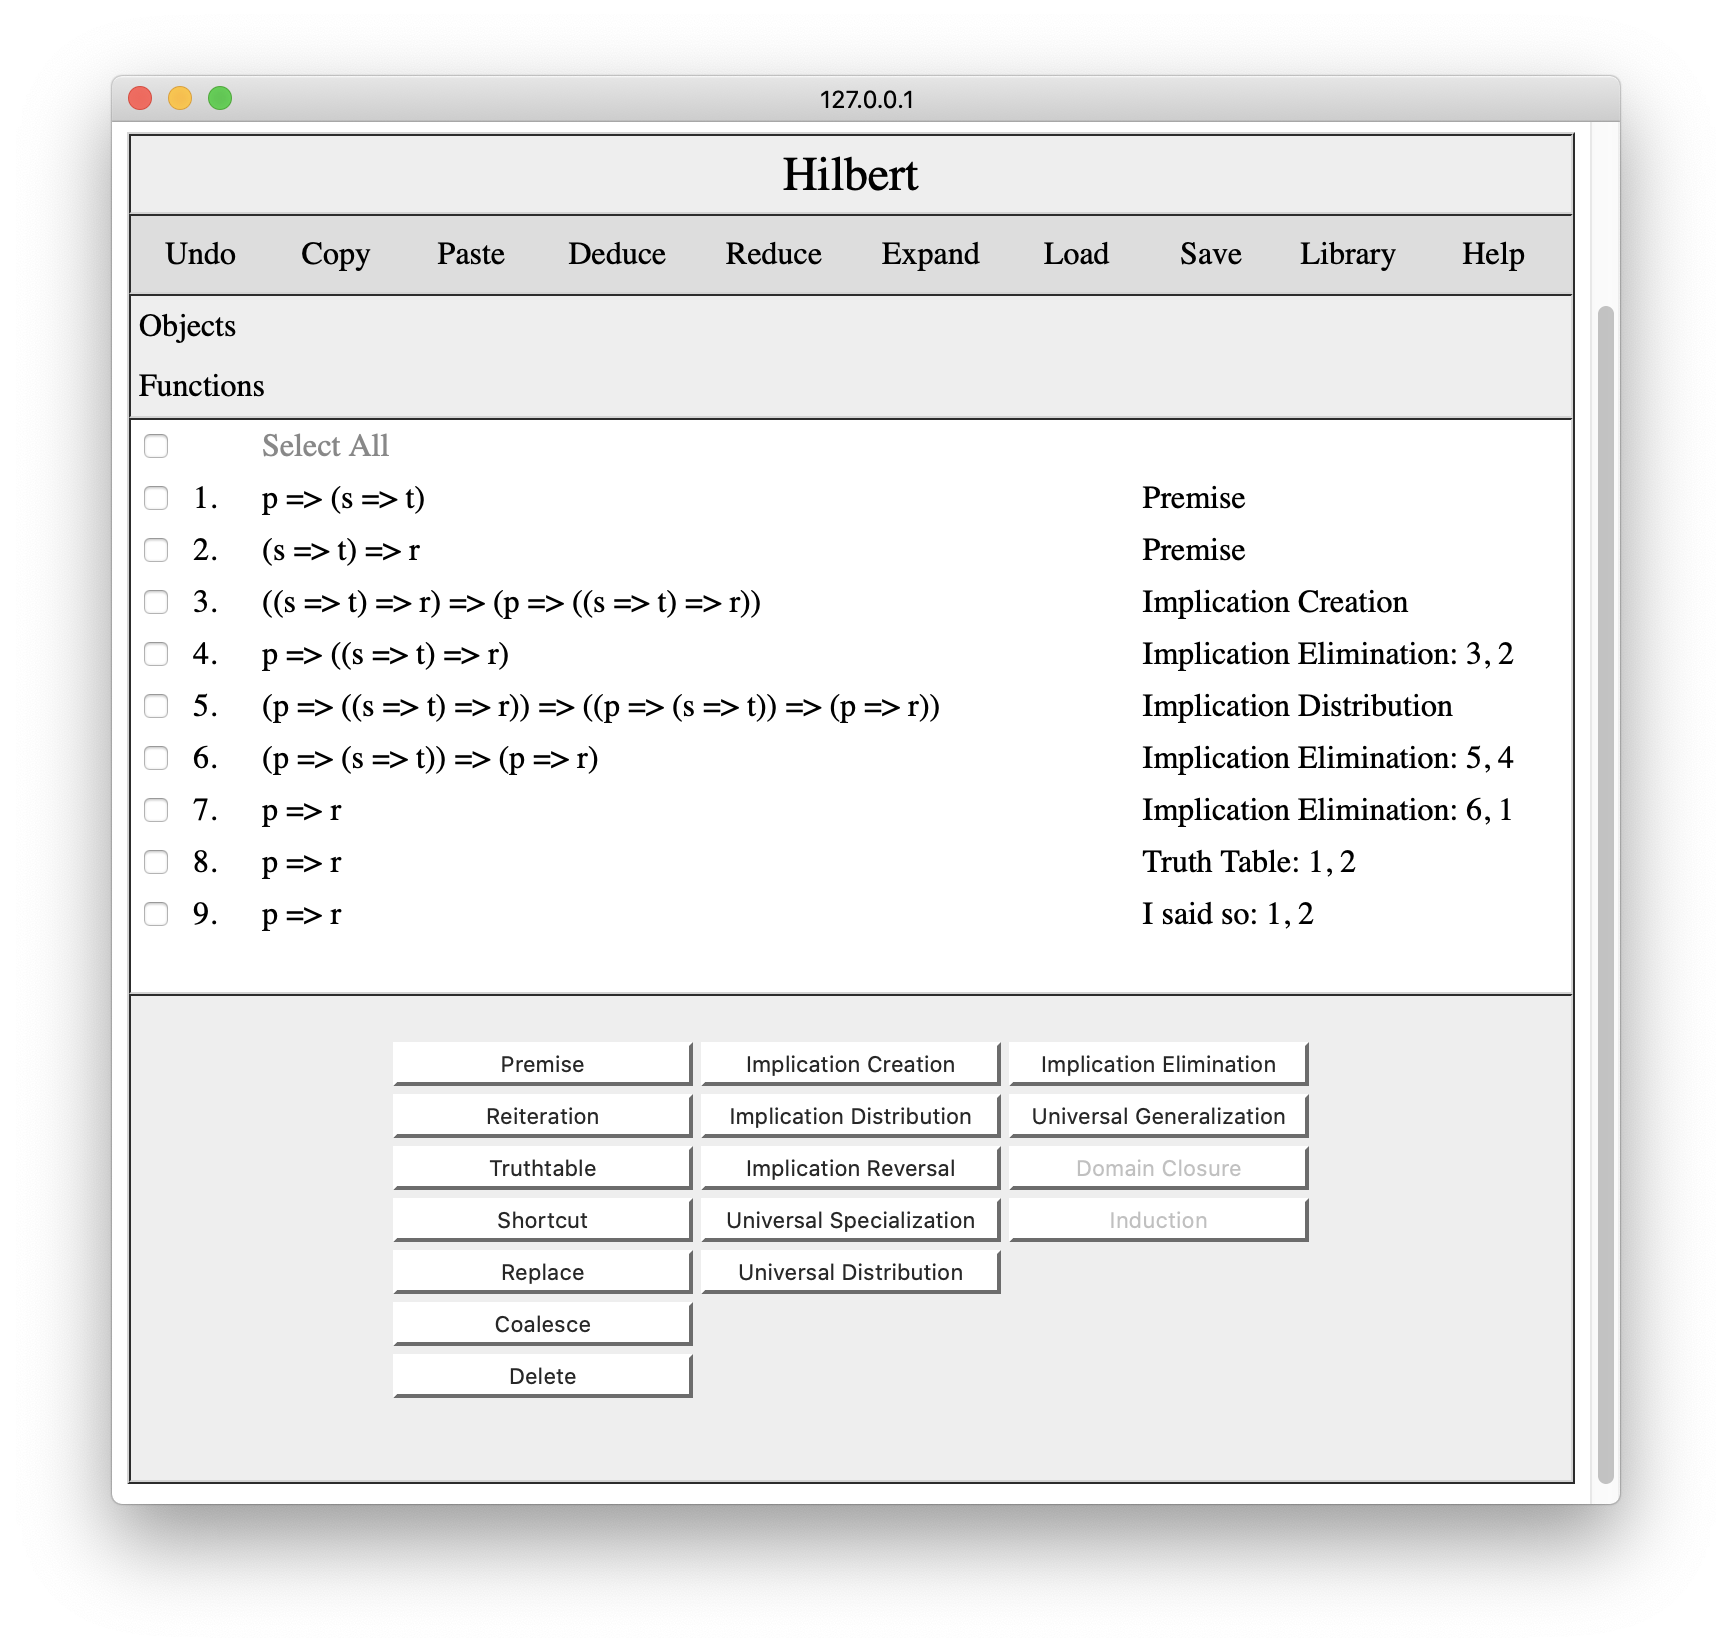
When we press the Add button, the system substitutes the specified replacement for the specified symbol. No additional lies are added to the proof.
Finally, there is Coalesce. Sometimes in developing a proof find that we can prove a thing in a different way and we want to delete the older proof. Unfortunately, deleting the older conclusion would also delete all conclusions that depend on it.
Suppose, for example, we wanted to replace the two step proof of p=>(q=>r) on line 4 with a single truthtable step. We could do this by placing the cursor anywhere before the old conclusion and using the Truthtable tool to derive this conclusion from line 2.
Having done this, we can then use Coalesce to merge the new line and the old line, and the system will transfer all things that depend on the old conclusion to the new conclusion and will then delete the old conclusion, as shown below.
While each of these tools is useful on its own, some (notably Shortcut, Replace, and Coalesce) have special value when developing complex proofs in multiple windows (as we shall see below).
5. Saving and Loading Proofs
The Save option on the command bar allows us to save the our proof to the local file system. The Load option allows us to load a previously saved proof. These operations are very useful in developing proofs. We can stop work and continue right where we left off on another day. And we can exchange proofs or proof fragments by sharing the XML files with others.
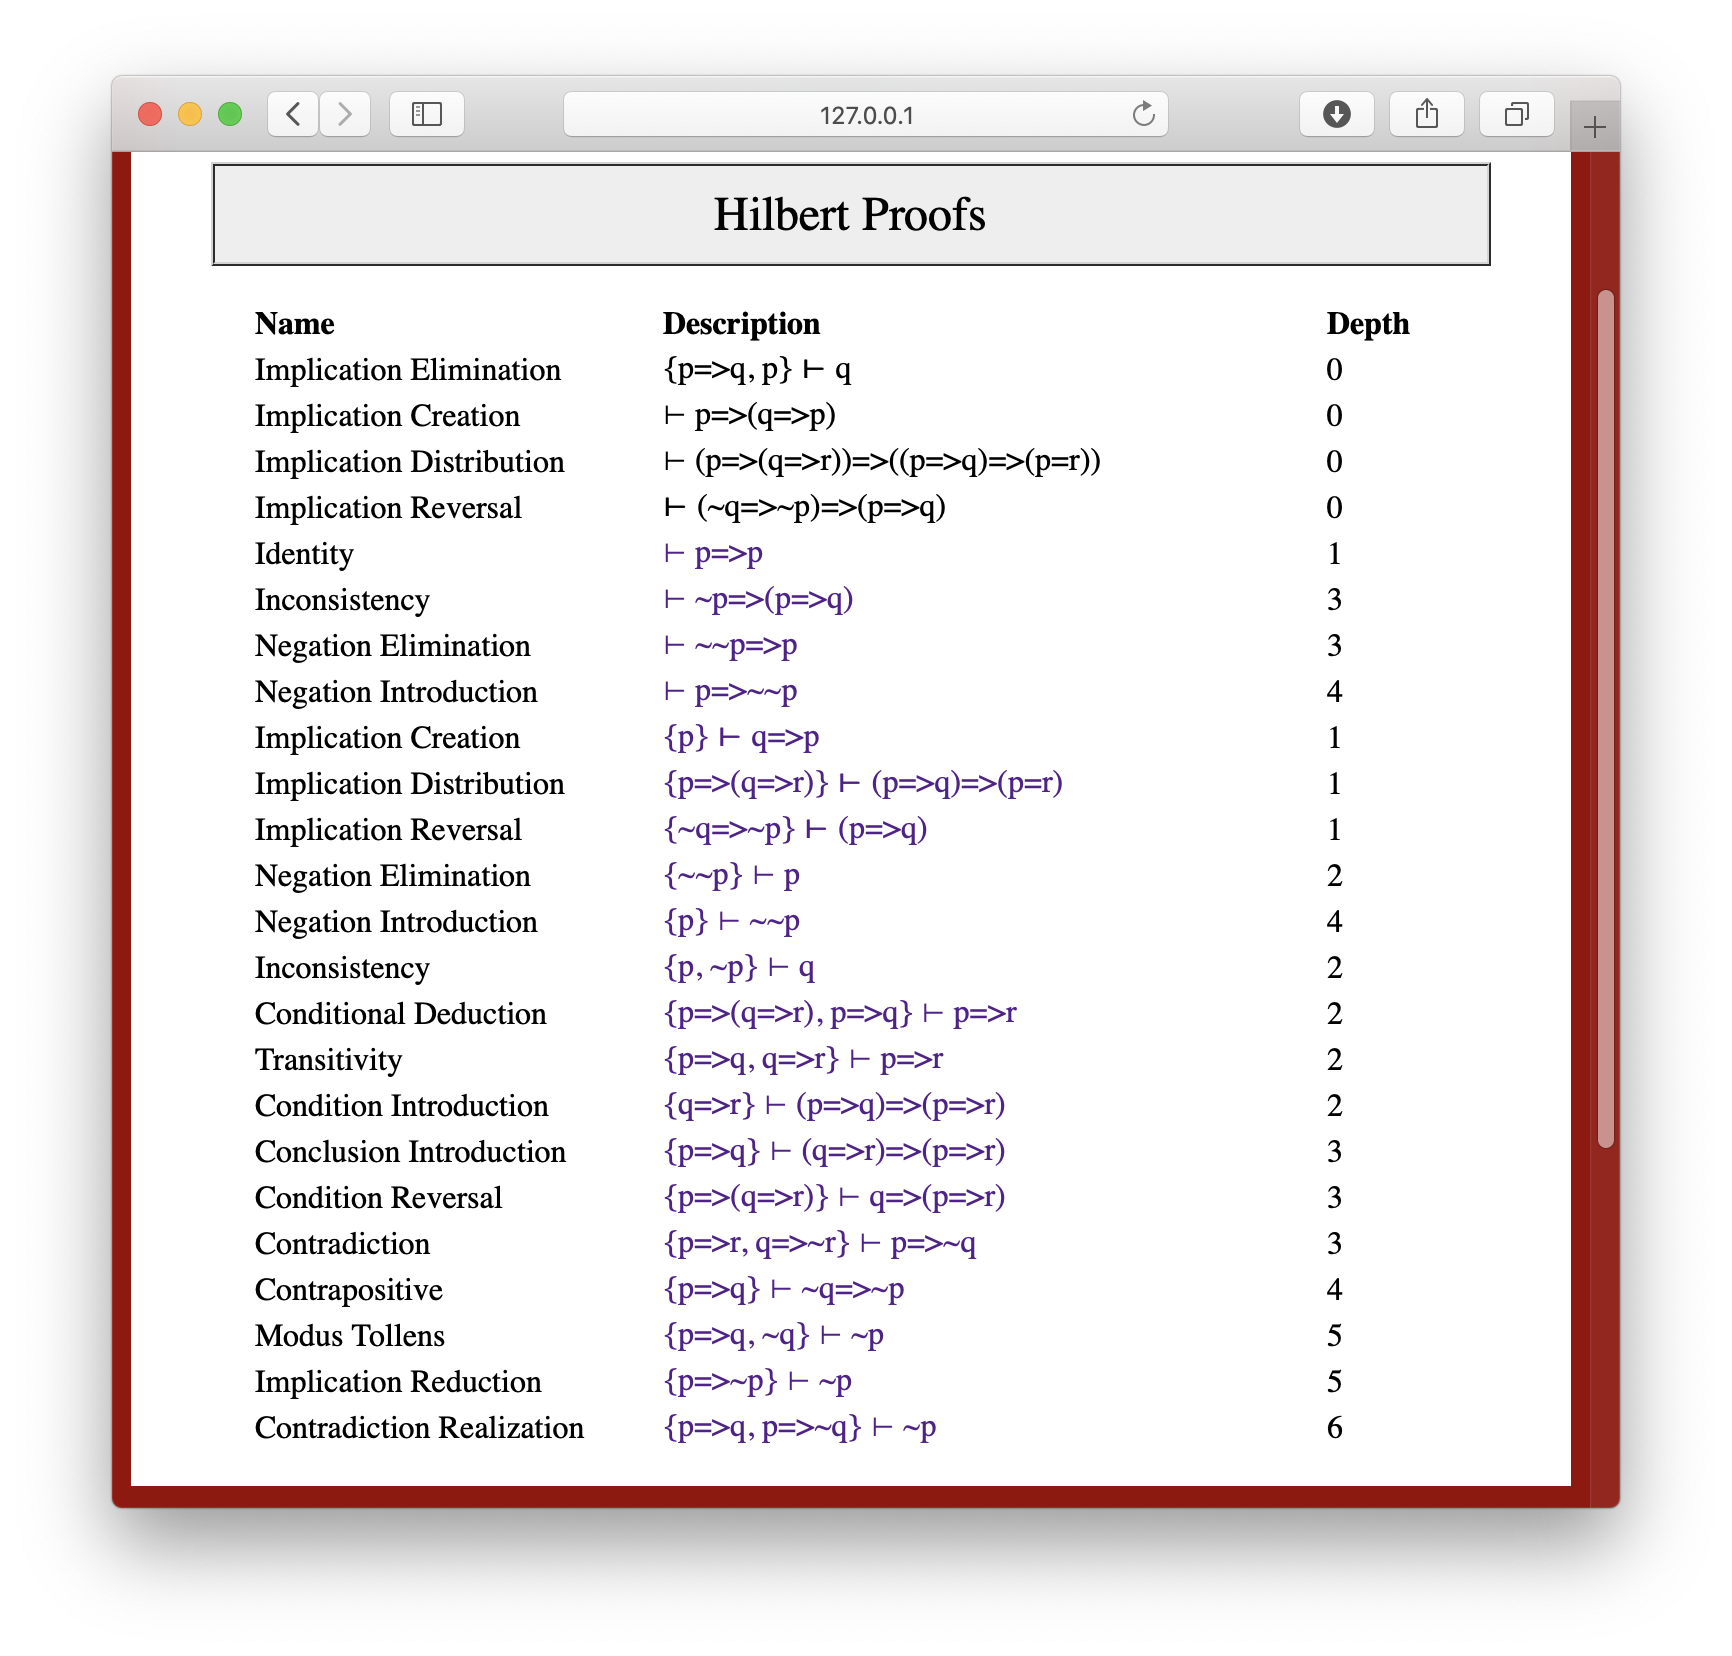
The Library operation on the command bar opens a library of common results together with their proofs. Clicking on library would produce a page something like the following.
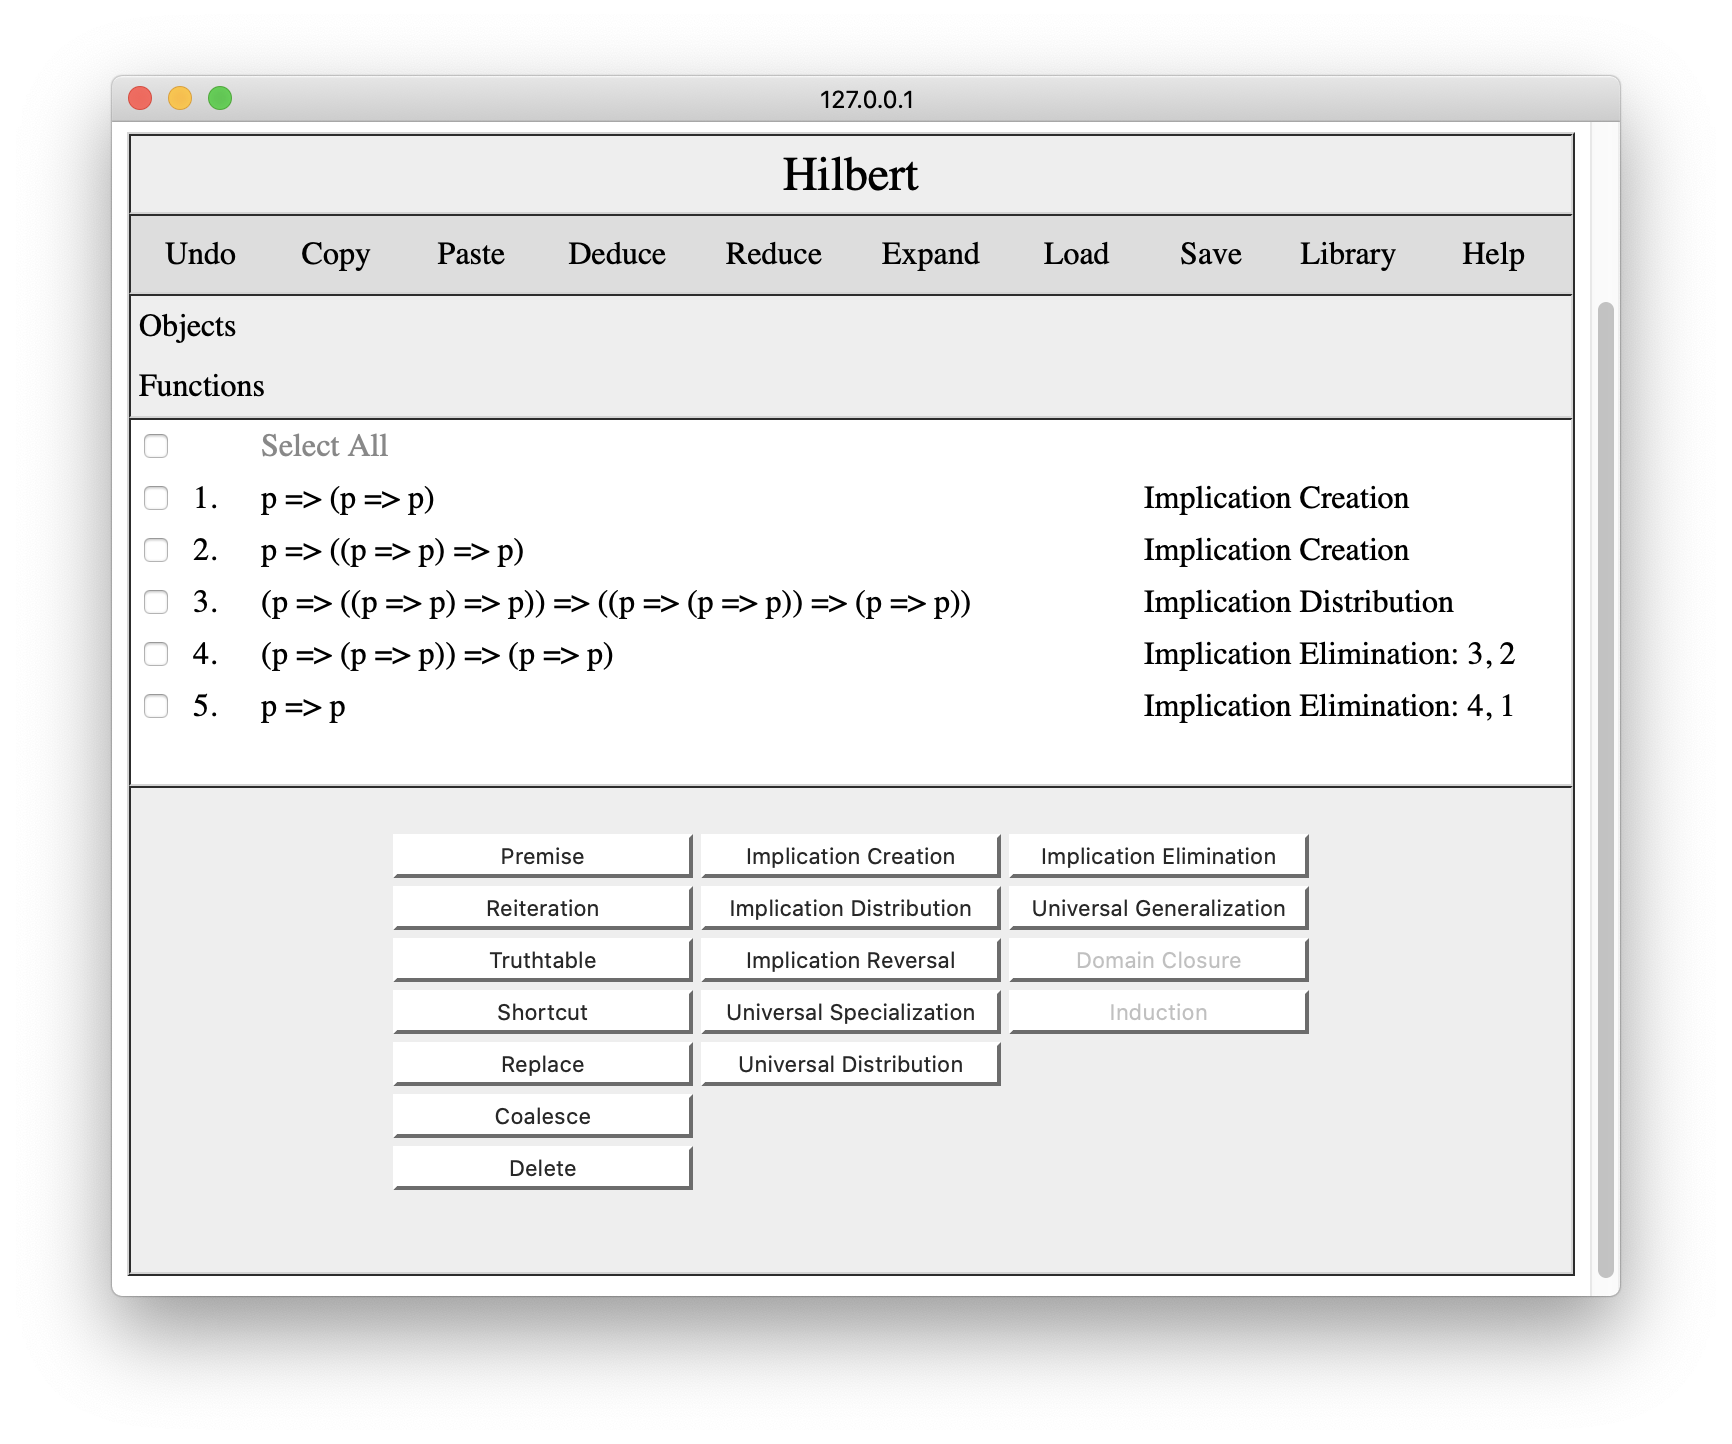
Clicking on one of the results spawns a Hilbert editor with the proof of the result. For example, if we were to click on the Identity result, we would get something like the following.
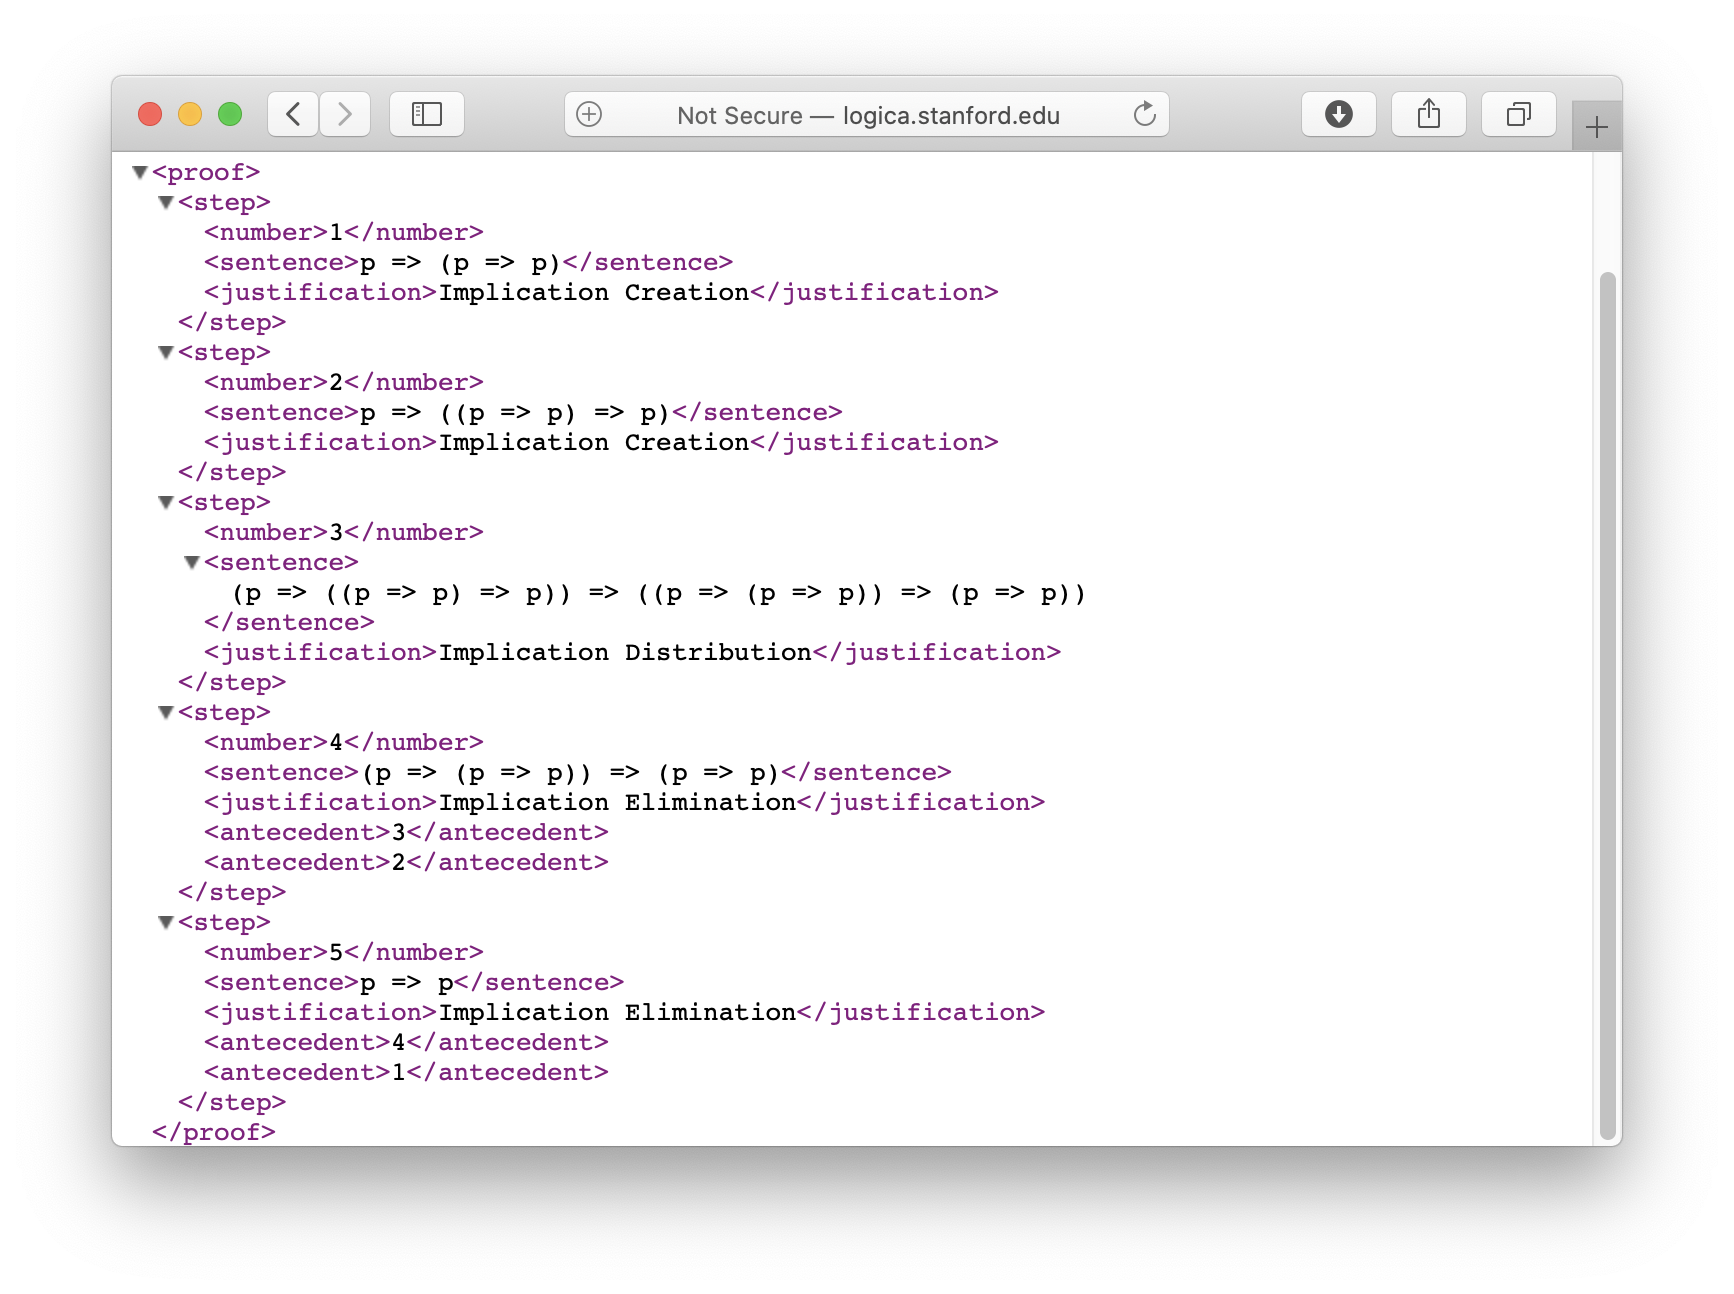
Hilbert saves proofs in XML format. For example, the transitivity proof just shown is stored in a file a file with the content shown below.
The only difference between our own proofs and proofs in the library s that the former are stored on our local machine (the one running the browser) while the latter are stored on the Logic server.
6. Copying and Pasting Proof Fragments
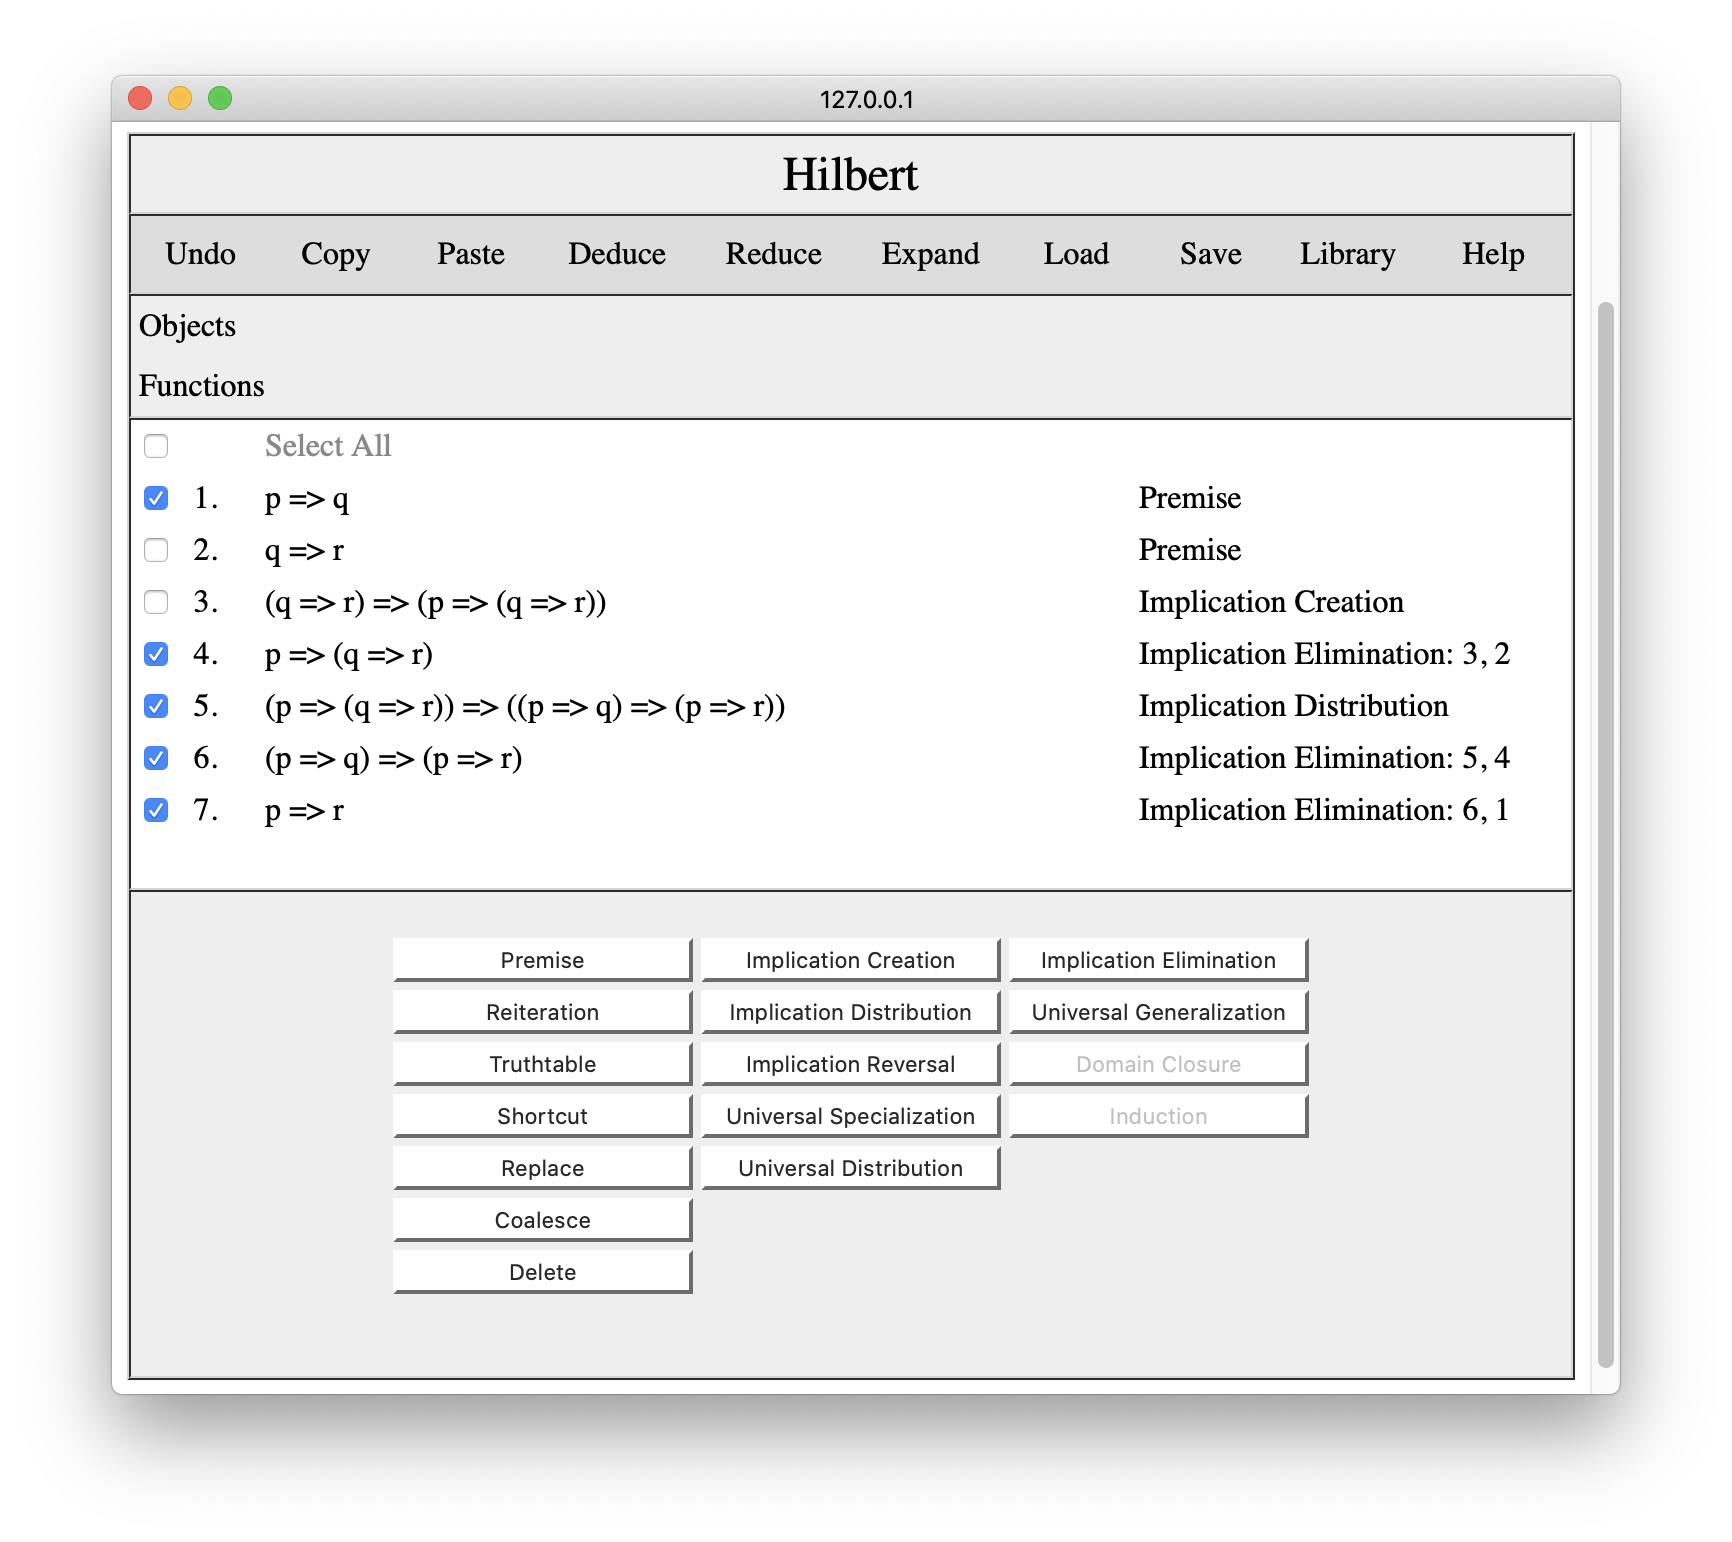
The Copy command on the Hilbert tool bar allows one to copy a proof or a fragment of a proof to the system's clipboard for later use in the same window or in other windows. In order to copy a portion of a proof, we select the rows we want to include. In the example below, we have selected rows 1, 4, 5, 6, and 7 from the proof in Section 3.
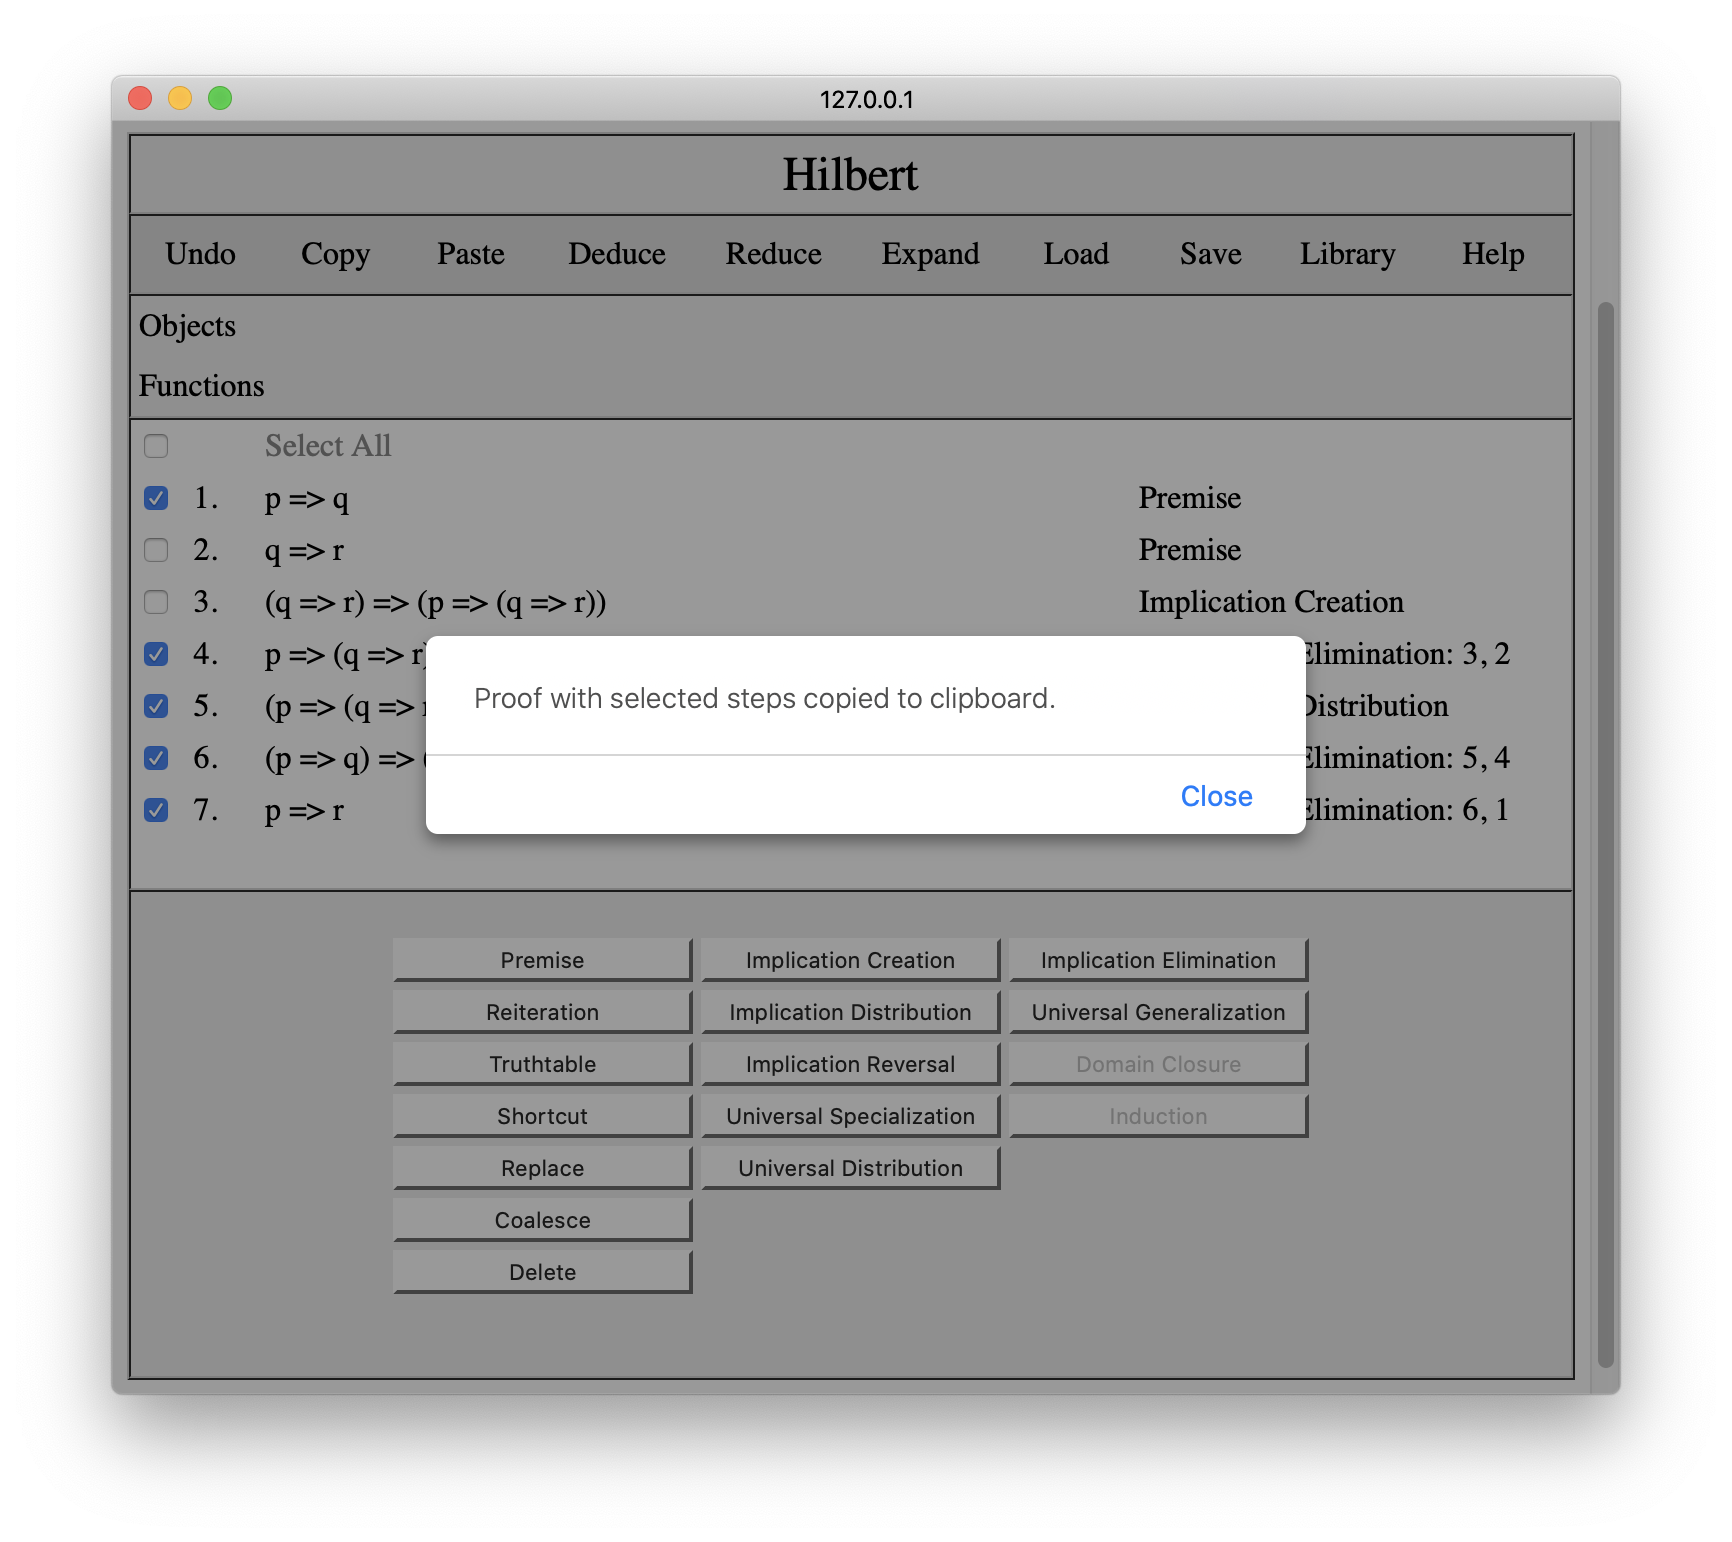
If we press Copy, the system will copy the selected lines and let us know that we have copied the selected lines to the clipboard.
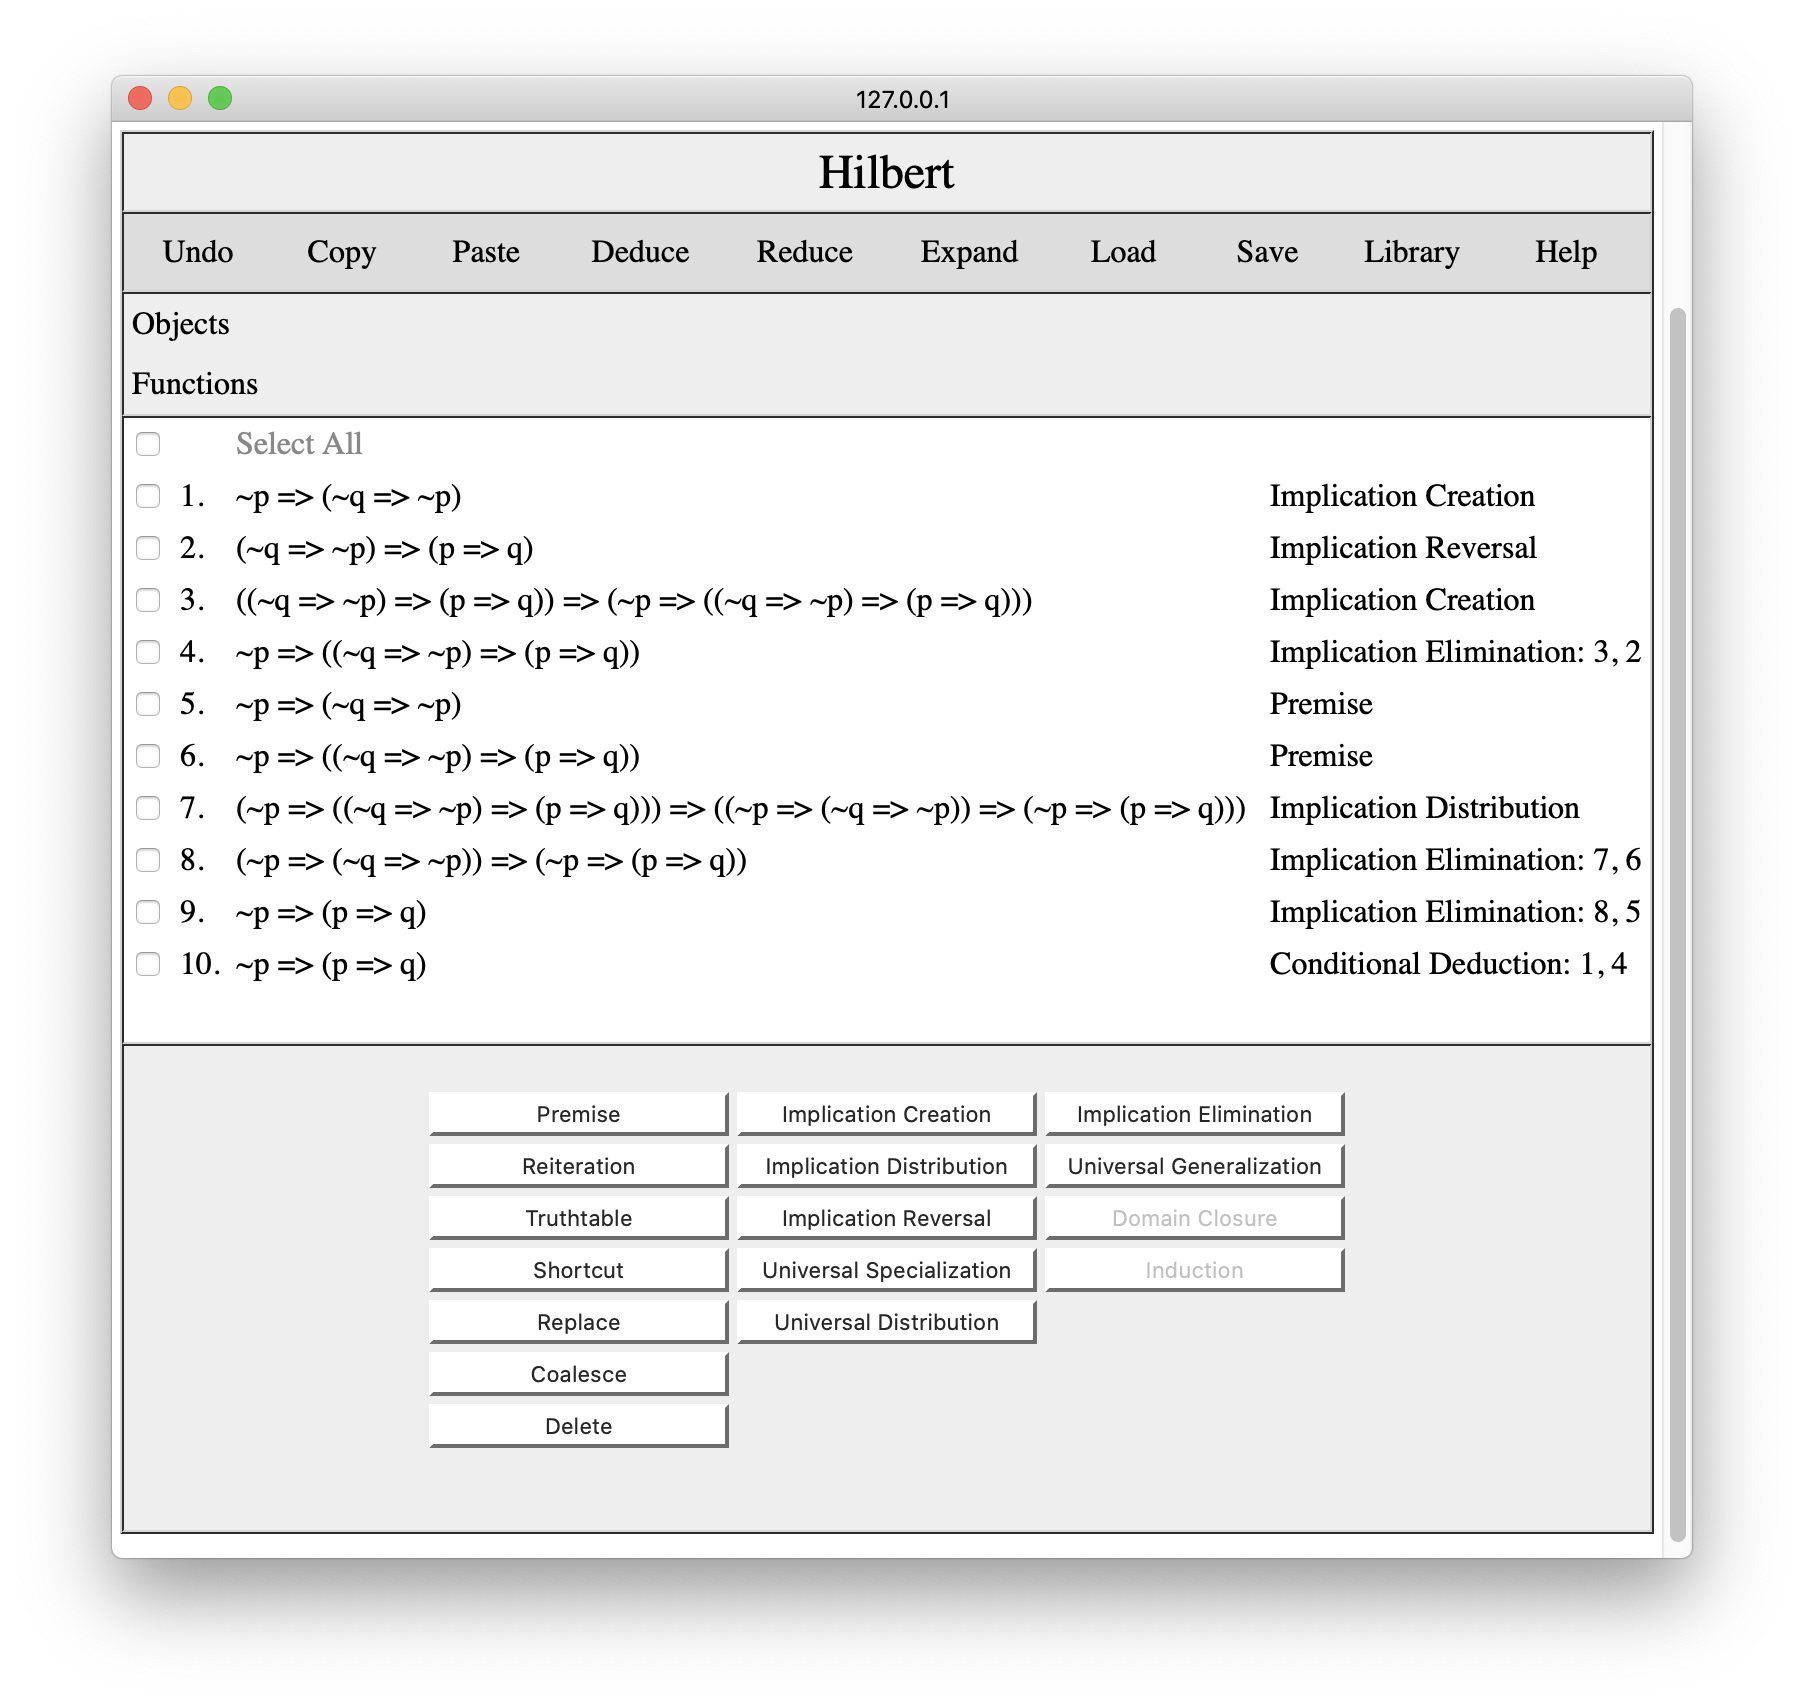
Once we have something on the clipboard, we can paste it into other windows. If we open a new Hilbert window and press Paste, we will get the result shown below. (The result in this case is a theorem known as Conditional Deduction.)

Note that only the lines we selected are included. Also, notice the the justification for p=>(q=>r) has been changed to Premise since we did not include the justification for that step when we made our copy.
Copy and paste are very useful when we are developing a proof and want to save work by using a previous subproof or a proof from the Hilbert proof library. To illustrate this, let's suppose we have created a proof of ~p=>(p=>q) that includes Conditional Deduction as a shortcut.

Now let's suppose we want to replace the conditional deduction shortcut in this proof with the proof we just saved.
Our first step would be to replace the symbols in our proof to make it look like the premises and conclusions of this shortcut. We replace p by ~p; we replace q by ~q=>~p; and we replace r by p=>q. Once we have done this, we select All, and copy our revised proof.

Switching to our overall proof, we set the cursor before the step to be replaced as shown below. Having done this, we press the Paste button and the proof from our clipboard is inserted in the proof at the cursor.
The only problem here is that we have multiple identical premises and multiple identical conclusions. This is where the Coalesce button comes in handy. We simply coalesce the premises with their counterparts, and we coalesce the pasted conclusion with the shortcut in the original proof. The result is the proof shown below.

Developing proofs in pieces is a lot easier developing all at once, and these operations make it possible to put the pieces together as necessary.
|